

10 Genius Shower Plumbing Tips for Homeowners
Dealing with a leaky showerhead or a sluggish drain can be a real pain. But guess what? You don’t always need to call a plumber! Many common shower plumbing issues are totally fixable with a little know-how. I’m Nazmul Hasan, and I’m here to guide you through it. We’ll break down simple fixes and smart tips that will save you time, money, and frustration. Get ready to feel like a plumbing pro in your own home!
Quick Summary:
This article offers 10 essential shower plumbing tips for beginners. It covers everything from preventing clogs and leaks to understanding shower valve basics and improving water pressure. You’ll learn simple DIY solutions, essential tools, and maintenance advice to keep your shower running smoothly. Plus, find answers to common shower plumbing questions.
1. Keep Your Shower Drain Running Freely: Prevent Clogs Before They Start
One of the most common shower woes is a slow or clogged drain. Hair, soap scum, and even tiny bits of debris can build up over time, creating a real mess. But there’s a simple way to fight back!
Common Culprits:
- Hair is the biggest offender!
- Soap residue also sticks around.
- Tiny particles from shampoos and body washes can contribute.
Proactive Prevention
The best offense is a good defense. Here’s how to keep that drain clear:
- Use a Drain Cover: Invest in a good shower drain cover or strainer. They’re inexpensive and catch most of the hair before it goes down the pipe.
- Regularly Clean the Strainer: Make it a habit to pull out the drain cover after every few showers and remove any trapped hair. It takes seconds and makes a huge difference.
- Occasional Flush: Once a month, pour a kettle of boiling water down the drain. This helps melt away light soap scum build-up. Follow up with a natural cleaner like baking soda and vinegar for a deeper clean.
Remember, tackling this early saves you from bigger headaches later.
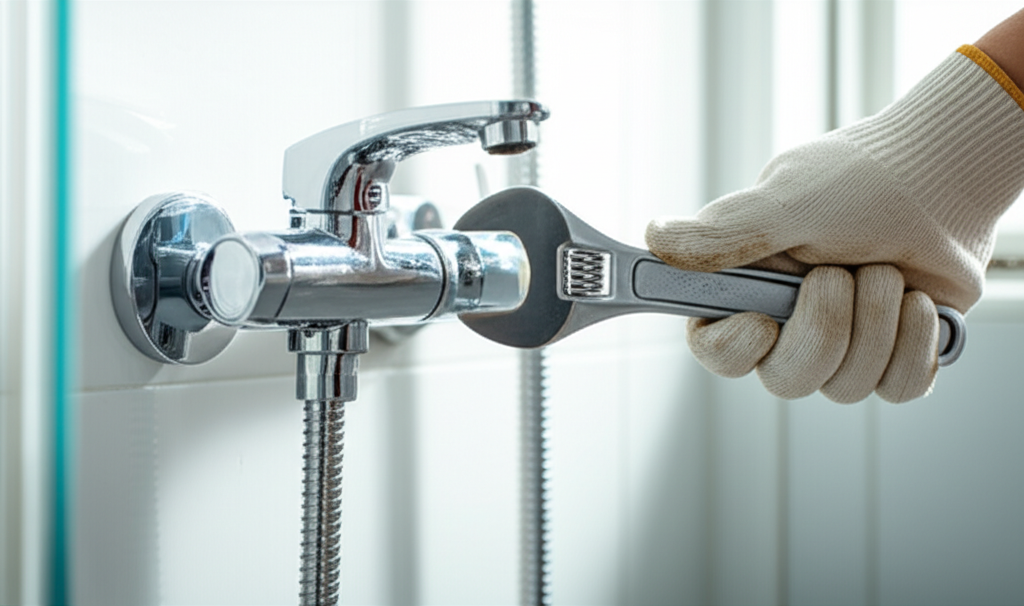
2. Banish Leaks: Fix That Dripping Showerhead
A showerhead that drips even when it’s off is not only annoying but also wastes a lot of water. Luckily, this is usually a simple fix related to the showerhead itself or the connecting pipe. Often, it’s just a worn-out washer or a loose connection.
Tools You Might Need:
- Adjustable wrench or pipe wrench
- Plumber’s tape (also called Teflon tape)
- Old rags or towels
- Replacement washers (if needed)
Steps to Stop the Drip:
- Turn Off the Water: This is super important for safety! Find the main water shut-off valve for your house or, if your shower has one, a dedicated shut-off valve behind an access panel.
- Remove the Showerhead: Gently use your wrench to unscrew the showerhead from the shower arm. Wrap the wrench jaws with a rag to avoid scratching the finish.
- Inspect and Replace Washer: Look inside the threaded end of the showerhead. There’s usually a rubber washer. If it looks worn, cracked, or flattened, it’s likely the culprit. Carefully remove the old washer and insert a new one of the same size.
- Clean and Re-tape: Clean the threads on both the shower arm and the showerhead connection. Wrap new plumber’s tape tightly around the threads of the shower arm, clockwise. This creates a watertight seal.
- Reattach the Showerhead: Screw the showerhead back onto the shower arm. Hand-tighten it first, then give it a gentle snug with the wrench (about a quarter turn).
- Test for Leaks: Turn the water back on slowly. Check if the drip has stopped. If it’s still leaking, try tightening the connection slightly, or check if the washer is seated correctly. Sometimes, the issue might be with the shower arm itself or the valve behind the wall, which might need professional attention.
A little plumber’s tape goes a long way!
For more detailed information on plumbing tools and their uses, check out resources like This Old House’s guide to basic plumbing tools.
3. Improve Shower Water Pressure: Get That Invigorating Flow Back
Low water pressure in your shower can be frustrating, making your morning routine feel less than refreshing. This often points to a few common issues, and thankfully, many are DIY-friendly.
Potential Causes for Low Pressure:
- Clogged Showerhead: Mineral deposits (like limescale) can block the small holes in your showerhead.
- Partially Closed Shut-off Valve: The valve controlling your shower might not be fully open.
- Leaks in Pipes: hidden leaks can reduce overall pressure.
- Issues with the Main Water Supply: Though less common for just one fixture, it’s a possibility.
Boosting Your Shower Power:
- Descale Your Showerhead: This is the most frequent fix. Remove the showerhead (as in Tip 2) and soak it in a bowl filled with white vinegar overnight. The vinegar helps dissolve mineral build-up. Scrub the holes with an old toothbrush and rinse thoroughly before reattaching.
- Check the Shut-off Valve: Ensure the valve controlling your shower is fully open. Sometimes these can accidentally get bumped or partially closed.
- Inspect the Shower Arm: While the showerhead is off, check the opening of the shower arm. There might be a small flow restrictor device inside the connection that can be removed or checked for blockages. Be sure to check your local regulations regarding flow restrictors if you consider removing one.
- Consider a New Showerhead: If your showerhead is old, it might simply not be designed for optimal pressure. Newer models often have better designs to enhance water flow.
A clean showerhead makes a world of difference!
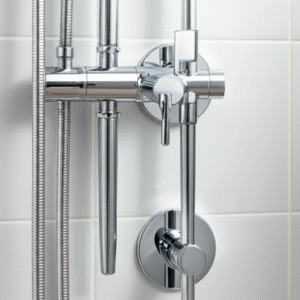
4. Understand Shower Valves: The Heart of Your Shower
Your shower valve controls the flow and temperature of the water. They can have different types, and knowing a bit about them helps with troubleshooting.
Common Shower Valve Types:
| Valve Type | Description | Common Issues |
|---|---|---|
| Compression Valve | Older style, uses rubber washers/seats to control water flow. Requires two handles (hot and cold). | Leaky handles, difficulty turning, dripping. |
| Cartridge Valve | Most common modern type. A single cylindrical unit controls flow and temperature. Often has one handle. | Water temperature won’t adjust, handle is stiff or loose, leaks. |
| Ball Valve | Uses a metal or plastic ball with openings to regulate water. Typically has one handle. | Leaks, difficulty controlling temperature, handle spins freely. |
| Thermostatic Valve | More advanced, maintains a set water temperature. Features a knob or lever to control both flow and temperature. | Temperature fluctuations, unresponsive controls. |
Basic Maintenance Tip:
For cartridge and ball valves, if you notice issues with temperature control or stiff handles, the internal cartridge or ball assembly might need replacement. This is a more involved DIY task, often requiring you to remove the handle and trim plate to access the valve body.
Consulting the manufacturer’s manual for your specific valve is highly recommended before attempting any repairs.
5. Dealing with Water Temperature Issues: Too Hot, Too Cold, or Just Right?
Fluctuating water temperatures in your shower can really disrupt your day. This is often a sign that the shower valve’s internal components are either worn out or not set correctly.
Troubleshooting Temperature Swings:
- Check Other Water Usage: Is someone flushing a toilet or running a sink elsewhere in the house? This can temporarily affect shower temperature. If it’s consistent, the issue is likely with your shower itself.
- Thermostatic Valve Adjustment: If you have a thermostatic valve, there’s usually a safety stop or temperature limit adjustment. You might need to remove the handle and look for a plastic or metal piece with notches that can be rotated to allow hotter water. Consult your valve’s specific manual. Build.com offers visual guides on this process.
- Replace the Cartridge: For cartridge valves, the internal cartridge is the most common cause of temperature problems. If it’s old or damaged, it won’t be able to mix hot and cold water correctly. Replacing it is often the solution.
- Check the Hot Water Heater: Ensure your home’s hot water heater is set to an adequate temperature and is functioning properly. If your hot water isn’t hot enough generally, that will affect your shower.
Always a good idea to test the water temperature carefully after any adjustments!
6. Silence That Squealing Showerhead: Easy Fixes for Annoying Noises
A squealing or whistling showerhead can be a real attention-grabber, and not in a good way. This noise usually comes from water vibrating through a constricted passage.
What Sounds Can Mean:
- High water pressure: Too much pressure can cause vibrations.
- Mineral buildup: Limescale can narrow water passages, creating whistling.
- Loose parts: A slightly loose showerhead or internal components can vibrate.
Tips to Stop the Squeal:
- Check Water Pressure: If you suspect high water pressure, you can get a simple water pressure gauge that screws onto an outdoor faucet. If it reads above 80 PSI, you might consider installing a pressure-reducing valve (PRV). Regulations vary on your home’s required water pressure, so consulting local building codes or a professional is wise. For most residential areas, 40-60 PSI is ideal. You can find more information on residential water pressure from sources like HomeTips.
- Clean the Showerhead Thoroughly: As mentioned before, soaking the showerhead in vinegar can remove mineral deposits that cause restricted flow and noise.
- Tighten Connections: Ensure the showerhead is securely attached to the shower arm. A loose connection can sometimes vibrate.
- Consider a new Showerhead: If the squealing persists after cleaning and tightening, your showerhead might be old or have internal defects causing the vibration. A new, quality showerhead might be the simplest solution.
A quiet shower is a more relaxing shower!
7. Repair or Replace a Leaky Faucet Handle
A dripping faucet handle in the shower (or the spout) usually indicates a worn-out washer, O-ring, or a faulty cartridge inside the valve. This is a common repair.
Tools for Handle Fixes:
- Screwdriver set (Phillips and flathead)
- Allen wrench set
- Adjustable wrench
- Plumber’s grease
- Replacement O-rings or cartridge (make sure to get the correct one for your valve type!)
- Rags
Fixing a Leaky Handle:
- Turn Off Water Supply: Crucial first step! Shut off the main water supply or the shower’s dedicated valve.
- Remove the Handle: Look for a small screw. It might be hidden under a decorative cap (pry this off gently with a flathead screwdriver or utility knife) or on the side of the handle. Unscrew it to release the handle.
- Remove Trim and Bonnet Nut: Once the handle is off, you’ll see a decorative trim plate. This usually unscrews or has clips holding it. Underneath that, you’ll find a bonnet nut that secures the valve stem or cartridge. Use your wrench to carefully unscrew this.
- Replace Worn Parts:
- For compression valves: The stem has rubber O-rings and a seat. Replace any worn O-rings on the stem and the seat washer at the bottom.
- For cartridge valves: Pull the cartridge straight out (you might need a special cartridge puller tool for some brands, or it might just pull out with careful wiggling). Take the old cartridge to the hardware store to get an exact match. Lightly grease the O-rings on the new cartridge with plumber’s grease before inserting it.
- Reassemble: Put everything back in reverse order: bonnet nut, trim plate, handle, and securing screw.
- Test: Turn the water back on and check for leaks.
Getting the right replacement part is key!
8. Understand Water Pressure Regulation
While we touched on improving pressure, it’s also important to know about regulating it. Excessively high water pressure can damage your plumbing system, including your shower valve, pipes, and even appliances. A U.S. Environmental Protection Agency article on water pressure highlights that optimal household pressure is typically between 40 and 60 PSI (pounds per square inch). Pressure above 80 PSI is generally considered too high.
When to Consider a Pressure-Reducing Valve (PRV):
- High Measured Pressure: If your pressure consistently reads above 80 PSI.
- Plumbing Noises: Hammering or banging pipes might indicate high pressure.
- Frequent Leaks: Repeated leaks or burst pipes can be a symptom.
- Appliance Issues: Washing machines or dishwashers getting damaged could be a sign.
What is a PRV?
A Pressure-Reducing Valve (PRV) is a device installed on your main water line where it enters your home. It reduces the incoming high pressure to a safe and consistent level for your entire house.
DIY vs. Professional Installation:
While installing a PRV is a plumbing task, it’s generally recommended for a qualified plumber, especially if you’re not experienced with water main connections. Incorrect installation can lead to low water pressure issues or damage.
If you suspect high water pressure is affecting your shower or home, consult a plumbing professional to test your pressure and discuss PRV installation.
9. Replace a Shower Cartridge: A Common Fix for Many Issues
As mentioned, the shower cartridge is a vital component in most modern shower systems. When it malfunctions, it can cause leaks, temperature control problems, or a stiff handle. Replacing it is a common DIY solution.
Signs Your Cartridge Needs Replacing:
- Difficulty turning the handle
- Handle spins freely without controlling water
- Inability to regulate water temperature
- Leaking from the handle or spout when off
Step-by-Step Cartridge Replacement:
- Turn Off Water: ALWAYS turn off the water supply to the shower.
- Remove Handle and Trim: Carefully remove the handle (usually a screw hidden under a cap) and the decorative trim plate.
- Identify the Cartridge: The cartridge is typically a plastic or brass cylinder. Note how it’s oriented.
- Remove Retaining Clip/Nut: Most cartridges are held in place by a clip or a threaded retaining nut. Remove this carefully.
- Pull Out the Old Cartridge: This can be the trickiest part. Use pliers to grip the stem and gently wiggle it out. If it’