

13 Genius Kitchen Sink Plumbing Fixes You Can Do Yourself!
Quick Summary
Got a leaky faucet or a slow-draining sink? Don’t fret! This guide breaks down 13 common kitchen sink plumbing issues and how to tackle them with confidence. We’ll cover everything from simple fixes to understanding your pipes. You’ll learn easy DIY steps, necessary tools, and when to call a pro. Get ready to save time and money!
Don’t Let Sink Woes Sink Your Day!
A messy kitchen sink problem can really put a damper on your day. Leaks, slow drains, or strange noises can be frustrating. But what if you could fix many of these yourself? It can seem daunting, but plumbing isn’t always complicated. With the right knowledge and a little patience, you can become a kitchen sink superhero. We’ll walk through simple, step-by-step solutions for 13 common issues. You’ll feel ready to tackle these common problems and keep your kitchen running smoothly.
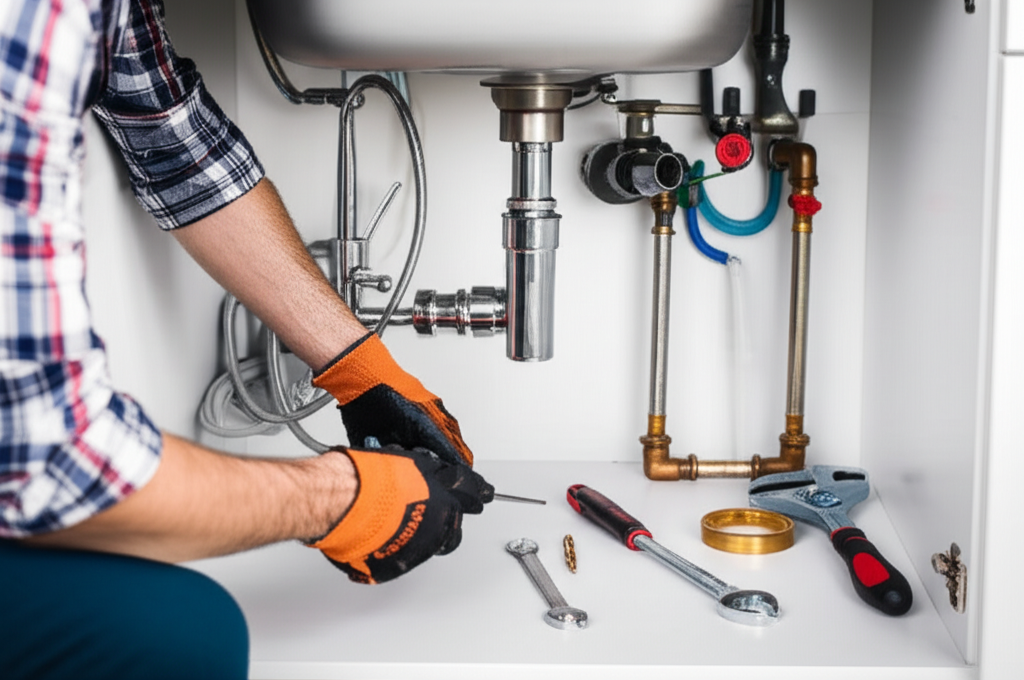
Understanding Your Kitchen Sink Plumbing
Before we dive into fixes, let’s get familiar with the main parts of your kitchen sink’s plumbing. Knowing these will make understanding the repairs much easier.
- Faucet: This is what dispenses your hot and cold water.
- Aerator: The little piece at the tip of your faucet spout. It mixes air with water for a smooth flow and can sometimes get clogged.
- Supply Lines: These are the flexible or rigid hoses connecting your faucet to the shut-off valves under the sink.
- Shut-off Valves: These valves control the water flow to your faucet. Usually, there’s one for hot and one for cold water.
- Drain Basket/Strainer: This is the metal insert in the drain opening that catches food scraps.
- Tailpiece: The short pipe that connects the drain basket to the P-trap.
- P-trap: The U-shaped pipe under your sink. It holds water to block sewer gases from coming up into your kitchen.
- Garbage Disposal (if applicable): An electric appliance that grinds food waste.
- Drainpipe: The pipe that carries wastewater away from your sink.
Knowing these parts helps you pinpoint where a problem might be. It’s like knowing the different parts of your car before you try to fix it!
1 . Fixing a Dripping Faucet
A constant drip can be annoying and waste a lot of water. Often, this is caused by a worn-out washer or cartridge inside the faucet. Don’t worry, this is usually a straightforward fix.
What You’ll Need:
- Adjustable wrench
- Plumber’s grease
- Replacement washers or cartridge (get the make and model of your faucet if possible)
- Screwdriver
- Rag
Steps:
- Turn Off the Water: This is the most important step! Look under your sink for the hot and cold shut-off valves. Turn them clockwise until they are completely off. Turn on the faucet to drain any remaining water.
- Disassemble the Faucet Handle: You might need to remove a decorative cap to expose a screw. Unscrew it and carefully remove the handle.
- Expose the Cartridge/Washer: Depending on your faucet type (compression, cartridge, ball, or ceramic disc), you’ll need to remove a packing nut or retaining clip to get to the inner workings.
- Replace the Worn Part: Carefully pull out the old washer or cartridge. If it’s a washer, replace it with an identical one. If it’s a cartridge, replace it with a new one that matches exactly. A little plumber’s grease on the new part can help it seal better.
- Reassemble the Faucet: Put everything back together in reverse order. Don’t overtighten anything.
- Turn Water Back On: Slowly turn the shut-off valves counter-clockwise. Check for leaks around the handle and spout.
Give the faucet a few minutes. If the dripping stops, you’ve done it! If it continues, you might need to check the valve seat or consider replacing the entire faucet.
2 . Clearing a Slow-Draining Sink
When water pools in your sink and drains slowly, it’s usually due to a clog in the drainpipe. Food bits, grease, and hair are the usual culprits.
What You’ll Need:
- Plunger
- Baking soda and vinegar
- Hot water
- Wire coat hanger (bent into a hook)
- Gloves
Steps:
- Try a Plunger: Make sure there’s enough water in the sink to cover the plunger’s rubber cup. Cover the overflow hole (usually near the top of the sink) with a wet rag to create a better seal. Place the plunger firmly over the drain opening and plunge up and down vigorously for about 20 seconds. Pull the plunger away quickly. Repeat if necessary.
- Baking Soda and Vinegar Flush: Pour about half a cup of baking soda down the drain, followed by half a cup of white vinegar. It will fizz! Cover the drain with a stopper or rag for about 15-30 minutes. Then, flush with plenty of hot water. This is great for minor clogs and deodorizing.
- The Coat Hanger Method: Straighten out a wire coat hanger and create a small hook at the end. Push the hooked end down the drain and try to snag any visible gunk or hair. Be gentle so you don’t push the clog further down.
- Check the P-trap: If the above methods don’t work, the clog might be in the P-trap. Place a bucket underneath to catch water. Unscrew the slip nuts on either side of the U-bend. Remove the trap, clean it out, and reassemble.
If the clog persists after these steps, it might be deeper in your plumbing. For tougher clogs, a water conservation tip is to avoid harsh chemical drain cleaners, which can damage pipes. Consider a plumbing snake or calling a professional.
3 . Fixing a Leaky Faucet Base
Sometimes, water pools around the base of your faucet. This usually means the O-ring or seals under the faucet body are worn out.
What You’ll Need:
- Adjustable wrench
- Screwdriver
- Replacement O-ring or seal kit
- Rag
Steps:
- Turn Off Water: Always shut off the water supply at the valves under the sink first.
- Remove Faucet Handle(s): Unscrew any decorative caps and screws to take off the handle(s).
- Remove the Escutcheon/Bonnet Nut: This is the dome-shaped piece or large nut that holds the faucet body together. You might need a wrench to loosen it.
- Lift Out the Cartridge/Stem: Carefully pull out the faucet’s internal parts.
- Replace O-rings: Look for any worn or damaged O-rings on the faucet body or stem. Replace them with new ones that match in size and shape. Apply a little plumber’s grease.
- Reassemble: Put everything back together carefully. Turn the water back on slowly and check for leaks.
This fix requires a bit more finesse, but it’s manageable. Taking pictures as you disassemble can help with reassembly.
4 . Dealing with a Loose Sink Drain
If your sink drain basket feels wobbly or loose, it means the plumber’s putty or sealant holding it in place has likely failed.
What You’ll Need:
- Plumber’s putty or silicone sealant
- Putty knife or flat-head screwdriver
- Bucket
- Adjustable wrench or pipe wrench
- Gloves
Steps:
- Remove the Stopper: Take out the drain stopper from the sink.
- Disconnect the P-trap: Place a bucket underneath the P-trap and unscrew the slip nuts. Let any water drain out.
- Loosen the Locknut: Underneath the sink, there’s a large metal locknut holding the drain flange to the sink basin. Use your wrench to loosen and remove this nut.
- Push the Drain Flange Up: From inside the sink, push the drain flange upwards. It should come loose. If it’s stuck, you might need to gently work it with a putty knife from the sink side.
- Clean Old Putty/Sealant: Scrape away all the old putty or sealant from both the sink basin opening and the underside of the drain flange.
- Apply New Putty/Sealant: Roll a rope of plumber’s putty into a long cylinder. Place it around the underside of the drain flange. Alternatively, apply a bead of silicone sealant.
- Reinstall the Drain Flange: Press the flange firmly into the sink opening. From underneath, reattach the locknut and tighten it securely to compress the putty/sealant.
- Reassemble the P-trap: Reconnect the P-trap and tighten the slip nuts.
- Test for Leaks: Run water into the sink and check all connections and around the drain flange for any leaks.
This job can be a bit messy, but getting a secure drain is crucial! Ensure the putty or sealant creates a good watertight seal.
5 . Silencing a Noisy Faucet or Pipes
Gurgling, banging, or whining noises from your faucet or pipes can be quite unsettling. These are often caused by air in the lines, loose pipes, or high water pressure.
Common Causes and Fixes:
- Water Hammer: This is a loud banging noise that happens when water flowing quickly is suddenly stopped (like when a valve is closed fast). It can be fixed by installing water hammer arrestors on your supply lines. This is a more advanced DIY task, so research thoroughly or call a plumber.
- Loose Pipes: Check under your sink and behind the walls (if accessible) for any pipes that feel loose. You can sometimes secure them with pipe straps.
- Air in Lines: If noises started after you turned off the water, there might be air trapped. Briefly turn off water to the troublesome faucet, then slowly turn it back on, letting air escape.
- Worn Faucet Parts: A loose washer or worn valve seat inside the faucet can also cause whining sounds. This is often fixed by replacing the washer or cartridge, as described in fix #1.
Properly securing pipes and ensuring your faucet parts are sound can make your kitchen a much quieter place. If you suspect high water pressure, you might need a pressure-reducing valve installed.
6 . Fixing a Leaky Sprayer Hose
The pull-out or side sprayer on your kitchen faucet can develop leaks, either at the connection point or along the hose itself.
What You’ll Need:
- Adjustable wrench
- Rag
- Replacement sprayer hose and nut (if needed)
- Washer or O-ring set
Steps:
- Turn Off Water: Shut off both hot and cold water supply valves under the sink.
- Detach the Sprayer Hose: Under the sink, locate where the sprayer hose connects to the faucet’s water supply. It’s usually a threaded connection. Unscrew it.
- Inspect for Leaks: Check the connection point for a damaged O-ring or washer. If the hose itself is frayed or cracked, it will need replacement.
- Replace Damaged Parts: If an O-ring or washer is the issue, replace it with a new one of the correct size. If the hose is damaged, you’ll need to replace the entire hose assembly. Typically, you’ll unscrew the old hose from the faucet body and thread on the new one.
- Reconnect and Test: Reattach the hose securely. Turn the water back on slowly and test the sprayer.
Make sure you get the correct replacement hose for your faucet model. A leaky sprayer hose can lead to water damage behind your sink, so address it promptly.
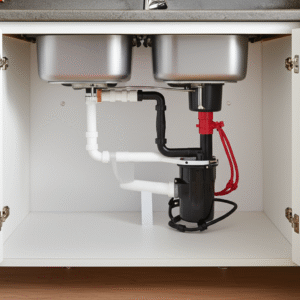
7 . Replacing a Garbage Disposal Splash Guard
The rubber splash guard at the top of your garbage disposal can degrade over time, leading to leaks or splashes.
What You’ll Need:
- Gloves
- Flat-head screwdriver or putty knife
- Replacement splash guard (specific to your disposal model)
Steps:
- Safety First! Turn Off Power: Unplug your garbage disposal or flip the breaker that controls it. Better safe than sorry!
- Remove the Old Guard: Reach into the disposal opening. You’ll see the rubber splash guard. It’s usually held in place by friction or small tabs. Gently pry it out with a flat-head screwdriver or putty knife. Be careful not to damage the disposal housing.
- Clean the Area: Wipe down the rim of the disposal opening to remove any debris or old sealant.
- Install the New Guard: Align the new splash guard with the opening and press it firmly into place. Most snap in.
- Restore Power: Plug the disposal back in or turn the breaker back on. Test it by running water and slowly turning on the disposal to ensure no leaks.
This is a quick and easy replacement that makes a big difference. A clean splash guard also helps prevent water from getting into the motor housing.
8 . Fixing a Leaky Shut-off Valve
If the valve under your sink is leaking, especially when you turn it on or off at the handle, it’s usually a sign of a faulty packing nut or washer.
What You’ll Need:
- Adjustable wrench
- Plumber’s grease
- Replacement valve handle or packing washer (if available)
- Rag
Steps:
- Turn Off Water: Shut off the main water supply to your house if you’re unsure or if the individual valve is completely broken. Otherwise, just try to tighten the packing nut slightly first.
- Tighten Packing Nut: Locate the nut behind the handle. If it’s leaking from there, try gently tightening it with an adjustable wrench. Turn the water back on slightly to test. Be careful not to overtighten!
- Replace Packing Washer: If tightening doesn’t work, you’ll need to replace the packing washer. Turn off the water again. Remove the handle. Then, unscrew the packing nut. You should be able to pull out a rubber washer or packing. Replace it with a new one, lubricated with plumber’s grease.
- Reassemble and Test: Put the packing nut and handle back on. Turn the water on slowly.
Leaky shut-off valves should be addressed promptly. If the valve is severely corroded or won’t fully shut off the water, it might be time to replace the entire valve. This is often a job for a plumber.
9 . Addressing Overflow Issues
If your sink is overflowing, it’s usually because the overflow drain is blocked or the stopper mechanism isn’t sealing properly.
What You’ll Need:
- Wire coat hanger
- Bucket
- Pine-Sol or similar cleaner (optional)
- Rag
Steps:
- Check the Stopper: Ensure your sink stopper is fully seated and not damaged, preventing a complete seal