

19 Proven Steps: How to Plumb a Bathroom Like a Pro (Beginner’s Guide)
Bathrooms involve a lot of pipes! From the toilet flushing to the shower running, it’s a complex system. Many homeowners worry about plumbing. Water leaks or low pressure can be frustrating. But you can learn to handle basic bathroom plumbing. This guide will show you how, step by step. We’ll make it simple and safe. Get ready to master your bathroom’s water system!
Why Plumbing a Bathroom Can Seem Daunting
Thinking about plumbing a bathroom can feel overwhelming. There are pipes, fixtures, and water pressure to consider. It’s easy to get lost in technical details. But understanding the basics makes it much less scary. Many common issues, like a leaky faucet or a running toilet, are fixable with the right approach.
This guide breaks down the process. We’ll focus on clear steps and useful tips. You’ll gain confidence in tackling your bathroom plumbing. We’ll cover everything from planning to the final touches. Let’s dive in and learn how to plumb your bathroom!
Understanding Your Bathroom’s Plumbing System
Before we touch any pipes, let’s understand how your bathroom plumbing works. It’s basically two main systems working together: the supply system and the drainage system.
The Water Supply System
This system brings fresh water into your bathroom. It starts from your main water line. The pipes carry water, under pressure, to your toilet, sink, and shower or tub. There are usually shut-off valves for each fixture. Knowing where these are is super important for any repairs!
Look for pipes made of copper, PEX (cross-linked polyethylene), or CPVC (chlorinated polyvinyl chloride). Each has its pros and cons. PEX is quite flexible and easier for beginners to work with.
The Drainage System
This system removes wastewater. It’s a network of pipes that carry dirty water away from your bathroom. These pipes lead to your home’s main sewer line. They rely on gravity, not pressure, to move the water.
Proper slope is key for drainage pipes. This ensures water flows downhill correctly. Vent pipes are also part of this system. They let air into the drainpipes. This prevents suction and helps water flow smoothly.
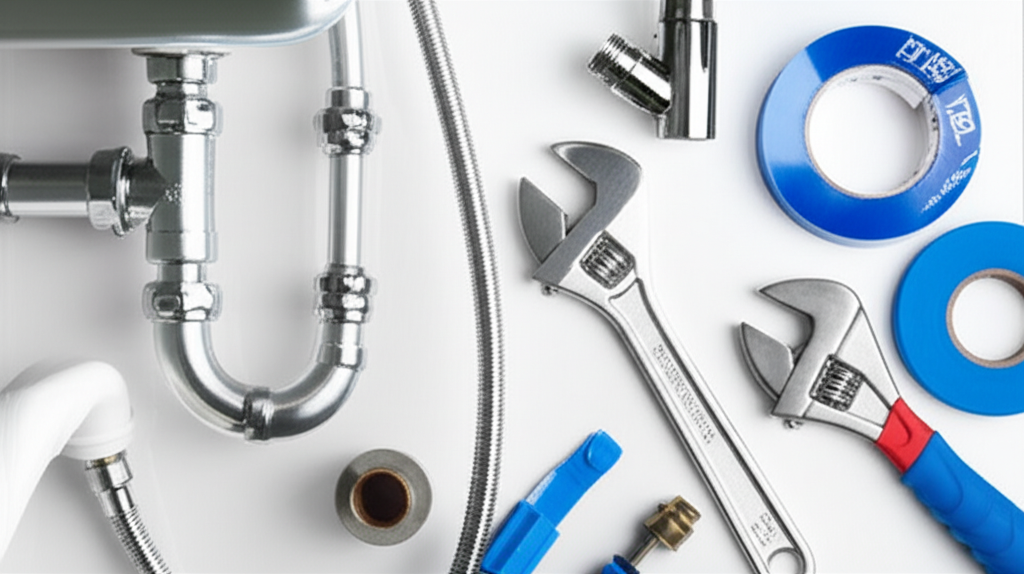
Essential Tools for Bathroom Plumbing
Having the right tools makes any plumbing job easier and safer. Here’s a list of essentials for your bathroom plumbing project.
Must-Have Tools
- Pipe Wrench: For gripping and turning pipes and fittings. You’ll likely need a few different sizes.
- Adjustable Wrench: Versatile for nuts and bolts.
- Plumber’s Tape (PTFE Tape): Seals threaded pipe connections to prevent leaks.
- Pipe Cutter: For making clean cuts on copper or plastic pipes.
- Bucket: Essential for catching drips and spills.
- Safety Goggles: Protect your eyes from debris and splashes.
- Work Gloves: Protect your hands.
- Measuring Tape: For accurate measurements.
- Deburring Tool: Smooths the edges of cut pipes.
- Pliers (various types, like slip-joint and channel locks): For gripping and holding.
- Level: To ensure pipes are installed correctly, especially drains.
- Marker or Pencil: For marking measurements.
- Drop Cloths: To protect your bathroom floor.
Optional but Helpful Tools
- Tubing Bender: For making smooth bends in soft copper tubing.
- Hacksaw: Can be used if a pipe cutter isn’t available, but it’s harder to get a clean cut.
- Torch and Solder (for copper): If you’re working with copper pipes and need to make soldered connections. (Many beginners start with push-to-connect fittings to avoid this).
- Pipe Dope (Pipe Joint Compound): An alternative to plumber’s tape for sealing threads.
- Stud Finder: To locate studs behind walls for mounting fixtures.
Planning Your Bathroom Plumbing Project: 19 Crucial Steps
Let’s break down the process into manageable steps. This plan assumes you’re installing new plumbing or renovating an existing bathroom. Always check your local building codes for specific requirements.
Important Note: For major overhauls or if you’re unsure, consulting a licensed plumber is always the safest bet. Safety first!
Step 1: Design and Layout
Sketch out where your toilet, sink, and shower/tub will go. Consider water supply lines and drain locations. Measure everything carefully. A good plan prevents costly mistakes later.
Step 2: Identify Existing Plumbing
If you’re working with an existing bathroom, locate the current water supply and drain pipes. Knowing their path is crucial for tie-ins.
Step 3: Shut Off Water Supply
Find the main water shut-off valve for your house. Turn it off completely. Open a faucet on the lowest floor to drain remaining water from the pipes.
Step 4: Gather Your Materials
Based on your design, purchase the necessary pipes (copper, PEX, PVC), fittings (elbows, tees, couplings), valves, and fixtures. Ensure you have all the tools listed earlier.
Step 5: Mark Pipe Routes
Using your design and a level, mark the path for your new pipes on the walls or subfloor. Ensure proper slope for drain lines (typically 1/4 inch per foot).
Step 6: Cut Holes for Pipes
Carefully cut holes in studs or joists where your pipes will run. Follow building code recommendations for hole size and placement.
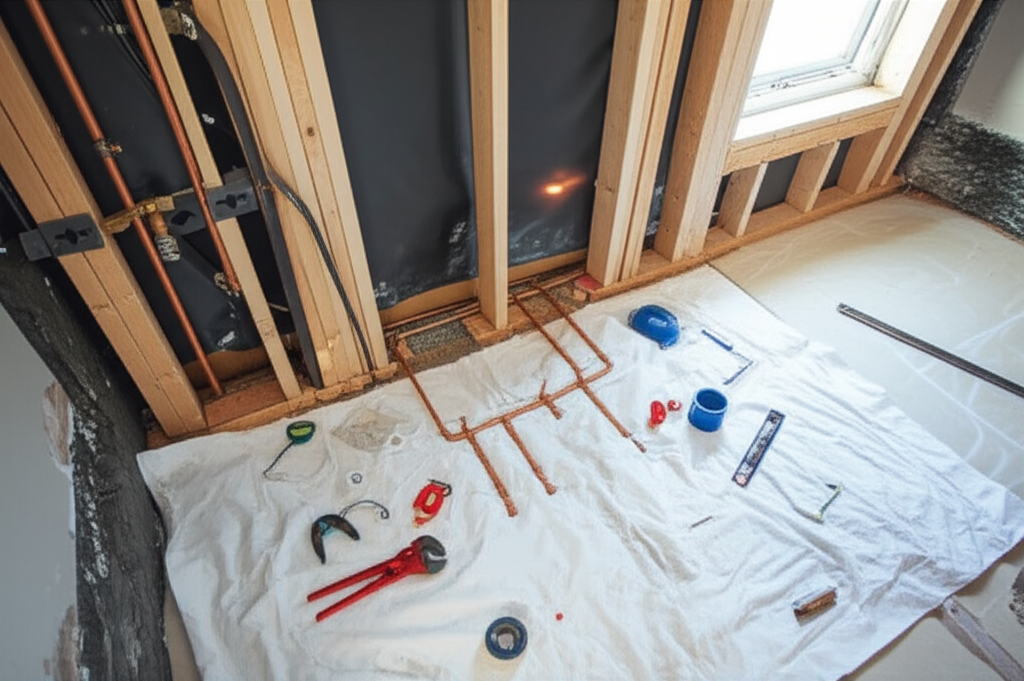
Step 7: Install Water Supply Rough-In
Run the hot and cold water supply pipes from the manifold or main line to each fixture location. Use appropriate fittings (e.g., PEX crimp rings, compression fittings, or solder for copper).
Step 8: Install Drainage Rough-In
Connect the drain pipes for the sink, toilet, and shower/tub. Ensure correct slope (1/4 inch per foot for most drain lines). Use appropriate PVC cement and primer for PVC pipes.
Step 9: Venting the Drains
Connect vent pipes to the drain system. These vents need to extend up through the roof to allow air into the drainage system, preventing vacuums and ensuring proper flow. Without proper venting, your drains can gurgle and back up.
Step 10: Connect Fixtures (Sink)
Install the sink. Connect the faucet’s supply lines to the hot and cold water risers. Attach the drain assembly (trap) and connect it to the drain pipe. Use plumber’s tape or dope on threaded connections.
Step 11: Connect Fixtures (Toilet)
Set the toilet flange on the floor. Connect the toilet’s supply line to the cold water riser. Ensure the flange is secure and has a good seal with the wax ring.
Step 12: Connect Fixtures (Shower/Tub)
Install the shower valve and connect it to the hot and cold water supply lines. Run the hot and cold lines to the showerhead and tub spout. Connect the shower drain to the main drainpipe.
Step 13: Test for Leaks (Supply Lines)
Once all supply lines are connected but before closing walls, turn the main water back on slowly. Open each fixture’s shut-off valve. Check every connection point for leaks. Small drips can cause big problems later.
Step 14: Test Drainage
Run water through each fixture. Watch the drain lines for leaks or slow draining. Flush the toilet several times. Ensure all drains empty properly and there are no strange noises.
Step 15: Insulate Pipes (Optional but Recommended)
Insulate hot water pipes to conserve energy and prevent freezing in unheated areas. Adding insulation to cold water pipes can help reduce condensation.
Step 16: Close Up Walls
Once you’re confident there are no leaks, you can close up the walls. Install drywall, tile, or other finishes as planned.
Step 17: Install Trim and Final Fixtures
Install faucet handles, showerheads, spouts, and toilet seats. These are the finishing touches that make your bathroom functional and beautiful.
Step 18: Final Inspection
Turn the water back on fully. Test all fixtures again. Check for any air in the lines, which should clear quickly. Make sure water pressure is good at each outlet.
Step 19: Clean Up
Clean up your work area, dispose of waste materials properly, and admire your new bathroom plumbing!
Choosing the Right Piping Material
The type of pipe you use can significantly impact the difficulty and cost of your project. Here’s a quick look at common options:
| Pipe Type | Pros | Cons | Best For |
|---|---|---|---|
| Copper | Durable, long-lasting, resistant to high temperatures and pressure. | More expensive, requires soldering (can be difficult for beginners), can corrode in certain water conditions. | Hot and cold water supply lines. |
| PEX | Flexible, easy to cut and connect, less expensive than copper, resistant to corrosion. | Susceptible to UV damage (must be covered), can be punctured by sharp objects, requires special tools for certain connections. | Hot and cold water supply lines. A great choice for DIYers. |
| PVC | Inexpensive, easy to work with (uses solvent cement), good for drainage. | Can crack in freezing temperatures, not suitable for hot water supply. | Drainage and vent pipes only. |
| CPVC | Can handle hot water and pressure, easier to install than copper. | More expensive than PVC, can become brittle over time, requires specific glue. | Hot and cold water supply lines. |
Understanding Water Pressure and Flow
Good water pressure is essential for a comfortable bathroom experience. Low pressure can be caused by several things:
- Partially Closed Shut-off Valve: Ensure the shut-off valves for your fixtures are fully open.
- Clogged Aerators or Showerheads: Mineral deposits can build up over time. Remove and clean them.
- Kinks in PEX Tubing: Flexible PEX can kink if bent too sharply, restricting flow.
- Issues with the Main Water Supply: This might be a problem with your municipal supply or your home’s main valve.
- Leaks in the System: Even small leaks can reduce overall pressure.
If you suspect an issue with the main water supply, it’s best to contact your local water utility or a qualified plumber.
Troubleshooting Common Bathroom Plumbing Problems
Even with careful work, you might encounter issues. Here are some common problems and how to address them:
| Problem | Possible Cause | Solution |
|---|---|---|
| Leaking Faucet | Worn-out washer or O-ring. | Replace the washer or O-ring. The specific parts depend on the faucet model. |
| Running Toilet | Flapper seal not working, float too high, or fill valve issue. | Adjust the float, replace the flapper, or replace the fill valve. Many good DIY kits are available. |
| Gurgling Drains | Lack of proper venting. | Check vent pipes for blockages. Ensure all drain lines have the correct slope and are properly vented. |
| Slow Draining Sink/Shower | Hair or soap scum clog. | Use a drain snake or plunger. For stubborn clogs, consider a biodegradable drain cleaner. |
| No Hot Water | Water heater issue, or a problem with the hot water supply line. | Check your water heater settings, pilot light (if applicable), or contact a water heater specialist. |
For more in-depth troubleshooting, resources like the Federal Trade Commission (FTC) offer helpful guides on home maintenance and repairs.
When to Call a Professional Plumber
While this guide empowers you to tackle many aspects of bathroom plumbing, some situations require a professional. Don’t hesitate to call a licensed plumber if:
- You encounter major leaks that you can’t easily stop.
- You suspect problems with your main water line or sewer line.
- You’re uncomfortable with any step of the process.
- The job involves complex pipe modifications or soldering you’re not confident with.
- Local building codes require a licensed professional for certain work.
- You’ve tried basic fixes, and the problem persists.
A professional plumber has the experience, tools, and knowledge to diagnose and fix complex issues safely and efficiently. It’s an investment in the long-term health of your home’s plumbing system.
Frequently Asked Questions (FAQs)
Q1: How much does it cost to plumb a bathroom?
The cost can vary widely depending on the size of the bathroom, the complexity of the layout, the materials used, and whether you DIY or hire a professional. For DIY materials, expect to spend a few hundred dollars on pipes, fittings, and basic fixtures. Professional installation can range from $1,000 to $5,000 or more for a complete remodel.
Q2: What is the easiest pipe to use for a beginner?
PEX (cross-linked polyethylene) tubing is generally considered the easiest for beginners. It’s flexible, allowing you to bend it around obstacles. Connections can be made with crimp rings or push-to-connect fittings, which are much simpler than soldering copper.
Q3: Do I need a permit to re-plumb my bathroom?
In most areas, yes, especially if you are moving existing fixtures or adding new ones. Check with your local building department to understand their permit requirements and inspection process. Skipping permits can lead to issues when selling your home.
Q4: How do I slope drain pipes correctly?
Drain pipes need a downward slope to allow gravity to move wastewater. The standard is a 1/4-inch drop for every 1 foot of horizontal pipe run. Use a level to ensure accurate sloping.
Q5: What’s the difference between supply and drain pipes?
Supply pipes carry clean water to your fixtures (like sink, toilet, shower) under pressure. Drain pipes carry wastewater away from your fixtures, relying on gravity and atmospheric pressure.
Q6: How deep should plumbing pipes be installed?
For pipes running within walls and floors, they typically don’t need to be deep unless they are exposed to freezing temperatures. In colder climates, pipes should be kept away from exterior walls or insulated. Always consult your local building codes for specific depths and protection requirements.
Conclusion
Plumbing a bathroom might seem like a big project, but by breaking it down into these 19 proven steps, you can gain the confidence to tackle it. Understanding your system, gathering the right tools, planning meticulously, and following each step carefully will lead you to success. Remember, safety is paramount, and don’t hesitate to call a professional when needed. With this guide, you’re well on your way to mastering your bathroom’s plumbing!