

24″ Plumbing Genius: Frame Walls Effortlessly
By Nazmul Hasan
Ever looked at a framed wall and wondered how to get your pipes exactly where they need to be without making a mess? It can seem tricky, right? Placing plumbing within a standard 2×4 framed wall, especially with the common 24-inch on-center spacing, is a core skill for any DIYer or homeowner tackling renovations. This guide will walk you through it smoothly. We’ll break down the process into easy steps. Get ready to place your pipes like a pro!
Why 24-Inch Centers Matter for Plumbing
Most modern homes use framing spaced 16 or 24 inches apart. While 16-inch centers are more common for structural load-bearing walls, 24-inch centers are often found in non-load-bearing walls like interior partitions or in attics and basements. For plumbing, these wider 24-inch gaps can offer more room to work. However, they also present unique considerations for supporting pipes and avoiding interference with other building components. Understanding this spacing is crucial for planning your pipe routes.
Understanding the Basics: Tools and Materials
Before we grab any tools, let’s make sure you have what you need. Having the right supplies on hand makes the job much smoother and safer. Think of it like gathering your ingredients before you start cooking!
Essential Tools for Framing Wall Plumbing
These are the must-haves. You might already own some of these from other DIY projects.
- Tape Measure: For accurate measurements.
- Pencil: To mark your cut lines and pipe locations.
- Hammer: For driving nails or using with nail sets.
- Hand Saw or Reciprocating Saw: For cutting lumber. A reciprocating saw with a wood blade makes quick work of it. Remember safety glasses!
- Level: To ensure pipes are installed correctly, especially for drainage.
- Drill and Drill Bits: For making holes for pipes to pass through studs. A spade bit or auger bit is best for wood. You’ll want various sizes, especially ones large enough for your pipes.
- Safety Glasses: Protect your eyes from sawdust and debris.
- Work Gloves: To protect your hands.
- Pry Bar: For removing or adjusting framing if needed.
- Stud Finder: Crucial for locating studs within the wall.
Common Materials You’ll Encounter
These are what you’ll be working with. Understanding their purpose helps keep everything secure.
- Dimensional Lumber: Typically 2x4s (which are actually 1.5″ x 3.5″).
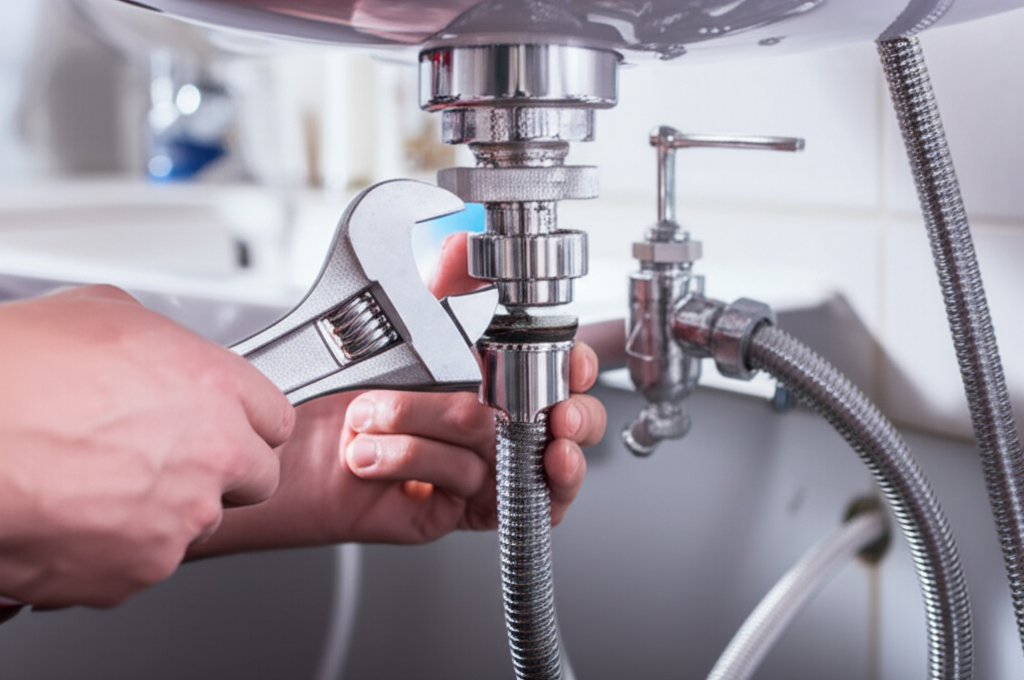
- Piping: Common types include PEX, copper, or PVC. Your local codes will dictate what’s allowed. PEX is often the easiest for DIYers.
- Pipe Hangers and Clamps: To secure pipes to the framing.
- Nails or Screws: For fastening lumber and pipe supports.
Step-by-Step: Framing Wall Plumbing for 24″ Centers
Let’s get down to business! We’ll take this one step at a time, focusing on safety and precision.
Step 1: Plan Your Pipe Layout
This is the most important step. Before you cut anything, visualize or sketch out where your pipes will run. Consider:
- Water Supply Lines: Hot and cold water.
- Drainage Lines: Where sinks, toilets, or showers will connect.
- Venting: Essential for proper drainage.
- Obstacles: Electrical wiring, HVAC ducts, or structural elements.
According to the International Code Council (ICC), proper pipe placement is critical for building safety and functionality. Always check your local building codes for specific requirements regarding pipe clearances and support.
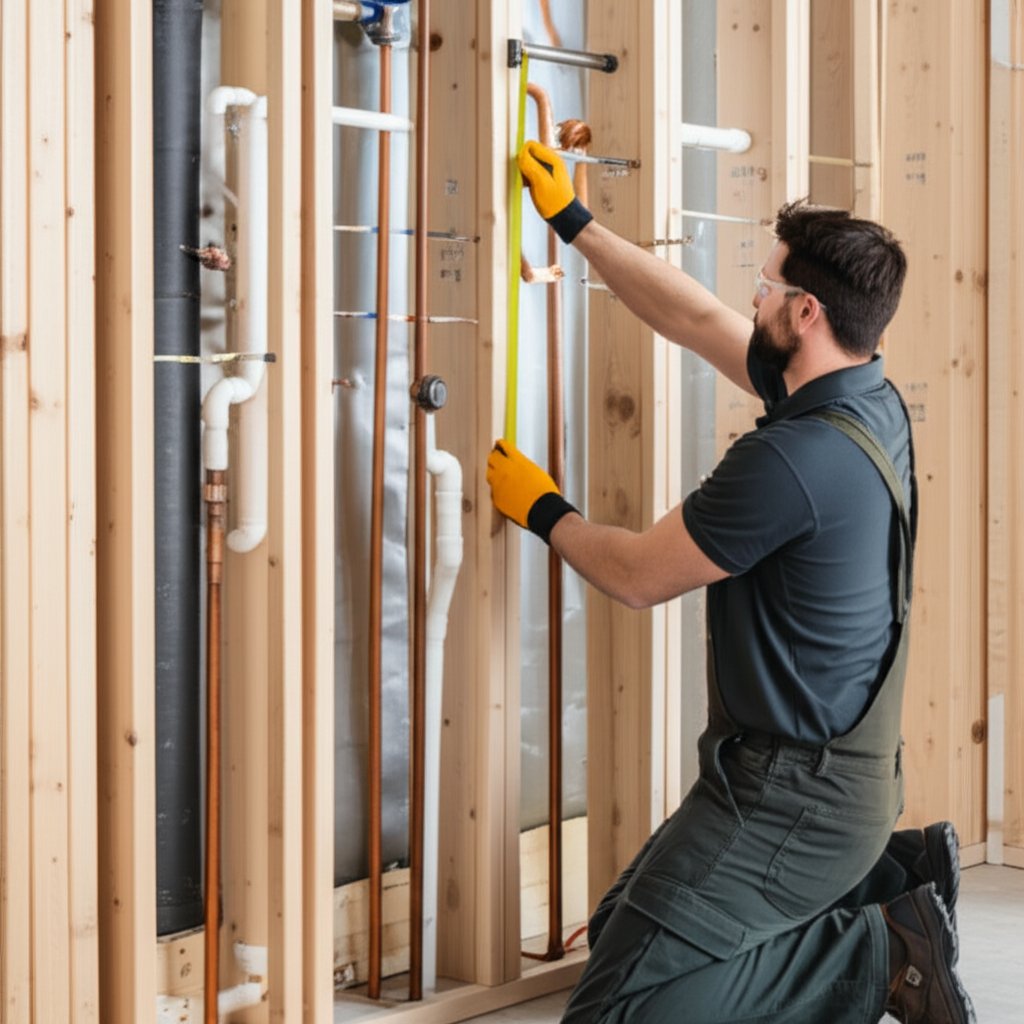
Step 2: Locate Studs and Mark Pipe Paths
Use your stud finder to clearly mark the center of each stud in your 24-inch framed wall section. Then, using your tape measure and pencil, draw the planned path for your pipes. Aim for the center of the stud bay where possible, but be mindful of where pipes need to connect or meet fixtures.
Step 3: Drill Holes for Pipes
This is where the magic happens! Choose a drill bit that is slightly larger than your pipe’s diameter. For example, if you are using 1/2-inch PEX tubing, a 3/4-inch or 1-inch drill bit might be appropriate. This extra space allows for expansion and prevents kinking, especially with PEX.
Safety Tip: When drilling through studs, try to stay as close to the center as possible. Avoid drilling too close to the edge of the stud, as this can weaken it. The ICC recommends that holes drilled through studs should not be closer than 5/8 inches to the edge of the stud. Also, do not drill more than three holes in a single stud, and ensure those holes are not all in the same horizontal plane if they are near the stud’s center.
Step 4: Run Your Pipes
Carefully feed your chosen piping through the drilled holes. For PEX, it’s flexible and easy to bend. For copper or PVC, you might need to cut and join sections. Ensure the pipes are not stressed or kinked.
Step 5: Secure the Pipes
This is vital for long-term stability. Use appropriate pipe hangers or clamps to secure the pipes to the studs. Spacing for hangers typically follows manufacturer recommendations or local codes, often around every 3 feet for horizontal runs.
Why is support important? Properly supporting pipes prevents sagging, which is especially critical for drain lines to ensure water flows away smoothly. It also reduces noise and stress on the fittings. For supply lines, secure support prevents vibration noise.
Step 6: Rough-in Connections
At this stage, you’ll prepare the ends of your pipes where fixtures will connect. This might involve crimping fittings for PEX, soldering for copper, or cementing for PVC. Ensure all connections are secure and leak-free.
Step 7: Install Additional Framing (If Needed)
Sometimes, you might need to frame in horizontal blocking between studs to provide extra support for pipes, especially for heavier drain lines or in areas where plumbing needs to be consolidated. This blocking fits snugly between the studs.
Example: If you have a cluster of pipes running horizontally, you might install a simple 2×4 block horizontally between two studs, drilling holes in the block to pass the pipes through and then securing the block with screws or nails.
Working with 24″ Centers: Pros and Cons
The 24-inch on-center framing has its advantages and disadvantages when it comes to plumbing. Let’s look at them.
| Aspect | Pros | Cons |
|---|---|---|
| Room to Work | Wider bays offer more space to maneuver pipes and fittings, especially compared to 16″ centers. This can make drilling and running pipes easier. | Can sometimes lead to longer unsupported pipe runs if not planned carefully, potentially requiring more blocking. |
| Fewer Studs | Less lumber means potentially lower material costs for framing itself. | Requires careful consideration for pipe support, as fewer studs mean fewer natural attachment points. |
| Flexibility | Good for running larger diameter pipes or multiple runs in a single bay more comfortably. | May require more creative solutions for supporting pipes that span across wider gaps without a stud directly beneath them. |
Common Challenges and How to Solve Them
Even with the best planning, you might run into a few snags. Here’s how to deal with common issues.
Challenge 1: Pipe Sagging
Problem: Your pipes, especially drain lines, aren’t perfectly level and are starting to sag between support points.
Solution: Ensure you’re using adequate hangers and clamps at recommended intervals. For drain pipes, a slight downward slope (typically 1/4 inch per foot) is necessary for gravity flow. If sagging occurs, you may need to add temporary support, remove the pipe section, and re-install it with proper bracing or support blocking.
Challenge 2: Hitting Electrical or HVAC
Problem: Your planned pipe route conflicts with existing electrical wires or HVAC ducts.
Solution: Re-evaluate your pipe layout. Can the pipe go slightly higher or lower? Can you route it through a different stud bay? Sometimes, you might need to strategically notch a stud (following code for notch depth and location – typically no more than 25% of the stud’s width and not within 1.25 inches of the stud edge) or install a metal protection plate over the hole if it’s close to electrical wiring. Always consult electrical codes (NFPA 70®, National Electrical Code (NEC)® details these) and be cautious. If unsure, it’s best to reroute or consult a professional.
Challenge 3: Not Enough Clearance
Problem: Not enough space inside a stud bay for all the required plumbing.
Solution: Consider using smaller diameter piping where appropriate (e.g., 1/2-inch instead of 3/4-inch for some runs). If necessary, you might need to slightly modify the framing. This could involve adding a second stud next to the original to create a wider channel, or creating a chase, which is a small framed-in box built out from the wall to accommodate the pipes. This is common for main drain stacks.
Challenge 4: Cutting into Existing Framing
Problem: You need to pass a pipe through a stud but the planned hole is too close to the edge or in an awkward spot.
Solution: If a simple drill hole isn’t feasible, you might need to notch the stud’s edge slightly. Again, observe code limitations for notch depth and location to maintain structural integrity. Always use a stud protector plate over any notches or holes where pipes might rub against wires or the wood itself.
When to Call a Professional
While this guide aims to empower you, some plumbing tasks are best left to the pros. Consider calling a licensed plumber if:
- You’re dealing with the main water supply line.
- You’re unsure about local plumbing codes or electrical safety.
- The job involves complex drainage systems or medical gas piping (in healthcare settings).
- You encounter unexpected issues or feel uncomfortable at any stage.
- You need to make significant modifications to existing structural framing.
For smaller renovations or straightforward pipe runs within walls, a DIY approach can be very rewarding. But always prioritize safety and adhere to building regulations. You can find a licensed plumber through your local home improvement store recommendations, online search directories, or by asking friends and neighbors for referrals.
Frequently Asked Questions (FAQ)
Q1: How large of a hole can I drill in a 2×4 stud for plumbing?
A: For a standard 2×4 stud (which is actually 1.5 inches thick), the maximum allowable hole diameter is typically one that doesn’t compromise the stud’s strength. The International Residential Code (IRC) generally limits holes to no more than 40% of the stud’s width for a single stud and 25% if the stud is notched. However, for plumbing, using a hole slightly larger than the pipe (e.g., 3/4 inch for 1/2 inch pipe) at the center is common and usually acceptable. Always check your local building codes for specific limitations, especially near the edges of studs.
Q2: Should my plumbing run through the center of the stud bay for 24″ centers?
A: It’s generally best to run pipes as close to the center of a stud bay as possible. This often provides the most clearance and avoids potential conflicts with drywall backing or sheathing screws. It also helps maintain the structural integrity of the studs.
Q3: How often do I need to support horizontal pipes in framed walls?
A: For water supply lines (like PEX or copper), horizontal supports are typically needed every 3 to 6 feet, depending on the pipe material and manufacturer’s recommendations. Drainage pipes require more frequent support, often every 5 feet or less, and must maintain a consistent downward slope. Always refer to the piping manufacturer’s installation guide and local plumbing codes.
Q4: Can I reuse existing holes in studs for new plumbing?
A: You can reuse existing holes if they are appropriately sized for your new pipes and do not compromise the stud’s structural integrity. If the existing hole is too small, it needs to be enlarged. If it’s too large or poorly placed, you may need to abandon it and drill a new one. Also, if the hole is near electrical wiring, ensure you use a nail plate to protect the wire.
Q5: What’s the best material for pipes when running them in walls?
A: PEX is a very popular choice for DIYers because it’s flexible, easy to cut and join, and less prone to bursting in freezing temperatures compared to copper. Copper is durable and widely accepted but requires soldering or crimping, which can be more challenging. PVC is mostly used for drain, waste, and vent (DWV) systems and requires solvent cement for joining.
Q6: Do drain pipes need to slope in framed walls?
A: Absolutely! Drain pipes must slope downwards to allow gravity to move wastewater and solids towards the drain system. The standard slope for most drain lines is 1/4 inch per foot. Failure to slope properly can lead to clogs and poor drainage. Supply lines, on the other hand, should be installed without significant dips or high points.
Conclusion: Your Framing and Plumbing Journey
Mastering how to run plumbing within framed walls, especially with those common 24-inch centers, is a significant step in your DIY journey. You’ve learned about the essential tools, the step-by-step process from planning to securing, and even how to tackle potential challenges. Remember, precise planning and careful execution are your best allies.
By following these guidelines and always keeping safety and local codes in mind, you can confidently tackle plumbing within your walls. This not only saves you money but also gives you a real sense of accomplishment. Happy building, and don’t hesitate to call a professional if a job feels too big or outside your comfort zone!