

Master Revit Plumbing with 38 Essential Tips for Beginners. Learn to design efficient, code-compliant plumbing systems in Revit, avoiding common mistakes for smoother projects.
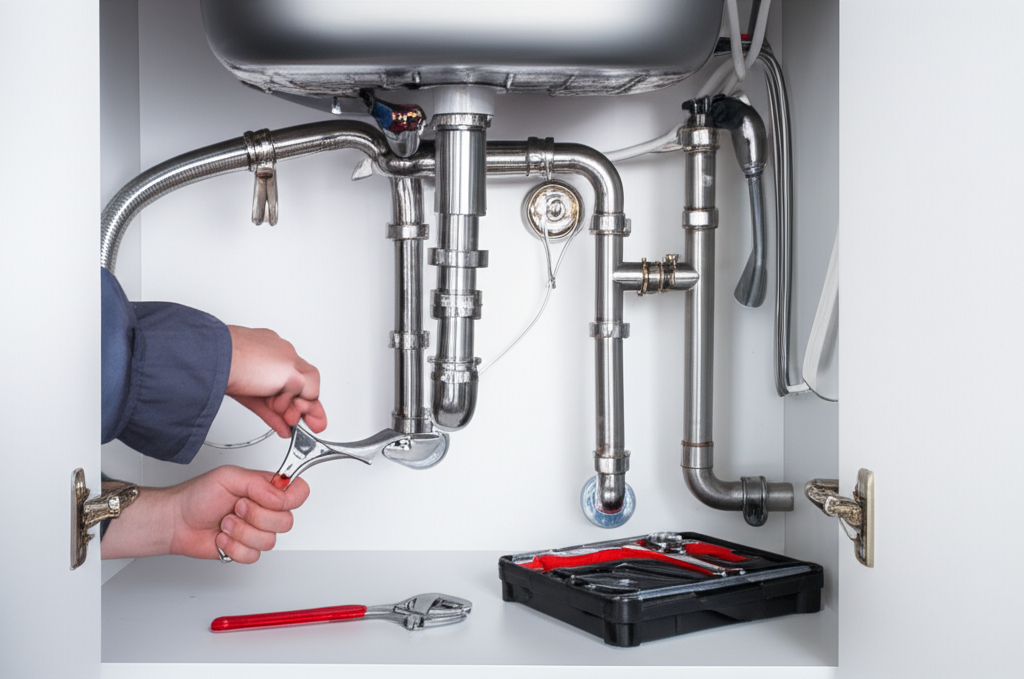
Leaky pipes and clogged drains can be a real headache, right? As a plumber, I’ve seen firsthand how even small issues can cause big problems in your home. But what if you could design your home’s plumbing so much better from the start? That’s where BIM software like Revit comes in. If you’re new to using Revit for plumbing, it might seem a bit overwhelming. Don’t worry! I’m here to guide you through the clever tricks and essential tips that will make designing your plumbing systems a breeze. We’ll cover everything from setting up your project correctly to making sure your designs are both functional and efficient. Get ready to build your confidence and your plumbing knowledge with these 38 genius Revit plumbing tips!
Understanding the Basics of Revit Plumbing

Before diving into the 38 tips, let’s get a clear picture of what Revit plumbing entails for a beginner. Revit is a powerful Building Information Modeling (BIM) software. Instead of just drawing lines like traditional CAD, Revit creates intelligent, 3D models of your building. For plumbing, this means you’re not just drawing pipes; you’re creating actual system components that have data, properties, and relationships. This allows for better coordination, clash detection (finding where pipes might intersect with walls or other systems), and more accurate material takeoffs.
Think of it like this: in CAD, you draw a pipe. In Revit, you place a “pipe” object that knows it’s a 3-inch copper supply pipe, it has a pressure rating, and it connects to a specific fixture. This makes a huge difference in how efficiently and accurately you can design. Our tips will build upon this foundation, making your journey into Revit plumbing much smoother and more rewarding.
Getting Started: Project Setup and Families
Setting up your Revit project correctly is like laying a solid foundation for your plumbing design. It ensures everything runs smoothly down the line. Here are some crucial tips to get you started on the right foot.
1. Use a Plumbing-Specific Template
Revit offers various templates. For plumbing, start with a Mechanical template or a dedicated MEP (Mechanical, Electrical, Plumbing) template if available. These come pre-loaded with relevant systems, families, and settings.
2. Load Essential Plumbing Families
Revit relies on “families” – the building blocks of your model (pipes, fittings, fixtures, equipment). Make sure you have a comprehensive library of plumbing families. Autodesk’s Content Library is a good start, but consider industry-specific quality families from manufacturers. Many manufacturers, like CAD Pro Systems, offer specialized Revit families for plumbing fittings and components.
3. Configure Your Pipe Types
Define your pipe types based on material, size, and system. Go to the “Architecture” tab > “Pipe” > “Pipe Types.” This allows Revit to understand the properties of different pipes, which is crucial for scheduling and analysis.
4. Set Up Your Pipe Systems
Create your pipe systems (e.g., Domestic Cold Water, Domestic Hot Water, Sanitary, Storm) early. This is done by selecting a pipe and using the “Create System” option. Proper system setup is vital for functionality and later analysis.
5. Define Coordination Settings
Under the “Manage” tab > “Coordination Model,” you can link other disciplines’ models (Architectural, Structural). This helps in identifying clashes early on.
6. Understand Piping Standards and Routing Preferences
Go to “Manage” > “MEP Settings” > “Piping Settings.” Here you can define how Revit routes pipes, including preferred fittings, slopes, and connection types. This is a game-changer for quick and consistent modeling.
7. Use Worksets Effectively
If you’re working on a larger project or in a team, use worksets to divide the plumbing model. For instance, one workset for sanitary, another for water supply. This improves performance and collaboration.
Modeling Plumbing Systems: Tips and Tricks
Now that your project is set up, let’s get into the nitty-gritty of modeling your plumbing systems efficiently and accurately.
8. Model Pipes with Purpose (Not Just Lines!)
Always use the “Pipe” tool, not the “Model In-Place” or generic lines. This ensures your pipes are intelligent objects with system properties and can be scheduled and analyzed.
9. Utilize Automatic Routing, But Master Manual Routing Too
Revit can automatically route pipes between two points based on your defined rules. While useful, learn to use manual routing for precise control, especially in complex areas. You can control bend types, fittings, and exact locations.
10. Pay Attention to Pipe Slopes
Sanitary and drainage pipes require slopes. When drawing, you can specify a slope value. Revit will then calculate the rise/run. Ensure your slopes align with local codes. The International Code Council (ICC) provides extensive guidelines on plumbing slopes.
11. Connect to Fixtures and Equipment Correctly
Use the “Connect Into” option when drawing pipes to ensure they properly attach to plumbing fixtures and equipment. This creates the logical connections needed for system analysis.
12. Manage Fittings and Accessories
Revit automatically places fittings (elbows, tees, reducers) as needed. You can control fitting types and sizes via your routing preferences. Don’t forget to add accessories like valves and strainers.
13. Use Pipe Accessories for Valves and Unions
Instead of modeling valves and unions as separate components, use the “Pipe Accessories” category. These are designed to be placed directly on pipes and will adjust pipe lengths correctly.
14. Model with Sufficient Detail (LOD)
Consider the Level of Development (LOD) required for your project. For basic clash detection, generic pipe elbows might suffice. For detailed fabrication, you’ll need manufacturer-specific families with all connections and details.
15. Use Pipe Run Calculations
For complex runs, or to verify lengths and fittings, use the “Pipe Run Calculator.” This tool can help estimate materials and ensure your routing preferences are working as expected.
16. Create Pipe Systems for Different Fluids
Model hot water, cold water, and waste as separate pipe systems. This is crucial for creating accurate schedules, performing flow analysis, and avoiding cross-contamination in your design.
17. Understand Pipe Segment and Fitting Types
Familiarize yourself with the different types of pipe segments (straight pipes) and fittings (elbows, tees, couplings, reducers) available in your loaded families. Knowing which to use where is key.
Visibility and Graphics: Making Your Design Clear
Even the best-designed plumbing system won’t be understood if it’s not visible and clear within your Revit model. These tips focus on how to make your plumbing stand out.
18. Customize Visibility/Graphics Overrides (VG)
Use Keyboard shortcut “VG” or go to “View” > “Graphics” > “Visibility/Graphics Overrides.” In the dialog box, you can control the visibility of specific MEP categories like “Pipes,” “Pipe Fittings,” and “Pipe Accessories.” You can also adjust line colors, weights, and patterns for clarity.
19. Create Dedicated Plumbing Views
Make specific views for plumbing systems. Duplicate your floor plan views and then use VG to turn off all other disciplines (architectural walls, structural columns, other MEP systems) so only your plumbing is clearly visible.
20. Use Filters for Specific Systems
Filters are powerful. Create filters based on system types (e.g., “Domestic Cold Water”) or pipe materials. You can then apply these filters to views to highlight or color-code specific systems.
21. Adjust Detail Level
Set the “Detail Level” of your views to “Fine” to see pipe accessories like valves and unions. Coarse and Medium detail levels often simplify pipes into single lines or represent fittings more abstractly.
22. Use Annotation Categories Wisely
Control the visibility of annotation elements like pipe tags, flow direction arrows, and insulation symbols using the “Visibility/Graphics Overrides” > “Annotation Categories” tab.
23. Employ Worksets Visibility Settings
If you’re using worksets, you can control the visibility of plumbing worksets in different views to isolate specific parts of the system or to manage collaboration.
Documentation and Scheduling: Quantifying Your Design
Revit’s strength lies in its ability to generate accurate documentation directly from the model. Don’t miss out on these features for your plumbing designs.
24. Create Accurate Pipe Schedules
Go to “View” > “Schedules/Quantities” > “Schedule/Quantities.” Select “Pipes” as the category. Add fields like Length, Diameter, System Type, Type, Material, and even parameters for insulation or linings to get a comprehensive list of all pipes used.
25. Schedule Fittings and Accessories Separately
Create separate schedules for Pipe Fittings and Pipe Accessories to quantify things like elbows, tees, valves, and unions. This is essential for purchasing and installation.
26. Use Tags for Information Display
Tags are vital for labeling. Use the “Tag by Category” or “Multi-Category Tag” tool to add information to your pipes, such as size, material, or flow rate. Customize tag families for specific needs.
27. Annotate with Keynotes
Use Keynotes for non-easily quantifiable information, like specific installation notes or special material requirements. Create or link a keynote file to your project settings.
28. Create Isometrics for Complex Runs
For challenging pipe runs, creating isometric views can provide clarity for installers. You can generate these from 3D views and add necessary annotations.
29. Schedule Equipment and Fixtures
Don’t forget to schedule your plumbing fixtures (toilets, sinks, showers) and equipment (water heaters, pumps). This provides a complete inventory of what’s in your design.
Collaboration and Coordination: Working with Others
Plumbing doesn’t exist in a vacuum. It needs to work with the building’s structure, electrical, and HVAC systems. Effective collaboration is key.
30. Link Architectural and Structural Models
Always link in the architectural and structural models. Use “Manage” > “Link Revit” and then “Pin” the linked model to prevent accidental movement. This allows you to see where you can and cannot route pipes.
31. Use Navisworks for Clash Detection
Export your Revit model (or specific disciplines) to Navisworks for comprehensive clash detection. This is where you can rigorously check for conflicts between plumbing pipes, ducts, structural elements, and walls. Reputable sources like Autodesk Navisworks offer solutions for this.
32. Communicate Clash Results Clearly
When clashes are found, clearly communicate them back to the relevant teams (architects, structural engineers, HVAC designers) for resolution within Revit.
33. Utilize Shared Coordinates
Ensure all linked models in your project use Shared Coordinates. This is critical for accurate spatial relationships between different discipline models and for the success of clash detection.
34. Coordinate Pipe Sizes and Risers
Work closely with other MEP disciplines to coordinate main risers and pipe sizes, especially where different systems might occupy the same vertical space.
Advanced Tips and Best Practices
Once you’ve got the hang of the basics, these advanced tips can significantly improve your efficiency and design quality.
35. Use the Pipe Tools Palette Effectively
When you select a pipe, a contextual ribbon tab appears with options like “Pipe Run Settings,” “Slope,” “Add,” and “Fitting.” Learn to leverage these tools for quick adjustments.
36. Create Custom Pipe Routing Preferences
Beyond the defaults, you can create your own routing preference files. This allows you to pre-define specific combinations of fittings and pipe types for different scenarios, saving immense time.
37. Model Insulation and Supports
For more detailed projects, model pipe insulation as a pipe accessory and consider using structural elements or specialized families to represent pipe supports. This adds crucial detail for fabrication and installation planning.
38. Perform Basic Hydraulic Analysis (if applicable)
If your Revit version includes MEP analysis tools (like Revit MEP), you can perform basic hydraulic calculations. Even without advanced analysis, understanding flow rates and pressure drops is a key part of good plumbing design.
Common Plumbing Issues and How Revit Helps
Let’s look at how using Revit effectively can help you avoid or solve common homeowner plumbing headaches.
| Common Plumbing Issue | How Revit Design Helps |
|---|---|
| Clogged Drains: Improper slope or undersized pipes | Revit allows precise slope setting for drain pipes and accurate sizing based on fixture units, minimizing the risk of clogs. |
| Low Water Pressure: Undersized pipes or excessive fittings | Accurate pipe sizing and thoughtful routing in Revit ensure optimal flow paths, maintaining pressure throughout the system. |
| Water Hammer: Abrupt valve closures leading to shockwaves | While Revit doesn’t directly design for water hammer, a well-coordinated system with proper pipe sizes and potential placement of expansion chambers (as components) can mitigate issues. |
| Leaks: Poor connections or low-quality fittings | Modeling with correct fittings and ensuring proper connections in Revit promotes good installation practice. Scheduling exact fittings and materials also helps ensure quality. |
| Inefficient Hot Water: Poorly designed recirculation loops | Revit can model complex hot water recirculation systems accurately, ensuring efficient delivery and reducing water waste. |
Frequently Asked Questions (FAQ)
Q1: What is the best way to learn Revit plumbing for beginners?
A1: Start with a good Revit MEP template. Work through tutorials focused on pipe creation, system setup, and view customization. Practice by modeling simple bathroom or kitchen plumbing layouts.
Q2: Can I use Revit for a small home plumbing project?
A2: Absolutely! While Revit is powerful for large projects, it’s also valuable for smaller ones. It helps you visualize, plan accurately, and ensure components fit together, reducing costly mistakes during installation.
Q3: How do I ensure my Revit plumbing design meets local building codes?
A3: Familiarize yourself with relevant codes (like the International Plumbing Code – IPC, or local amendments). Design with correct pipe slopes, sizes, and material types as specified by the codes. You can use Revit’s annotation and scheduling to document code compliance.
Q4: What’s the difference between a pipe and a pipe fitting in Revit?
A4: A pipe is the main conduit for fluid. A pipe fitting (like an elbow, tee, or reducer) is used to change the direction or size of the pipe run. In Revit, both are distinct families that connect to form a system.
Q5: How can I make my plumbing views less cluttered in Revit?
A5: Use Visibility/Graphics Overrides (VG) to hide unnecessary categories. Create specific views for different systems (e.g., one for hot water, one for sanitary) and use filters to highlight relevant elements.
Q6: Where can I find good Revit plumbing families?
A6: Autodesk’s built-in content library is a starting point. Many manufacturers provide their product families in Revit format on their websites. Websites like BIMobject or Revitcity also offer a vast library of families, though quality can vary.
Conclusion
Tackling Revit plumbing as a beginner might seem like a daunting task, but armed with these 38 genius tips, you’re well on your way to mastering it. From the crucial first steps of project setup and family loading to the intricacies of modeling, view customization, and generating accurate documentation, each tip is designed to build your confidence and proficiency. Remember, Revit is a tool that empowers you to design smarter, cleaner, and more efficient plumbing systems. By leveraging its BIM capabilities, you can avoid common pitfalls, ensure better coordination with other trades, and ultimately create better-designed buildings. Keep practicing, experiment with these tips, and don’t hesitate to explore further resources. You’ve got this!