

Unlock a crystal-clear, leak-free pool with these 39 essential swimming pool plumbing tips. Learn simple DIY fixes, maintenance routines, and troubleshooting tricks to keep your pool system running smoothly and efficiently, saving you time and money.
Is your swimming pool’s plumbing acting up? A leaky pipe or a clogged filter can quickly turn a relaxing splash into a frustrating mess. Don’t worry, many common pool plumbing problems are surprisingly easy to tackle yourself! As your trusted plumbing expert, Nazmul Hasan, I’m here to guide you. We’ll walk through practical, beginner-friendly tips to keep your pool water sparkling and your system in top shape without needing to call a pro for every little thing. Get ready to feel confident and in control of your pool’s plumbing system!
Why Pool Plumbing Matters
Your swimming pool’s plumbing system is the unsung hero of clean, inviting water. It’s responsible for everything from circulating water through the filter to ensuring your heater works efficiently and your jets provide a relaxing massage. When this intricate network of pipes, valves, and pumps isn’t functioning correctly, you’ll notice issues like cloudy water, poor circulation, leaks, or reduced skimmer and return jet performance. Understanding the basics of your pool’s plumbing can help you perform regular maintenance, catch problems early, and save a significant amount of money on professional repairs. Think of it as preventative care for your backyard oasis!
Understanding Your Pool Plumbing System
Before we dive into the tips, let’s get a basic understanding of what makes your pool’s plumbing work. It’s a cycle designed to keep your water clean and safe. Here’s a simplified breakdown:
- The Pump: This is the heart of your pool system. It pulls water from the pool through the skimmer and main drain, pushes it through the filter, and then sends it back to the pool via the return jets.
- The Filter: Whether it’s a sand, cartridge, or diatomaceous earth (DE) filter, its job is to remove debris and contaminants from the water.
- The Heater (if applicable): If you have a heated pool, the water is directed here after the filter for warming.
- The Skimmer: These devices, typically located at the water’s surface, skim floating debris like leaves and bugs into a basket and then into the circulation system.
- The Main Drain: Located at the bottom of the pool, it helps remove heavier debris and provides a significant portion of the water intake for the pump.
- The Return Jets: These fittings push the filtered and heated water back into the pool, helping to circulate it.
- Valves: These are the gatekeepers of your plumbing, controlling the flow of water to different parts of the system, like backwashing the filter or directing water where it needs to go.
Each component plays a vital role, and their smooth operation depends on a well-maintained plumbing network. Now, let’s get to those essential tips!
Essential Swimming Pool Plumbing Tips
Maintenance & Prevention
- Regularly Inspect Pool Plumbing for Leaks: One of the most crucial aspects of pool maintenance is vigilance. Walk around your pool and the equipment pad. Look for any unusual wet spots, puddles, or dampness that doesn’t seem to evaporate. Pay close attention to pipe joints, valve connections, and areas around the pump and filter. Catching a small leak early can prevent major water loss and costly damage.
- Clean Skimmer Baskets and Pump Baskets Frequently: These baskets are designed to catch larger debris. If they become clogged, they restrict water flow to the pump, which can strain the motor and reduce filtration efficiency. Aim to check and empty them at least once or twice a week, more often if you have many trees or debris around your pool.
- Check and Clean Your Pool Filter: A dirty filter restricts water flow, making your pump work harder. Depending on your filter type:
- Sand Filters: Backwash when the pressure gauge reads 8-10 PSI above the clean starting pressure.
- Cartridge Filters: Remove and rinse cartridges when the pressure gauge reads 8-10 PSI above the clean starting pressure or when flow decreases.
- DE Filters: Backwash and recharge with DE powder when the pressure gauge reads 8-10 PSI above the clean starting pressure.
Refer to your filter manual for specific cleaning instructions. For more on filter maintenance, check out the Pool and Hot Tub Association’s guide.
- Winterize Plumbing Properly in Colder Climates: If you live in an area that experiences freezing temperatures, proper winterization is critical. This involves draining all water from pipes, the pump, filter, and heater to prevent ice expansion and cracking. Consult your pool equipment manuals or a professional for specific winterization steps for your system. The Pool Nation offers a helpful guide on winterizing.
- Keep the Area Around Equipment Clean: Ensure the space around your pump, filter, and heater is clear of debris, plants, and stored items. Good airflow is important for equipment cooling, and a tidy area makes it easier to spot any leaks or issues.
- Test Your Pool Water Regularly: While not directly plumbing itself, balanced water chemistry (pH, alkalinity, sanitizer levels) is crucial for preventing corrosion and scaling in your pipes and equipment. Unbalanced water can damage your plumbing over time. Aim to test your water at least twice a week.
- Lubricate O-rings and Gaskets on Filter Lids and Pump Baskets: These seals keep water where it should be. Dried-out or damaged o-rings can cause leaks. Use a silicone pool lubricant to keep them supple and ensure a tight seal.
- Check and Tighten Valve Handles: Ensure all valve handles are secure and turn smoothly. Loose handles can lead to leaks at the stem.
- Listen for Unusual Pump Noises: A noisy pump, especially whining or grinding sounds, can indicate air in the system or a bearing issue. If you hear something unusual, check the water level, prime the pump if necessary, and inspect for air leaks on the suction side.
- Inspect and Clean the Main Drain Cover: Ensure the main drain cover is securely fastened and not blocked by debris. A loose cover can be a safety hazard, and a blocked drain restricts water flow.
- Inspect All Return Jet Fittings: Make sure they are tight and pointed in the desired directions for optimal water circulation.
- Periodically Flush Your Plumbing Lines: Especially if your pool has been closed for a while or after repairs, running the pump for an extended period can help flush out any residual debris from the lines.
- Consider Using a Pool Cover: A pool cover significantly reduces the amount of debris that enters the water, lessening the load on your skimmer baskets and filter, and indirectly protecting your plumbing from unnecessary stress.
- Properly Prime the Pump: Before starting your pump, always ensure it’s primed. This means filling the pump’s strainer basket and housing with water. Air pockets can cause the pump to run dry, leading to damage.
- Don’t Overload Your Filter: Stick to recommended flow rates for your pump and filter combination. Over-forcing water through the system can damage the filter media or internal components.
- Flush out the Heater Passages (as needed): If you have a pool heater, occasional flushing of its internal passages can prevent buildup that restricts flow and reduces efficiency. Consult your heater manual for guidance.
- Secure All Plumbing Connections: Over time, vibrations can loosen pipe fittings. Periodically check accessible PVC pipe connections and tighten them if necessary, but be careful not to overtighten, which can crack the PVC.
- Insulate Exposed Pool Plumbing: In areas with temperature fluctuations, insulating exposed pipes can help prevent damage from freezing or extreme heat.
- Use the Correct Type of PVC Primer and Cement: When making PVC repairs or installations, use products specifically designed for pool plumbing (typically Schedule 40 or Schedule 80 PVC for main lines). Using the wrong type can lead to weak joints.
- Ensure Proper Electrical Grounding for Metal Components: If any part of your pool plumbing system involves metal (like certain heater components or clamps), ensure they are properly grounded according to local electrical codes to prevent galvanic corrosion and electrical hazards. Consult an electrician if unsure. U.S. Consumer Product Safety Commission provides valuable guidelines on pool and spa electrical safety.
Troubleshooting Common Issues
- Low Water Flow from Return Jets: This is usually a sign of a blockage or restricted flow. Check the skimmer basket, pump basket, and filter. Ensure all valves are fully open. If the problem persists, you might have an obstruction in the underground pipes or a problem with the pump itself.
- Pump Not Priming or Losing Prime: This often indicates an air leak on the suction side of the system. Check the pump lid o-ring, all threaded fittings on the suction side (including the skimmer basket housing), and the condition of the pump shaft seal. Any air entering here will prevent the pump from holding water.
- Air Bubbles from Return Jets: Similar to losing prime, this indicates air leaking into the system, usually on the suction side before the pump. Inspect all connections and the pump lid. A dirty or clogged filter on the suction side of the pump can also cause this.
- Leaks Around the Pump or Filter: These are often caused by worn-out seals or gaskets. Check the pump’s shaft seal (if the leak is from the pump’s motor end, it needs professional attention), the pump lid o-ring, and any unions or threaded connections. Filter leaks can be from the filter lid o-ring or drain plug.
- Strange Noises from the Pump: Grinding or squealing noises can mean bad bearings. A cavitation noise (like marbles in the pump) suggests restricted water flow or air getting into the pump. Check for blockages and air leaks.
- Water Level Dropping Too Quickly Despite No Visible Leaks: This is a classic sign of an underground pipe leak. With the pump off, mark your water level. If it drops significantly overnight, you likely have a leak “downstream” of the pump, potentially in the pipes or returns. Sometimes, you can hear leaks if you listen closely near underground pipes.
- Reduced Skimmer Suction: If your skimmer isn’t pulling in debris efficiently, check if the skimmer basket is full. Also, ensure the weir flap is functioning correctly and not stuck open or closed. The skimmer’s specific valve might also be partially closed.
- Slow Drainage or Backwashing Issues: If your filter isn’t backwashing effectively or the pool is draining very slowly, the multiport valve might be the culprit, or there could be a clog in the waste line.
- Frozen Pipes in Winter: This is one of the most dreaded issues. If you suspect frozen pipes, shut off the pump immediately to prevent damage. You may need to use a hair dryer or heat gun (carefully!) to thaw small sections you can access, or wait for warmer temperatures. Proper winterization is the best defense.
- Pool Heater Not Working Efficiently: Reduced water flow to the heater can cause it to shut down or heat poorly. Check for kinks in the plumbing lines leading to and from the heater and ensure the filter pressure isn’t too high.
DIY Repairs and Upgrades
- Replacing a Pump Lid O-ring: This is a common fix for air leaks. Turn off the pump. Remove the lid, clean the groove, apply silicone lubricant to the new o-ring, and press it firmly into the groove. Replace the lid and prime the pump.
- Fixing a Leaking Union Fitting: Unions are designed to be taken apart for servicing. If a union is leaking, try tightening it a quarter-turn. If that doesn’t work, you may need to replace the o-ring inside or the entire union if it’s cracked.
- Sealing Minor Cracks in PVC Pipes: For very small cracks or pinholes in PVC, you can attempt a temporary fix with specialized PVC repair tape or epoxy putty designed for pools. However, for significant cracks, replacement is the best long-term solution.
- Replacing a Valve Handle or Stem: If a valve handle is stripped or the stem leaks, you can often replace just that part. Turn off the water flow, open the valve to relieve pressure, and then disassemble the valve to replace the faulty component.
- Upgrading to a More Efficient Pump: Consider upgrading to a variable-speed pump. While more expensive upfront, they can significantly reduce energy costs over time by allowing you to run the pump at lower speeds for longer periods. Learn more about pump efficiency from the U.S. Department of Energy.
- Installing a Timer or Smart Controller: Automating your pump’s run time can improve efficiency and ensure consistent filtration. Smart controllers also allow for remote adjustments and monitoring.
- Replacing Damaged PVC Fittings: If a PVC fitting (like an elbow or coupling) is cracked or leaking, you’ll need to cut out the damaged section and glue in a new fitting using PVC primer and cement. Ensure you have tools like a PVC cutter or hacksaw.
- Adding Shut-off Valves: If your system lacks shut-off valves on both sides of major equipment (like the pump or filter), consider adding them. This makes future maintenance or repairs much easier as you can isolate specific components without draining the entire pool.
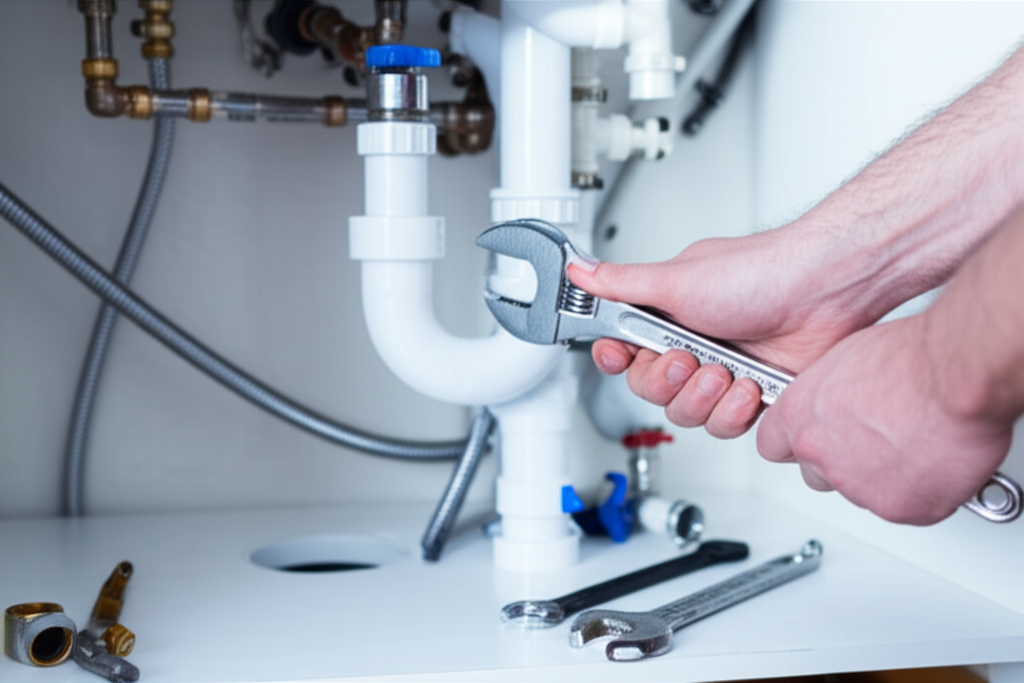
- Using the Right Tools for the Job: Have essential tools on hand like a PVC pipe cutter, adjustable wrenches, pipe wrenches, screwdrivers, a bucket for capturing water, and a towel for drying connections.
Pool Plumbing Repair Kit Essentials
For any DIYer, having a few key items can make pool plumbing repairs much smoother. Here’s a basic list to consider keeping in your pool shed:
| Item | Purpose | Notes |
|---|---|---|
| PVC Primer and Cement | For gluing PVC pipes and fittings. | Ensure you get the correct type for your pipe size and temperature. |
| PVC Pipe Cutter or Hacksaw | For cleanly cutting PVC pipes. | A pipe cutter makes for cleaner, straighter cuts. |
| Adjustable Wrenches | For tightening threaded fittings and unions. | Various sizes are helpful. |
| Pipe Wrenches | For gripping and turning pipes securely. | Use for the larger PVC pipes. |
| Silicone Pool Lubricant | To lubricate o-rings and gaskets. | Keeps seals pliable and prevents leaks. |
| Replacement O-rings and Gaskets | For pump lids, filter lids, and filter drain plugs. | Keep common sizes on hand. |
| Thread Seal Tape (Teflon Tape) | To seal threaded connections. | Use on male pipe threads. |
| PVC Repair Tape or Epoxy Putty | For temporary fixes on minor leaks. | Not a permanent solution for significant damage. |
| Bucket and Towels | For catching water and drying connections. | Essential for keeping the work area tidy. |
Frequently Asked Questions (FAQ)
Q1: How often should I clean my pool filter?
A1: You should clean your pool filter when the pressure gauge rises 8-10 PSI above its clean starting pressure. For cartridge filters, it’s also common to clean them when you notice a significant decrease in water flow from your return jets. Sand filters need backwashing, while cartridge and DE filters require removal and rinsing or backwashing, respectively.
Q2: Why is my pool pump making a loud noise?
A2: Loud noises, like grinding or squealing, often indicate failing bearings in the pump motor. A gurgling or “marbles in the pump” sound suggests air is entering the pump or the water flow is restricted. Check your skimmer basket, pump basket, and look for air leaks on the suction side of the plumbing.
Q3: What’s the easiest way to check for a leak?
A3: Turn off your pump and fill the pool to its normal operating level. Mark the water level with a piece of tape on the tile or inside the skimmer. Turn the pump back on and let it run for 24 hours. Then, turn it off again and mark the level after another 24 hours. If the water level drops significantly when the pump is off, you likely have a