

Quick Summary: Tackle common home tank plumbing issues with these 44 genius DIY fixes. Learn simple, step-by-step solutions for toilets, water heaters, and more. Save time and money with these essential home tank solutions designed for beginners, empowering you to master basic repairs.
Plumbing problems can feel like a big, intimidating mystery, especially when it comes to the tanks in our homes – like the one for your toilet or your water heater. A funny noise, a slow drip, or a tank that won’t fill can cause real stress. But guess what? Many of these common tank troubles don’t require a professional plumber. You can often fix them yourself with a little know-how and the right tools.
This guide is here to demystify those tank-related headaches. We’ll break down simple fixes for the most frequent issues, using clear language and easy-to-follow steps. Get ready to feel confident about handling your home’s plumbing!
Understanding Your Home’s Tanks
Our homes rely on several key tanks that keep water flowing and comfortable. The most familiar is the toilet tank, the workhorse behind every flush. Then there’s the water heater tank, the silent guardian of hot showers and clean dishes. Knowing a bit about how these tanks work is your secret weapon against common problems.
The Toilet Tank: More Than Just a Reservoir
Your toilet tank is a clever assembly of parts designed to hold water and release it efficiently. Key components include:
- The Fill Valve (or Ballcock): This part refills the tank with fresh water after each flush and shuts off the water when the tank is full.
- The Flapper: A rubber cup that seals the flush valve at the bottom of the tank, preventing water from leaking into the bowl. When you flush, it lifts, allowing water to rush into the bowl.
- The Flush Valve: The opening at the bottom of the tank that the flapper seals.
- The Overflow Tube: A vertical pipe that prevents water from overflowing the tank if the fill valve malfunction. Water drains down this tube into the toilet bowl if the flapper isn’t sealing properly.
- The Handle and Lever: Connected to the flapper, this mechanism initiates the flush.
When these parts work in harmony, your toilet flushes smoothly. If one part falters, you can get leaks, running water, or weak flushes.
The Water Heater Tank: Your Hot Water Hub
A typical storage-tank water heater is an insulated tank filled with water that’s heated by an element (electric) or a burner (gas). Key parts include:
- The Tank Itself: Holds the water, often lined with glass or enamel to prevent corrosion.
- Heating Element/Burner: Heats the water.
- Thermostat: Controls the water temperature.
- Dip Tube: Directs cold water to the bottom of the tank to prevent mixing with hot water at the top.
- Heat Trap Nipples: Reduce heat loss from the tank.
- Anode Rod: A sacrificial metal rod that corrodes instead of the tank lining.
Problems here can range from no hot water and strange noises to leaks and reduced efficiency.
44 Ingenious Plumbing Fixes for Home Tanks
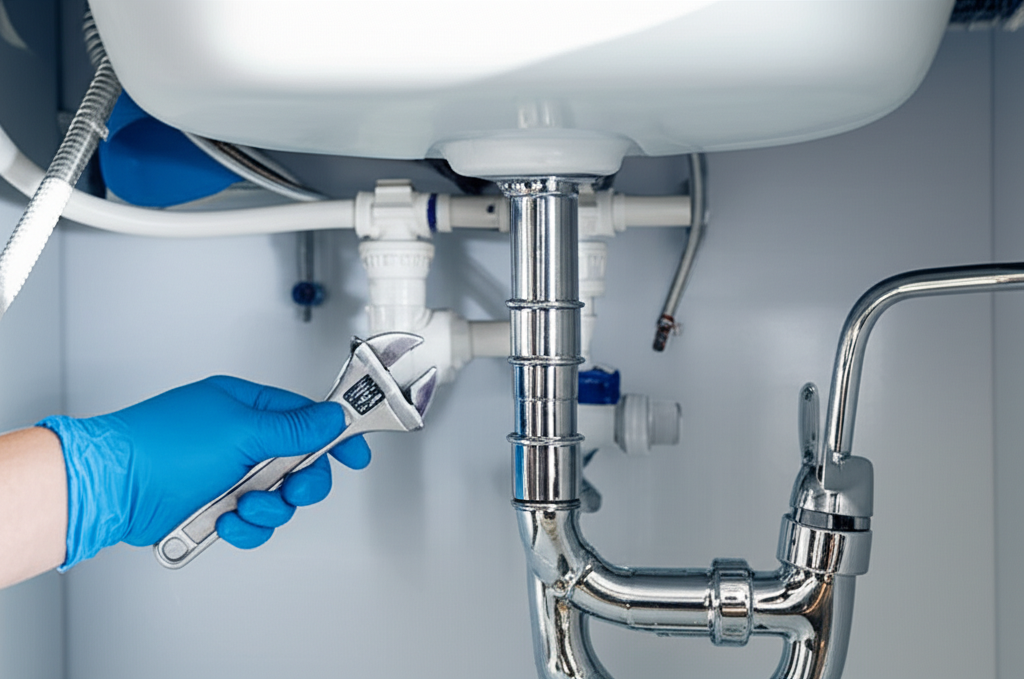
Let’s dive into the practical solutions. These tips are designed to be achievable for most homeowners. Remember to always turn off the water supply to the fixture before starting any repair!
Toilet Tank Fixes (1-25)
1. Constant Running Toilet: The Leaky Flapper
This is the most common toilet problem. If water constantly runs into the bowl, your flapper is likely failing to create a proper seal. Often, it’s just old and worn out.
- Diagnosis: Remove the tank lid. If you see water steadily flowing into the bowl (not just from the fill valve), the flapper is the culprit. You can also add a few drops of food coloring to the tank; if color appears in the bowl without flushing, the flapper is leaking.
- Fix: Purchase a universal toilet flapper from a hardware store. Turn off the water supply to the toilet. Flush to empty the tank. Detach the old flapper from the flush valve seat and the chain from the flush lever. Attach the new flapper and reconnect the chain, ensuring it has a little slack (about half an inch). Turn the water back on and test.
2. Slow Refill After Flushing: The Fill Valve Connection
If your toilet tank takes a long time to refill after flushing, the fill valve might be partially blocked or not opening fully.
- Diagnosis: Observe the fill valve. Is water flowing into the tank slowly?
- Fix: Turn off the water supply. Unscrew the fill valve cap (refer to your specific model’s instructions or look for a twist mechanism). Check for debris inside and around the rubber seal. Rinse it out. Some fill valves have a small adjustment screw; ensure it’s set correctly to allow full water flow. Reassemble and test.
3. Toilet Won’t Stop Running: Fill Valve Malfunction
If the water level in the tank keeps rising and running into the overflow tube, the fill valve isn’t shutting off properly.
- Diagnosis: Watch the water level after the tank has refilled. If it continues to rise and spill into the overflow tube, the fill valve is faulty.
- Fix: Lift the float arm on the fill valve. If the water stops, the float is misaligned or the valve itself is bad. Adjust the float to a slightly lower level. If it still continuously fills, replace the fill valve. This is a common DIY job; new valves are inexpensive and come with instructions.
4. Weak Flush: Low Water Level or Chain Sag
A weak flush means not enough water is being released from the tank with force.
- Diagnosis: Check the water level in the tank. It should be about 1/2 to 1 inch below the top of the overflow tube. Also, check the chain connecting the flush lever to the flapper; it should have slight give, not be too tight or too loose.
- Fix:
- Water Level: Adjust the float on the fill valve to raise the water level (check your valve’s manual).
- Chain: Adjust the chain length so there’s a little slack. If the chain is too short, it can slightly lift the flapper, causing a slow leak. If it’s too long, it may not lift the flapper enough for a full flush.
5. Toilet Wobbles: Loose Tank-to-Bowl Bolts
A wobbly toilet tank usually means the bolts securing it to the toilet bowl are loose.
- Diagnosis: Gently rock the tank. You might see water around the base of the bolts under the tank.
- Fix: You’ll need a wrench and possibly a socket. Reach under the tank and snug up the nuts on the bolts. Don’t overtighten, as you could crack the porcelain. If the bolts or the rubber grommets have failed, you’ll need to replace the tank-to-bowl gasket kit. This involves removing the tank.
6. Condensation on Tank: Improve Ventilation
A sweating toilet tank is usually caused by warm, humid air condensing on the cool surface of the tank.
- Diagnosis: Feel the outside of your tank. Is it wet and dripping?
- Fix:
- Ventilation: Ensure your bathroom is well-ventilated. Run the exhaust fan during and after showers.
- Insulation: Install a toilet tank insulating jacket. These are readily available at hardware stores and are relatively easy to install.
- Dew Point: In severe cases, you might need to raise the tank’s water temperature slightly by adjusting the water heater thermostat or installing an anti-sweat valve on the toilet’s water supply line.
7. Slow Filling: Clogged Water Supply Valve
If the water supply valve to the toilet is partially closed or clogged, it can restrict water flow.
- Diagnosis: Check if the shut-off valve is fully open. If it is, and the fill valve still seems slow, the valve itself might be internally clogged.
- Fix: Turn off the water supply using the shut-off valve. Disconnect the supply line from the fill valve. Place a bucket or rag underneath. Slowly turn the shut-off valve on slightly to see if debris shoots out. If so, you may need to clean the valve outlet or replace the valve.
8. Gurgling Toilet: Air in the Lines
Gurgling sounds can indicate air trapped in the plumbing system, often related to venting issues.
- Diagnosis: Does the toilet gurgle when it flushes, or when other fixtures are used? Test by flushing the toilet and then quickly running water in a nearby sink.
- Fix: This is often a venting issue and might require professional attention if DIY troubleshooting doesn’t resolve it. However, sometimes a simple blockage in the overflow tube or vent stack can cause this. Ensure the overflow tube isn’t obstructed.
9. Water Hammer: Shock Absorber Needed
A loud banging sound when the water shuts off suddenly is called water hammer. It’s caused by the sudden stop of moving water.
- Diagnosis: Listen for the bang when the fill valve shuts off or when other fixtures are used.
- Fix: Install water hammer arrestors on your supply lines. These are small devices that absorb the shock. For toilets, the fill valve itself can sometimes be the culprit and may need replacement.
10. Jiggling Handle: Loose Handle Assembly
If the toilet handle feels loose or wobbly, the internal nut securing it to the tank lever might be loose.
- Diagnosis: Gently try to tighten the handle from the outside. If it still feels loose, the internal nut is the likely cause.
- Fix: Reach inside the tank. You’ll see a nut on the back of the handle assembly. Tighten this nut with your fingers or a wrench. Be careful not to overtighten.
11. Water Level Too High: Float Adjustment
As mentioned in “Toilet Won’t Stop Running,” a high water level means the fill valve isn’t shutting off at the correct point.
- Diagnosis: Water level is above the overflow tube.
- Fix: Adjust your fill valve’s float. For most modern fill valves, you can adjust the float by turning a screw on the valve arm or by gently bending the metal arm (for older ball-and-arm types). Aim for the water level to be about 1/2 to 1 inch below the top of the overflow tube.
12. Water Level Too Low: Float Adjustment
A low water level results in a weak flush.
- Diagnosis: Water level is significantly below the overflow tube.
- Fix: Adjust the float on your fill valve to raise the water level. Ensure it’s set to the manufacturer’s recommended level, typically indicated by a line inside the tank or on the overflow tube.
13. Noisy Fill Valve: Worn Parts
A whistling or screaming fill valve often indicates worn seals or internal components.
- Diagnosis: Loud noises coming from the fill valve while it’s operating.
- Fix: Sometimes, cleaning the internal seals can help. However, worn fill valves are best replaced. It’s an inexpensive part and a straightforward replacement.
14. Flush but No Water in Bowl: Crippled Flapper Chain
If you flush and nothing happens in the bowl, the flapper chain might be too short, preventing the flapper from lifting.
- Diagnosis: You hear water filling the tank, but the bowl remains dry or receives minimal water. The flapper is still seated.
- Fix: Adjust the chain length. Ensure there’s about a half-inch of slack, allowing the flapper to lift freely when the handle is pushed.
15. Toilet Overflows Constantly: Clogged Vent Pipe
A clogged vent pipe can cause all sorts of flushing issues, including overflows that seem to happen for no reason.
- Diagnosis: Other plumbing fixtures may also gurgle, or you might notice slow drains.
- Fix: The vent pipe runs from your sewer line up to your roof. Debris (leaves, nests) can clog it. Locate your plumbing vents on the roof and carefully clear any obstructions. This can be dangerous, so consider hiring a professional for this task.
16. Water Only Refills Slowly: Mineral Buildup
Hard water can cause mineral deposits to build up on the fill valve, restricting water flow.
- Diagnosis: Slow refill even after checking for simple chain or float issues.
- Fix: Turn off the water. Disassemble the fill valve according to the manufacturer’s instructions and clean any mineral deposits with a brush or vinegar. Replace any worn seals. If the deposits are severe, consider replacing the fill valve.
17. Toilet Seat Wobbles: Loose Hinges
If the toilet seat itself is loose, it’s an easy fix for stability.
- Diagnosis: The seat moves around when you sit on it.
- Fix: Look under the back of the toilet seat. You’ll see two bolts with nuts (often plastic). Tighten these nuts with a screwdriver or pliers. Some seats have decorative caps covering the bolts; pop these off first.
18. Toilet Seat Creaks: Lubrication Needed
Annoying squeaks can often be fixed with a bit of lubrication.
- Diagnosis: The seat makes noise when lifted or lowered.
- Fix: Apply a small amount of silicone lubricant or grease to the hinges of the toilet seat. Avoid petroleum-based lubricants as they can degrade plastic.
19. Tank Lid Rocks: Improper Seating
If the tank lid doesn’t sit flat, it can be unstable and noisy.
- Diagnosis: The lid moves or wobbles on the tank.
- Fix: Check if there are any small rubber or plastic mounting grommets or bumpers on the bottom of the tank lid that might be out of place or missing. Ensure the lid is correctly centered on the tank.
20. Filling Toilet Runs Continuously into Overflow: Leaking Flush Valve Seat
If the fill valve correctly shuts off but the water still runs into the overflow tube, the flush valve seat itself is leaking.
- Diagnosis: Water level rises to the overflow tube, but the fill valve shuts off. Yet, water continues to flow into the bowl via the overflow tube.
- Fix: The rubber seal at the base of the flush valve (where the flapper sits) is likely worn or damaged. You’ll need to replace the entire flush valve assembly. This is a more involved job, requiring you to unbolt the tank.
21. Water Not Reaching Flapper: Fill Tube Issue
If the water stops filling the tank early, it might be because the fill tube isn’t directing water correctly.
- Diagnosis: Tank water level is too low, and the fill tube is not directing water into the overflow tube.
- Fix: Ensure the small rubber hose (fill tube) connected to the top of the fill valve is properly positioned inside the overflow tube. It should direct water into the tube to refill the tank and the bowl. Adjust its position or secure it if it has come loose.
22. Tank Drips Internally: Condensation or Leak
This could be condensation (as in #6) or a small leak in the tank itself.
- Diagnosis: Small drips noticed inside the tank, especially on the exterior.
- Fix: Confirm it’s not condensation from humidity. If you suspect a leak in the porcelain, it’s a significant issue that often requires tank replacement. Check the tank-to-bowl gasket and fill valve connections for leaks first.
23. Fill Valve Makes Noise After Flush: Air in Line
Sometimes air trapped in the water line can cause the fill valve to make noise as it operates.
- Diagnosis: High-pitched whine or gulping sound from the fill valve after the flush.
- Fix: Try bleeding the air from the line. Turn off the water supply. Disconnect the supply line from the fill valve. Place the end in a bucket. Turn the shut-off valve on and off a few times to release any trapped air. Reconnect and test.
24. Toilet Rocks Horizontally: Shim the Base
If the toilet rocks side-to-side (not just the tank), the base is uneven on the floor.
- Diagnosis: The entire toilet unit shifts.
- Fix: Gently push down on one side of the toilet. Where it lifts, slide thin plastic shims (available at hardware stores) under the toilet base to stabilize it. You