

Quick Summary: Installing a washing machine in Melbourne is a straightforward DIY task. Follow these 47 genius steps for a safe, leak-free, and efficient installation, saving you time and money on professional services. We cover everything from preparation to the first wash!
Welcome, Melbourne homeowners! Is that brand-new washing machine sitting in its box, looking a little intimidating? Don’t worry! Installing a washing machine might seem like a big job, but with a little guidance, you can do it yourself. Leaks, noisy operation, or connection issues are common frustrations for many. But what if I told you you could tackle this yourself, saving a call-out fee? This guide breaks down the process into simple, manageable steps. Let’s get your new appliance humming!
Your Essential Washing Machine Installation Toolkit
Before we dive into the 47 genius steps, let’s gather your essential tools. Having everything ready means a smoother process and fewer trips to the hardware store. Think of this as your pre-flight checklist for a successful installation!
- Adjustable Wrench (or two)
- Pliers
- Bucket
- Towels or Rags
- Level
- Teflon Tape (Plumber’s Tape)
- Screwdriver Set (Phillips and Flathead)
- Safety Gloves
- Safety Glasses
- New Fill Hoses (if not supplied or if yours are old)
- Drain Hose Clamp (if needed for securing drain hose)
- Dolly or Hand Truck (for moving the machine)
- Measuring Tape
- A Helping Hand (optional, but very useful for lifting)
It’s also a good idea to have your washing machine’s user manual handy. It often contains specific instructions for your model, which can be a lifesaver!
Phase 1: Preparation is Key – Setting the Stage for Success
Getting the installation area ready is crucial. This phase focuses on ensuring safety, accessibility, and the right conditions for your new machine. Let’s make sure the workspace is prepped and ready to go!
Step 1: Unboxing and Inspection
Carefully open the box using a utility knife or scissors. Remove all packaging materials, including any transit clips or bolts holding the drum secure. Check the user manual for specific instructions on removing these. Inspect the machine for any damage that might have occurred during shipping. If you find any issues, contact the retailer immediately.
Step 2: Choose the Perfect Spot
Select a level, stable surface. This is paramount for reducing vibration and noise. Ensure there’s adequate space around the machine for ventilation and easy access to water connections, the drain, and the power outlet. For front loaders, ensure you have enough clearance to open the door fully. Melbourne homes often have limited laundry space, so measure carefully!
Step 3: Check Water Supply Valves
Locate your hot and cold water supply valves. These are usually found behind the washing machine area. Ensure they are in good working order and can be easily turned on and off. Inspect for any signs of leaks or corrosion around the valves themselves.
Step 4: Inspect the Drain Outlet
Verify you have a suitable drain for the washing machine’s discharge hose. This could be a standpipe, a floor drain, or a laundry sink trap. Ensure it’s positioned correctly and at the right height as specified in your machine’s manual (usually between 65cm and 90cm from the floor). A drain that’s too low can cause siphoning, and one that’s too high can prevent proper drainage.
Step 5: Check the Power Source
Ensure you have a properly grounded electrical outlet within reach of the machine’s power cord. Never use extension cords for washing machines. The outlet should be on a dedicated circuit if possible, or at least not shared with high-draw appliances. Safety first!
Step 6: Clear the Pathway
Make sure the path from the delivery point to the installation spot is clear. Remove any obstacles, rugs, or furniture that could be tripped over or damaged. Protect your floors with old towels or a drop cloth if necessary.
Step 7: Gather Your “Old” Machine’s Details (If Replacing)
If you’re replacing an existing machine, note how the hoses are connected and where the drain hose is routed. This can be helpful for a smooth transition.
Step 8: Read the Manual (Seriously!)
I know, I know, nobody likes reading manuals. But your washing machine’s manual is your best friend for installation. It will have specific details about transit bolts, hose connections, and leveling requirements unique to your model. Take five minutes to skim it.
Phase 2: Making the Connections – The Plumbing and Power Play
This is where the magic happens! Connecting the water, drain, and power are the core of the installation. We’ll go step-by-step to ensure everything is secure and functional.
Step 9: Turn Off Water Supply
Before disconnecting any hoses, turn off both the hot and cold water supply valves completely. This prevents an uncontrolled water spray!
Step 10: Disconnect Old Hoses (If Applicable)
If you’re replacing an old machine, place a bucket and towels underneath the hose connections. Unscrew the water fill hoses from the back of the old machine and the wall valves. Be prepared for a small amount of residual water to drain out.
Step 11: Disconnect Old Drain Hose (If Applicable)
Carefully unhook the drain hose from the standpipe or drain system. If it’s secured with a clamp, loosen it. Place the end of the hose into the bucket you prepared.
Step 12: Disconnect Power (If Applicable)
Unplug the old washing machine from the wall outlet. Ensure the power is off at the breaker if you are unsure or if it’s a direct wiring situation (rare for residential machines).
Step 13: Move the Old Machine Out (If Applicable)
With a helper if possible, carefully maneuver the old washing machine out of the way. Use a dolly or hand truck if you have one. Be mindful of doorways and floor surfaces.
Step 14: Prepare New Fill Hoses
Inspect your new fill hoses. Ensure the rubber washers are present in both ends of each hose. If your existing hoses are old, brittle, or kinked, it’s highly recommended to replace them. Use new hoses designed specifically for washing machines.
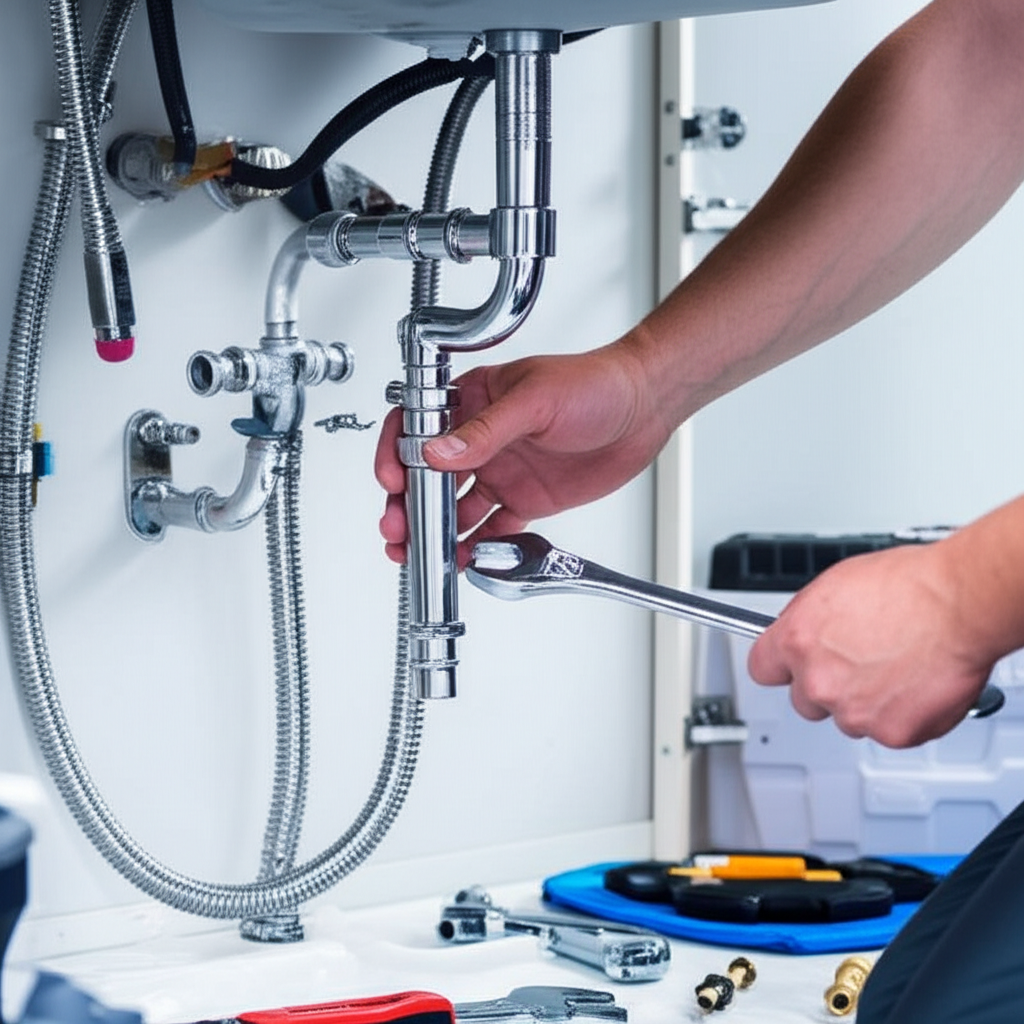
Step 15: Connect Fill Hoses to Machine
Take the cold water fill hose (usually blue-marked) and attach it to the cold water inlet on the back of the washing machine. Hand-tighten first, then give it about a quarter to half a turn with pliers or an adjustable wrench. Don’t overtighten, as this can damage the fitting or the washer.
Step 16: Connect Hot Fill Hose to Machine
Repeat Step 15 with the hot water fill hose (usually red-marked) for the hot water inlet on the machine.
Step 17: Apply Teflon Tape (Optional but Recommended for Valve Threads)
While washer hose connections are typically compression fittings that don’t require tape, some people prefer to wrap the threads on the wall valves with Teflon tape for an extra layer of sealing. Wrap the tape clockwise around the valve threads 2-3 times. This step is less critical for the machine side.
Step 18: Connect Fill Hoses to Wall Valves
Attach the other end of the cold water fill hose to the cold water supply valve on the wall. Hand-tighten, then use your wrench for a slight snug. Do the same for the hot water fill hose and the hot water valve.
Step 19: Position the Washing Machine
Carefully move the new washing machine into its final position. Leave a few inches of space behind it to allow for hose connections and ventilation. Using a dolly or a helper makes this much easier and safer.
Step 20: Connect the Drain Hose
The drain hose usually has a curved end designed to hook onto the edge of a standpipe or laundry tub. If your machine came with a separate drain hose or requires a clamp, attach it now. Slide the hose securely into the standpipe or secure it to the sink trap as per your manual. Ensure it’s not pushed too far down the standpipe (no more than 15cm) as this can create a siphon effect. A drain hose guide or U-shaped bracket is often supplied for this purpose.
Step 21: Plug In the Power Cord
Once all water connections are made and the machine is in place, plug the power cord into the grounded electrical outlet.
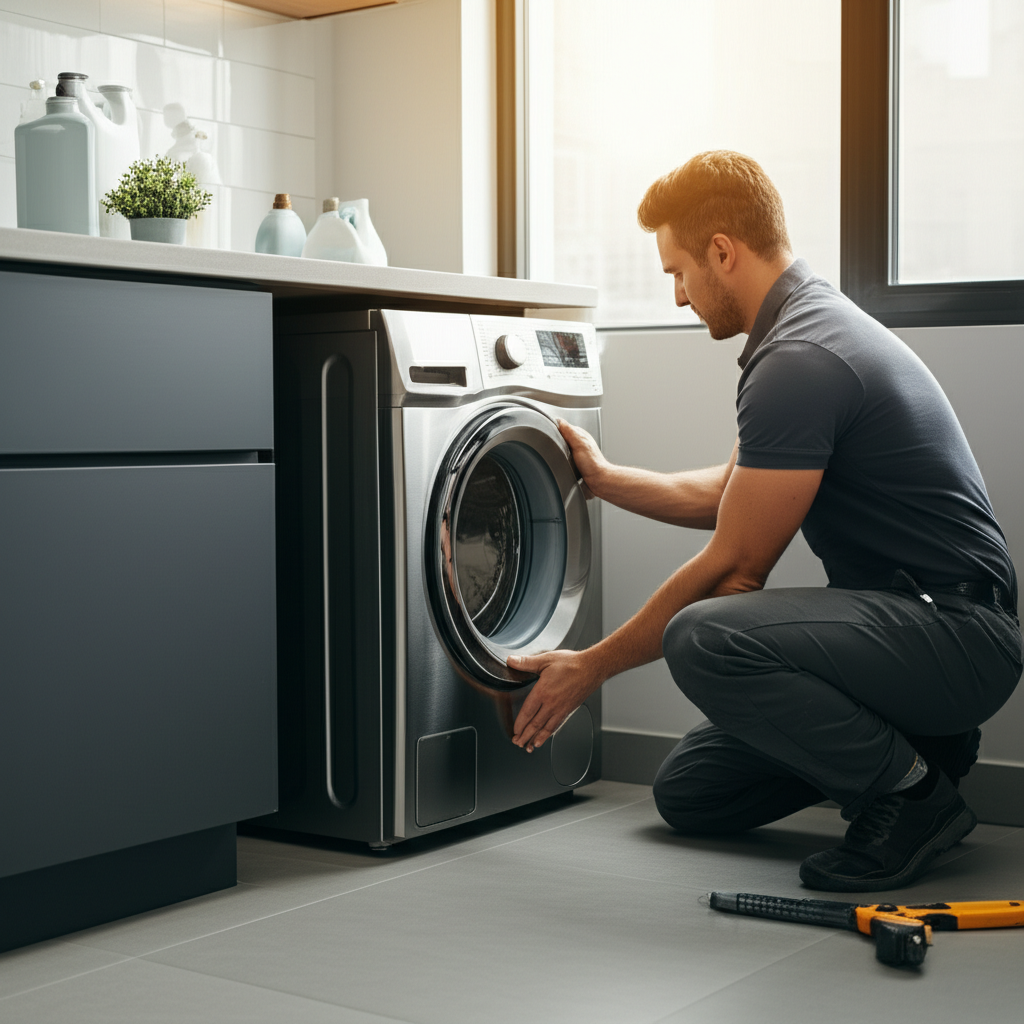
Phase 3: Levelling and Testing – The Fine-Tuning for Optimal Performance
Now that everything is connected, it’s time to ensure the machine is perfectly level and to test your work. This phase is crucial for preventing excessive vibration, noise, and wear on your appliance.
Step 22: Initial Levelling Check
Place your level on top of the washing machine. Check that it’s level both side-to-side and front-to-back. Most washing machines have adjustable feet at the base.
Step 23: Adjusting the Feet
If the machine isn’t level, turn the adjustable feet. For most machines, you can turn the feet clockwise to raise that corner and counter-clockwise to lower it. Most feet have a locking nut; loosen this nut first, adjust the foot, and then retighten the locking nut. Test the level again after each adjustment.
Step 24: Ensure Stability
Gently try to rock the machine diagonally. It shouldn’t wobble at all. If it does, continue adjusting the feet until all four corners are firmly planted and the machine feels stable. This step is critical for reducing noise and vibration during spins.
Step 25: Turn on Water Supply
Slowly turn the cold and hot water supply valves back on. Listen for any immediate leaks around the hose connections at both the wall and the machine. Eye them up carefully.
Step 26: Leak Check – Cold Water Fill
Start a short drain and spin cycle, or a cold water wash cycle, allowing water to enter the machine. While it’s filling, double-check all connection points for any drips. Tighten slightly if you see any minor leaks, but again, be gentle.
Step 27: Leak Check – Hot Water Fill
If your cycle uses hot water, also check the hot water connection points for leaks during the filling stage.
Step 28: Check Drain Function
Allow the machine to go through a drain cycle. Ensure the water drains efficiently and that the drain hose is securely in place. Watch to make sure no water backs up around the drain outlet.
Step 29: Initial Spin Test
Run a short spin cycle with no load. This is a good way to test stability, noise levels, and to ensure everything is functioning correctly without the added complexity of clothes.
Step 30: Check for Abnormal Noises
Listen for any grinding, banging, or excessive thumping during the spin cycle. This could indicate that the machine is still not perfectly level, or that the drum wasn’t properly de-activated from its transit bolts (if you missed any).
Step 31: Secure Hoses (Optional)
Some people like to use hose clamps on the fill hose connections to the machine for an extra layer of security, especially if they live in an area with high water pressure. This is usually not strictly necessary if the hoses are properly seated and tightened.
Phase 4: The First Wash – Putting Your New Machine to the Test
It’s time for the moment of truth! Let’s run a load of laundry to confirm everything is working as it should. This is the final verification step.
Step 32: Load the Machine
Add a small load of laundry. Avoid overloading the machine, as this can cause imbalance and strain components, especially during the initial test run.
Step 33: Select a Cycle
Choose a standard wash cycle and start the machine.
Step 34: Monitor the Wash Cycle
Stay nearby during the wash cycle. Periodically check for leaks at the hose connections and listen for any unusual noises. Observe how the machine balances the load during different stages.
Step 35: Observe the Spin Cycle
Pay close attention to the spin cycle. The machine should spin smoothly with minimal vibration. A slight hum is normal, but excessive shaking or loud banging isn’t.
Step 36: Post-Wash Check
Once the cycle is complete, check the machine and surrounding area one last time for any leaks. Ensure the clothes are clean and properly spun.
Step 37: Clean Up Your Workspace
Gather all your tools, towels, and packaging materials. Wipe down any spilled water and ensure the area is clean and tidy.
Step 38: Re-check Hoses After First Use
After the first wash, it’s a good practice to give the hose connections another quick visual check just to be absolutely sure no leaks have developed as the machine settled.
Phase 5: Maintenance and Pro Tips – Keeping It Running Smoothly
Installing your washing machine wasn’t so bad, right? Now, let’s talk about keeping it in tip-top shape. Regular maintenance is your best friend for a long-lasting appliance.
Step 39: Regular Hose Inspection
Periodically (every 3-6 months) inspect your fill hoses for any signs of bulging, cracking, or fraying. Replace them if they show any wear, as a burst hose can cause significant water damage. This is a common failure point for older hoses.
Step 40: Cleaning the Drum and Filter
Follow your manual’s instructions for cleaning the washing machine drum and any lint filters. This prevents odours and ensures efficient operation.
Step 41: Maintain Levelness
Over time, floors can settle, or the machine might shift slightly. Periodically check the levelness of your machine and adjust the feet if necessary, especially if you notice increased vibration.
Step 42: Proper Loading
Avoid overloading the machine. Distribute clothes evenly inside the drum to help the machine balance itself effectively during spin cycles. This reduces wear and tear.
Step 43: Know When to Call a Pro
While DIY installation is achievable, don’t hesitate to call a licensed plumber or appliance technician if you encounter persistent leaks, error codes you can’t resolve, or unusual noises that indicate a mechanical issue. It’s always better to be safe than sorry, especially with water and electricity involved.
Step 44: Melbourne Water Regulations
While not typically an issue for standard washing machine installations, be aware that some areas may have specific plumbing regulations. For standard domestic machines, direct connection to sewerage systems is usually handled by the machine’s design, but always ensure your drain hose is secured and routed correctly to prevent wastewater from entering your home. Check Victorian plumbing regulations via Victorian Building Authority (VBA) for any local nuances.
Step 45: Energy and Water Efficiency
Newer washing machines are designed for greater efficiency. Ensure you’re using the correct settings for your loads to take advantage of water and energy savings. This is good for your wallet and the environment!
Step 46: Future Proofing
Consider buying washing machine hoses with reinforced stainless steel braiding. They are significantly more durable and less prone to bursting than standard rubber hoses, offering extra peace of mind.
Step 47: Enjoy Your New Washer!
You’ve done it! You’ve successfully installed your new washing machine. Now you can sit back, relax, and enjoy a perfectly running appliance, knowing you handled it yourself. Bravo!
Washing Machine Installation Comparison Table
Here’s a quick look at the key components and considerations for a smooth installation:
| Component | Importance Level | Action/Check | Potential Issue if Ignored |
|---|---|---|---|
| Water Supply Valves | Critical | Ensure they turn on/off fully; check for leaks. | Flooding, inability to connect/disconnect. |
| Fill Hoses | High | Check washers, use new hoses if old, ensure tight but not overtightened connections. | Leaks, burst hoses leading to major water damage. |
| Drain Hose Routing | High | Securely in standpipe or drain; correct height; no kinks. | Siphoning, improper drainage, overflowing. |
| Electrical Outlet | Critical | Grounded, accessible, avoid extension cords. | Electrical shock hazard, fire risk. |
| Machine Lev
|