

Discover 49 proven tests to pinpoint hidden plumbing leaks in your home. This comprehensive guide offers simple, DIY methods to detect and address water leaks efficiently. Protect your home, save money, and gain peace of mind with easy-to-follow plumbing tests designed for beginners.
Homeownership is fantastic, but sometimes our plumbing decides to throw a little mystery our way! You might notice a damp spot on the ceiling, an unusually high water bill, or the faint sound of dripping when everything should be quiet. These are often signs of hidden leaks – sneaky culprits that can cause serious damage if left unchecked. But don’t worry! As your friendly neighborhood plumbing expert, Nazmul Hasan, I’m here to help you become a leak detective. This guide is packed with 49 easy-to-follow tests that anyone can do. We’ll dive into simple techniques to find those hidden water woes, keeping your home safe and your wallet happy. Get ready to gain confidence and tackle plumbing with ease!
Why Hidden Leaks Are a Big Deal
Hidden leaks are more than just an inconvenience; they can silently wreak havoc on your home. That small drip under the sink, the slow seep behind a wall, or a pinhole in a pipe you can’t see can lead to:
- Structural Damage: Persistent moisture can weaken wood, drywall, and even foundations.
- Mold and Mildew Growth: Damp environments are perfect breeding grounds for mold, which can impact your family’s health and cause musty odors.
- Increased Utility Bills: Leaks mean wasted water, which directly translates to higher water and potentially sewer bills.
- Damage to Belongings: Water seeping through floors or ceilings can ruin carpets, furniture, paint, and personal items.
- Pest Infestations: Damp areas can also attract insects and rodents.
The good news is that with a little know-how and these simple tests, you can become super vigilant about your home’s plumbing. Let’s get started on turning you into a DIY leak detection pro!
The Foundation: Understanding Your Water System
Before we jump into tests, let’s quickly cover the basics of your home’s water system. This knowledge helps immensely when you’re trying to figure out where a leak might be coming from. Your plumbing system generally consists of:
- Water Meter: This is usually located outside your home, near the street curb. It measures how much water you use.
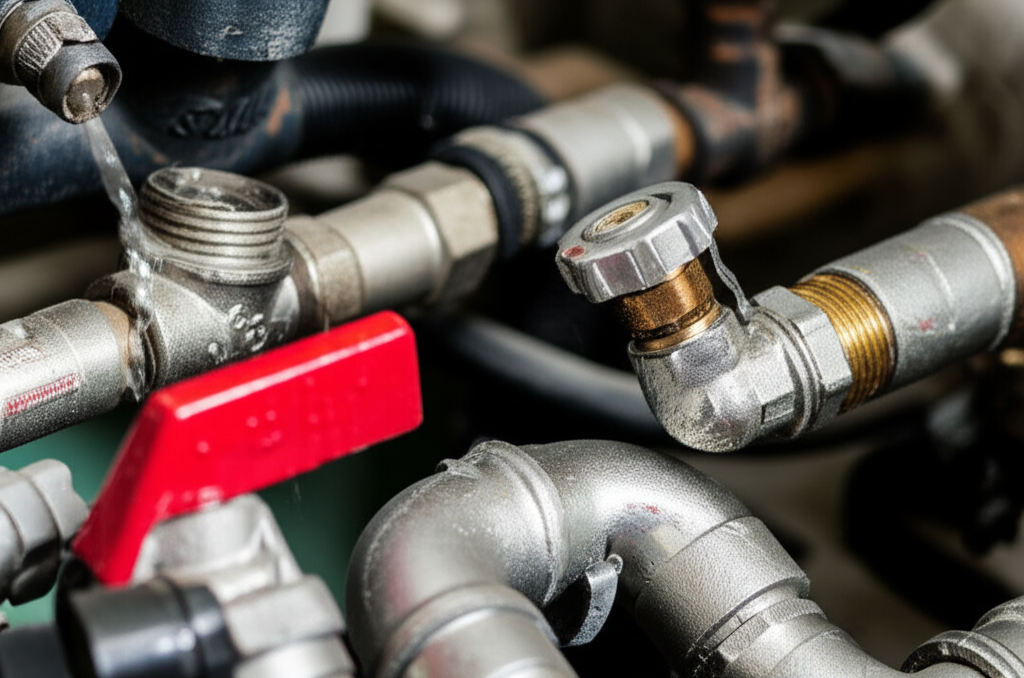
- Main Water Shut-Off Valve: This is the valve that controls all water coming into your house. Knowing where this is located is crucial for emergencies.
- Pipes: These carry water to all your fixtures and appliances. They can be made of various materials like copper, PEX, or PVC.
- Fixtures: These are the things you can see and use, like faucets, showerheads, toilets, and sinks.
- Appliances: Water-using appliances include washing machines, dishwashers, water heaters, and refrigerators with ice makers.
Visual Inspection: Your First Line of Defense
The most straightforward way to spot a leak is by using your eyes (and nose!). Regularly checking visible areas is a simple yet incredibly effective habit. Here are 4 crucial visual inspection steps:
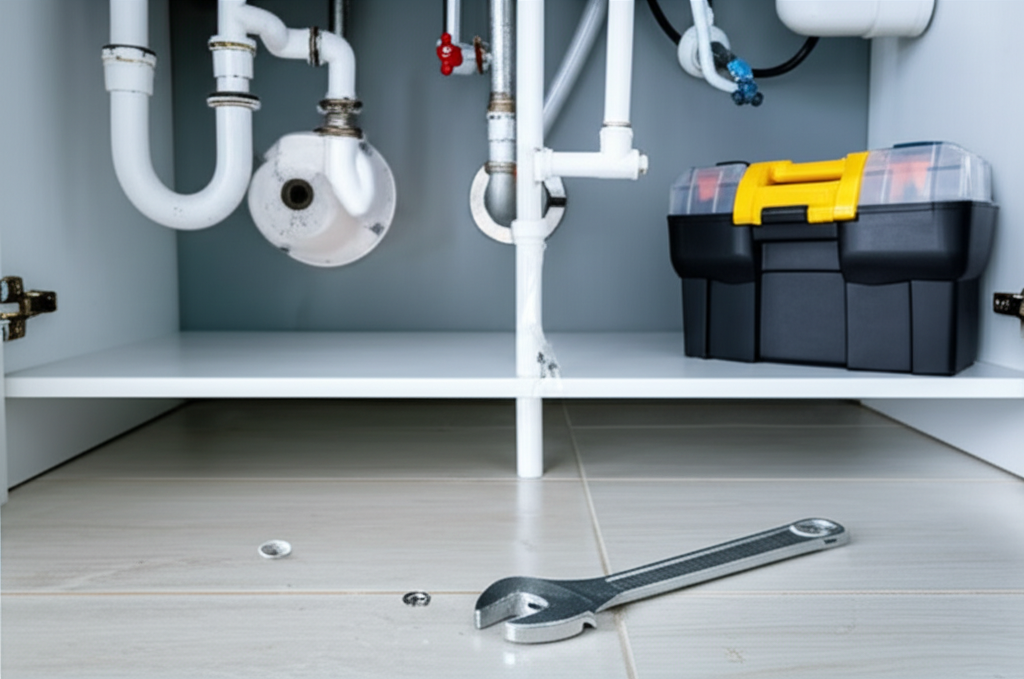
1. Inspect Under Sinks
Open the cabinets under your kitchen and bathroom sinks. Look for any:
- Drips from the faucet connections.
- Moisture around the drain pipes or P-trap.
- Water stains on the cabinet floor or shelves.
- Signs of corrosion on the pipes.
2. Check Around Toilets
Examine the base of each toilet. Look for:
- Water pooling on the floor near the tank or bowl.
- A constantly wet floor around the toilet base.
- Signs of water or discoloration on the wax ring seal below the toilet.
3. Examine Bathtubs and Showers
Pay close attention to:
- The caulk around the tub or shower base. Cracks or gaps can allow water to seep behind walls.
- Grout in tiled shower walls. Damaged grout can also be an entry point for water.
- The showerhead and faucet connections for visible drips.
4. Look at Appliance Connections
For appliances like washing machines and dishwashers:
- Check the water supply hoses connecting to the machine for kinks, cracks, or leaks.
- Inspect the drain hose for any signs of damage or improper fit.
Auditory & Olfactory Clues: Hiring Your Ears and Nose
Sometimes, leaks don’t show themselves visually right away. Your other senses can be your best ally!
5. Listen for Dripping Sounds
Turn off all water-using appliances and ensure no faucets are on. Then, listen carefully. Can you hear any faint dripping or running water sounds when there shouldn’t be any? This is often a clear indicator of a leak somewhere in the system.
6. Smell for Musty Odors
Musty or damp smells, especially in basements, crawl spaces, or near walls, are strong signals of persistent moisture from a hidden leak. Don’t ignore these smells – they often point to a problem that’s been going on for a while.
Water Meter Tests: The Ultimate Leak Detector
This is where you can become a plumbing detective with the help of your water meter. These tests are highly effective because they isolate your home’s water usage from any potential external leaks. You’ll need to know where your water meter is.
7. The Basic Meter Check (For All Leaks)
This is your go-to test to see if any leak is occurring within your home.
- Step 1: Locate your water meter. It’s usually in a box near the street.
- Step 2: Ensure all water inside and outside your house is turned off. This means no running toilets, no dripping faucets, no active appliances, and no garden hoses.
- Step 3: Carefully lift the meter lid and locate the small triangle or a thin dial, often called a leak indicator.
- Step 4: If this indicator is spinning or moving, water is flowing somewhere, indicating a leak. Record the meter reading, wait an hour (without using any water), and check it again. If the reading has changed, you have a leak.
8. Low-Flow/Slow Leak Meter Check
This test is specifically designed to catch very slow or small leaks that might not make the main leak indicator move significantly.
- Step 1: Again, ensure all water usage in your home is completely stopped.
- Step 2: Note the exact reading on your water meter, including the numbers and any dials.
- Step 3: Wait for at least two to four hours, or even overnight, without using any water.
- Step 4: Re-read your water meter. If the numbers have changed at all, it confirms that water is being used somewhere, meaning there’s a leak.
9. Identifying Fixture vs. Main Line Leaks with Meter
This multi-step process helps determine if the leak is within your house or further up the line.
- Step 1: Perform the Basic Meter Check (Test 7). If the leak indicator moves, proceed.
- Step 2: Locate and turn off the main water shut-off valve to your house. This valve is usually near where the water pipe enters your home.
- Step 3: Check the water meter again.
- Step 4: If the leak indicator stops moving after you shut off the main valve, the leak is somewhere inside your home.
- Step 5: If the leak indicator continues to move even after the main valve is off, the leak is between the meter and your home’s shut-off valve, or outside your property boundary.
Toilet Leak Tests: The Silent Water Wasters
Toilets are common culprits for hidden leaks because the water often goes directly into the drain line without being noticed visually. Check these 6 toilet areas:
10. The Food Coloring Test
This is a classic and easy way to check your toilet’s flapper valve.
- Step 1: Open the toilet tank lid.
- Step 2: Add a few drops of food coloring (or a dye tablet made for this purpose) into the tank.
- Step 3: Wait for about 15-20 minutes without flushing.
- Step 4: Check the toilet bowl. If colored water appears in the bowl, your flapper valve is leaking, allowing water to continuously seep from the tank.
11. The Flapper Seal Check
Beyond the dye test, a visual inspection of the flapper can reveal wear and tear.
- Step 1: With the tank lid off, examine the rubber flapper at the bottom of the tank.
- Step 2: Look for any signs of cracking, hardening, or wear on the rubber seal.
- Step 3: Gently press down on the flapper to see if it creates a tight seal. If it feels loose or doesn’t sit snugly, it’s likely leaking.
12. The Float Ball/Cup Adjustment Test
An improperly set float can cause the water level to be too high, leading to water continuously entering the overflow tube.
- Step 1: Observe the water level in the tank. It should be about an inch below the top of the overflow tube.
- Step 2: If the water level is at or above the overflow tube, adjust the float mechanism. (Consult your toilet’s manual or look up your specific model online).
- Step 3: After adjusting, check if the water level is now correct and if the leak has stopped.
13. The Overflow Tube Check
The overflow tube is designed to prevent tank water from going over the top, but if the fill valve seals improperly, water can still run down it.
- Step 1: Remove the tank lid and look down into the overflow tube.
- Step 2: If you can see water constantly running down into the tube, it indicates a problem with the fill valve not shutting off properly, or the water level being set too high.
14. The Flush Valve Seal Test
The flush valve seal (often a flapper or a larger tank-to-bowl seal) can degrade and leak.
- Step 1: Listen closely after flushing. Do you hear any faint hissing or trickling sounds from the tank after the water has refilled?
- Step 2: Sometimes, you can feel a slight vibration on the tank bottom when the toilet is not in use if there’s a seal leak.
15. The Toilet Base Pooling Check
This check targets leaks where the toilet meets the floor.
- Step 1: Feel around the base of the toilet with your hand or a dry paper towel.
- Step 2: If the floor feels damp, or the paper towel picks up moisture, it suggests water is seeping out from around the wax ring seal at the bottom of the toilet.
Faucet and Fixture Leak Tests
Leaky faucets and fixtures waste enormous amounts of water and can be annoying. Here are 7 tests for these common leak sources:
16. The Dripping Faucet Test
The most obvious leak!
- Step 1: Turn off all your faucets.
- Step 2: Listen for any dripping sounds.
- Step 3: Place a dry cloth or paper towel under each faucet spout.
- Step 4: Check the cloth/paper towel periodically for any signs of moisture. Even a slow drip is a leak.
17. The Aerator Soak Test
Sometimes, a mineral buildup in the aerator can distort the water flow, making it seem like a leak.
- Step 1: Unscrew the aerator from the end of your faucet (you might need pliers with a cloth to protect the finish).
- Step 2: Submerge the aerator in a bowl of white vinegar overnight to dissolve mineral buildup.
- Step S3: Rinse thoroughly, reassemble, and check if the faucet still appears to be leaking or has an odd spray pattern.
18. The Handle Wiggle Test
Loose or worn handles can sometimes cause leaks around the spindle.
- Step 1: Gently try to wiggle the faucet handle when the faucet is turned off.
- Step 2: If it feels loose or moves excessively, the internal components might need tightening or replacing, which could be causing a slow drip.
19. The Shower Valve Escutcheon Check
The decorative plate behind your shower handle can hide leaks.
- Step 1: Carefully remove the escutcheon plate (usually held by screws).
- Step 2: Inspect the area behind it for any signs of moisture, drips, or water stains on the pipes or wall.
20. The Bathtub Spout Check
Leaks can occur at the base of the spout where it meets the wall.
- Step 1: After turning off the shower, visually inspect the area where the spout meets the tile or wall.
- Step 2: Look for any water dripping or pooling there.
21. The Sink Drain Seal Test
Leaks can happen where the drain assembly meets the sink basin.
- Step 1: Fill the sink with a few inches of water.
- Step 2: Observe the underside of the sink around the drain pipe connection point.
- Step 3: Look for any drips or wetness. If you see any, the seal or pipe fitting may need tightening or replacing.
22. The P-Trap Inspection
The U-shaped pipe under your sink is designed to hold water and prevent sewer gases from entering, but its seals can leak.
- Step 1: Place a bucket or deep pan directly underneath the P-trap.
- Step 2: Hand-tighten the slip nuts on either side of the trap.
- Step 3: Check the bucket/pan and around the nuts for any evidence of wetness or drips.
Appliance Leak Detection
Appliances that use water are sophisticated systems and can develop leaks in various places. Here are 5 tests for them:
23. Washing Machine Hose Inspection
These hoses carry significant water pressure and can burst.
- Step 1: Visually inspect both the hot and cold water supply hoses running to your washing machine.
- Step 2: Look for any signs of bulging, cracking, fraying, or corrosion, especially at the connection points.
- Step 3: Feel for dampness around the fittings.
24. Dishwasher Hose and Seal Check
Dishwashers have supply lines, drain lines, and door seals that can leak.
- Step 1: Inspect the water supply hose running to the dishwasher (often under the sink) for visible damage.
- Step 2: Check the area around the dishwasher door. Are the seals intact? Is there any water leaking out when the machine is running or has recently finished?
- Step 3: After a cycle, check the floor around the dishwasher for any dampness or puddles.
25. Water Heater Base Inspection
Water heaters have drain valves and connections that can leak.
- Step 1: Examine the base of your water heater.
- Step 2: Look for any signs of rust, corrosion, or water pooling around the unit or its drain valve.
- Step 3: Check the inlet and outlet pipe connections to the tank.
26. Refrigerator Ice Maker/Water Dispenser Check
These systems have thin water lines that can be easily damaged.
- Step 1: Locate the water line running to your refrigerator.
- Step