

7 Genius Toilet Plumbing Tips to Keep Your Bathroom Running Smoothly
Is your toilet acting up again? A leaky toilet or a slow flush can be a real headache. But you don’t always need to call a plumber. Many common toilet problems are surprisingly easy fixes you can handle yourself. Imagine a bathroom that works perfectly every time. With a few simple tips, you can tackle these issues with confidence. Let’s dive into some smart ways to keep your toilet in great shape!
Quick Summary
This guide offers 7 practical tips for homeowners and DIY beginners to address common toilet plumbing issues. Learn how to fix leaks, improve flushing, and perform basic maintenance to save money and prevent bigger problems. Key takeaways include understanding your tank’s components, dealing with silent leaks, adjusting the float, and troubleshooting flush issues.
Why Understanding Your Toilet Matters
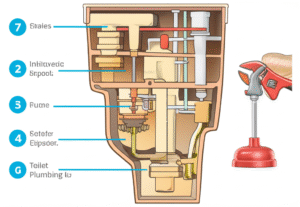
Your toilet is a vital part of your home’s plumbing. Knowing a few basic things about how it works can save you time, money, and a lot of frustration. Most toilets have two main parts: the tank and the bowl. The tank holds the water for flushing, and the bowl carries the waste away. When you flush, a mechanism in the tank releases water into the bowl, creating a siphon effect that clears the bowl. Simple, right?
But sometimes, things get a little sticky. A running toilet can waste hundreds of gallons of water a day. A weak flush might mean you have to flush multiple times. These aren’t usually signs of a major disaster, but they’re definitely annoying – and they can get worse if ignored.
The good news is that many of these common issues are fixable with a little know-how. You’ve got this!
Common Toilet Problems & Their Simple Solutions
Let’s break down some of the most frequent toilet troubles and how to fix them. It’s all about understanding what’s happening inside that tank!
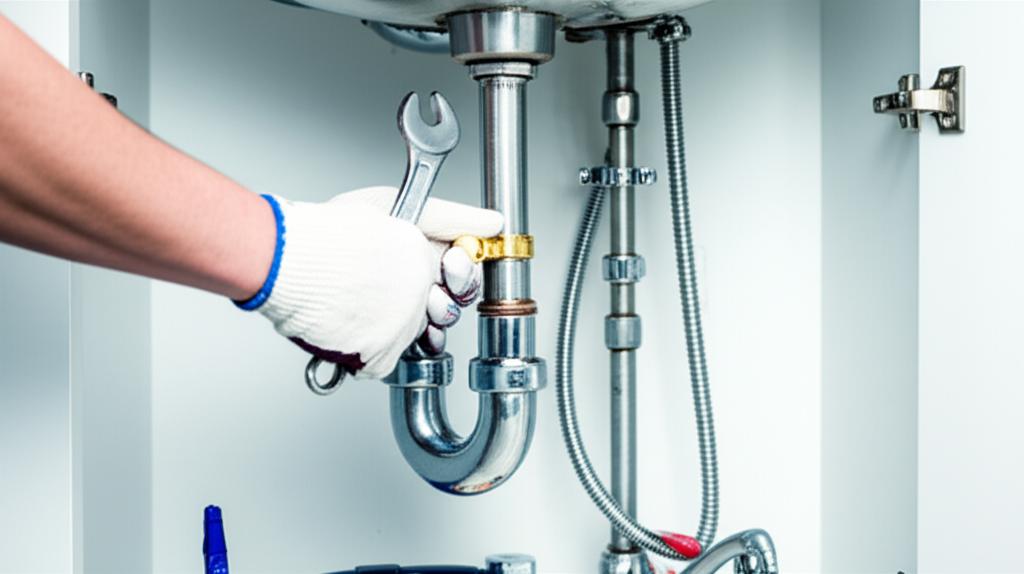
Tip 1: Tackle Those Silent Leaks
A toilet that runs constantly after you flush is obvious. But what about a toilet that seems fine, yet you keep hearing it fill slightly? That’s a silent leak, and it’s a big water waster!
How to Check for Silent Leaks:
- Open the toilet tank lid.
- Add a few drops of food coloring or a dye tablet into the tank water.
- Wait for about 15-20 minutes without flushing.
- Check the toilet bowl. If colored water appears in the bowl, you have a leak.
The Usual Suspect: The Flapper
The most common cause of a silent leak is a worn-out flapper. The flapper is the rubber or plastic seal at the bottom of the tank that lifts to allow water into the bowl. Over time, it can become brittle, warped, or just lose its seal.
How to Replace a Flapper:
- Turn off the water supply. Look for the valve on the wall behind the toilet. Turn it clockwise until it stops.
- Flush the toilet. This will empty most of the water from the tank.
- Unclip the old flapper. It’s usually attached to the flush valve by two clips or ears. Gently pull them off. You might also need to detach it from the flush lever chain.
- Attach the new flapper. Connect the new flapper to the flush valve the same way the old one was attached. Make sure it seals the opening completely.
- Connect the chain. Attach the chain to the flush lever. You might need to adjust the length so it’s taut but not so tight that it lifts the flapper when the lever is at rest. A good rule of thumb is to have about a half-inch of slack. The EPA’s WaterSense program offers great tips on saving water, and fixing leaks is a big part of that!
- Turn the water back on. Turn the supply valve counter-clockwise.
- Test it. Let the tank fill completely. If you don’t hear running water and the bowl water stays clear after 20 minutes, you’ve fixed the leak!
Replacing a flapper is a simple, inexpensive fix that makes a big difference. You can find replacement flappers at any hardware store or home improvement center.
Tip 2: Adjust the Float for a Better Flush
Does your toilet flush weakly, or does the tank take forever to refill? The float in your toilet tank is likely the culprit.
The float is a buoyant device that rises with the water level. When it reaches a certain height, it shuts off the water supply. If the float isn’t set correctly, your tank won’t fill with enough water for a strong flush, or it might keep running.
Types of Floats:
| Float Type | How to Adjust | When to Adjust |
|---|---|---|
| Ball Float | Look for an adjustment screw or a bendable arm that connects the ball to the fill valve. Gently turn the screw clockwise to raise the water level, or carefully bend the arm downwards if using an arm style. | Weak flush, running toilet, tank not filling enough. |
| Cup Float | These usually have a clip or screw on the side of the fill valve. Look for a dial or a screw. Turning the dial clockwise or tightening the screw will raise the float and the water level. | Weak flush, running toilet, tank not filling enough, or toilet constantly running. |
How to Adjust:
- Turn off the water supply to the toilet.
- Flush the toilet to empty the tank.
- Locate the float.
- Make a small adjustment. For most ball floats with a screw, a quarter turn can make a difference. For cup floats, adjust the dial or screw incrementally.
- Turn the water back on and let the tank fill.
- Check the water level. After the tank fills, the water should stop just below the overflow tube. If the water level is too high (above the overflow tube), the water will continuously drain into the bowl, causing a running toilet. If it’s too low, you’ll get a weak flush.
- Repeat adjustments as needed, making small changes each time.
Getting the float adjustment right means optimal flushing and no wasted water. It’s a balancing act!
Tip 3: Stop the Running Toilet – The Flapper Chain
Sometimes, the issue isn’t the flapper itself, but its chain. If the chain connecting the flapper to the flush lever is too long, it can prevent the flapper from sealing properly. If it’s too short, it might accidentally lift the flapper, causing a constant trickle.
How to Adjust the Flapper Chain:
- Turn off the water supply and flush the toilet.
- Inspect the chain. Ensure there’s about a half-inch of slack in the chain when the flush lever is at rest.
- If the chain is too long, find the small clip on the chain and move it to a closer hole on the flush lever arm.
- If the chain is too short, you might need to find a different clip position or, if there are no other options, you may need a longer chain or a flapper with an adjustable chain.
- Turn the water back on and test the flush.
A properly tensioned chain is key to a responsive and efficient flush!
Tip 4: Unclogging a Toilet Without a Plunger (or When the Plunger Fails)
Ah, the dreaded clog. Before you panic or reach for the plunger and a bucket of water, consider these methods:
The Dish Soap Method:
- Pour a generous amount of liquid dish soap (about 1/4 cup) into the toilet bowl. Let it sit for 10-15 minutes. The soap helps lubricate the clog.
- Gently pour a bucket of hot (but not boiling) water into the bowl from about waist height. The heat and force can help break up the clog.
- Let it sit for another 10-15 minutes. If the water level drops, the clog is likely clearing.
The Baking Soda and Vinegar Method:
- First, remove as much water from the bowl as possible using a cup or small container. This allows the reaction to work better at the clog itself.
- Pour about one cup of baking soda into the toilet bowl.
- Slowly pour about two cups of white vinegar over the baking soda. It will fizz and bubble – this is the reaction helping to break down the clog.
- Let it sit for at least 30 minutes, or preferably an hour, or even overnight for stubborn clogs.
- Follow up with a bucket of hot water, as described in the dish soap method.
Using a Toilet Auger (Closet Auger):
If the above methods don’t work, a toilet auger (also called a closet auger) is a more powerful tool. It’s a specialized tool designed for toilets that won’t scratch your porcelain bowl like a regular snake might. You can rent or buy one at most hardware stores. This tool works by sending a flexible cable into the drain to break up or retrieve blockages. The FTC also warns about the dangers of chemical drain cleaners, so mechanical methods are often safer.
Using the right tool can make all the difference. Don’t be afraid to try these methods!
Tip 5: How to Handle a Clogged Drain Line
If your toilet clogs and the water level in the bowl rises but doesn’t go down at all, you might have a blockage further down the drain line, not just in the toilet itself. This can affect other fixtures too.
Signs of a Clogged Drain Line:
- Toilet water rises when other fixtures (like a sink or shower) are used.
- Multiple drains in your home are slow or clogged.
- Water backs up into tubs or sinks when flushing the toilet.
What to Do:
- Stop Using Water: If you suspect a main line clog, stop using all water-using appliances and fixtures immediately. This includes running the dishwasher, doing laundry, and even taking showers.
- Check the Cleanout: Most homes have a “cleanout” access point for the main sewer line, usually outside the house or in the basement/crawl space. This is a capped pipe. Carefully unscrew the cap. If water or sewage flows out when you remove it, the clog is likely further down the main line. Be very cautious and prepare for potential backup. Wear gloves and eye protection.
- Use a Drain Snake (or Auger) for Main Lines: For deeper clogs, you might need a larger drain snake designed for main lines. These are usually longer and more robust than toilet augers. You feed the snake into the cleanout pipe until you meet resistance, then crank the handle to break up the clog.
- Call a Professional: If you’re uncomfortable with this step, or if the clog persists, it’s time to call a licensed plumber. They have specialized cameras to inspect the line and powerful equipment to clear serious blockages.
Understanding the difference between a local toilet clog and a main drain line issue is crucial for the right approach. For main line issues, professional help is often the safest and most effective route.
Tip 6: Lowering the Water Level in the Tank
Sometimes, the problem isn’t that the tank isn’t filling, but that it’s filling too much. If the water level in the tank is consistently above the overflow tube, water will constantly run into the bowl, wasting water and sometimes causing the toilet to run.
How to Lower the Water Level:
- Turn off the water supply.
- Flush the toilet to empty the tank.
- Adjust the float. As mentioned in Tip 2, you can adjust the float to stop the water at a lower level. For ball floats, slightly adjust the arm downwards or turn the screw counter-clockwise. For cup floats, use the adjustment dial or screw to lower the float.
- Turn the water back on and let the tank fill. The water level should stop just below the top of the overflow tube.
- Test it. Make sure there’s still enough water for a good flush. You might need to make a couple of small adjustments to get it just right.
This is a simple fix that can significantly reduce your water bill.
Tip 7: Easy Toilet Tank Maintenance
A little regular ‘check-up’ can prevent small issues from becoming big ones. Think of it like changing the oil in your car!
What to Check Regularly:
- Flush Handle: Ensure it’s not loose or wobbly. A loose handle can affect the chain connection and flushing power. Tighten any visible screws connecting it to the tank.
- Water Supply Line: Check the flexible hose connecting the wall valve to the toilet tank fill valve. Look for any cracks, bulges, or leaks. If you see any signs of wear, it’s best to replace it proactively. These hoses can burst and cause significant water damage.
- Base of the Toilet: Look for any signs of water on the floor around the base. This could indicate a failing wax ring seal, which is a more involved repair but needs attention if it occurs.
- Inside the Tank: Periodically, maybe once a year, lift the lid and inspect the components. Are the seals looking good? Is the chain functioning smoothly? Is there any buildup of sediment or corrosion?
Cleaning the Tank:
Occasionally, mineral deposits can build up inside the tank, affecting the flush. You can clean the tank by turning off the water, flushing to empty it, and then scrubbing the tank walls and components with a mild cleaner or vinegar. Avoid using harsh chemicals or abrasive cleaners that could damage the rubber parts.
Regular, simple maintenance can keep your toilet functioning flawlessly for years. It’s about being proactive!
When to Call a Professional
While these tips can help with many common toilet problems, there are times when it’s best to call in the experts. If you’ve tried the simple fixes and the problem persists, or if you encounter any of the following, it’s time to contact a licensed plumber:
- Persistent clogs that you can’t clear with basic methods.
- Water backing up into tubs or sinks when you flush the toilet, indicating a main sewer line issue.
- Leaks at the base of the toilet, which could mean a failing wax ring seal.
- Cracks in the porcelain of the toilet bowl or tank.
- If you encounter any situation that makes you feel uncomfortable or unsafe.
Plumbers have the tools and expertise to diagnose and fix more complex issues, ensuring the job is done right and safely.
Frequently Asked Questions (FAQ)
Q1: How much water does a running toilet waste?
A1: A constantly running toilet can waste anywhere from $50 to $100 per month on your water bill, or even more depending on your local water rates. Some estimates suggest a small leak can waste up to 50 gallons a day, while a steady run can waste hundreds.