

4 Essential Plumbing Plan Reads: Proven Tips for Homeowners & DIYers
As a seasoned plumber, I know how daunting plumbing plans can seem. But understanding them is easier than you think! It’s like learning a new language, but this one can save you time, money, and a lot of frustration. When a pipe leaks or a faucet drips, having a basic grasp of plumbing diagrams helps you pinpoint the problem faster. It’s not just for the pros; it’s a superpower for your home! So, let’s demystify these drawings together, step-by-step, and build your confidence in tackling common plumbing issues. Ready to become your own home’s plumbing hero?
Why Reading Plumbing Plans Boosts Your DIY Skills
Plumbing plans might look like a complex maze of lines and symbols at first. But really, they’re just a visual guide. Think of them as a map for your home’s water and waste systems. Knowing how to read them can be incredibly useful for any homeowner.
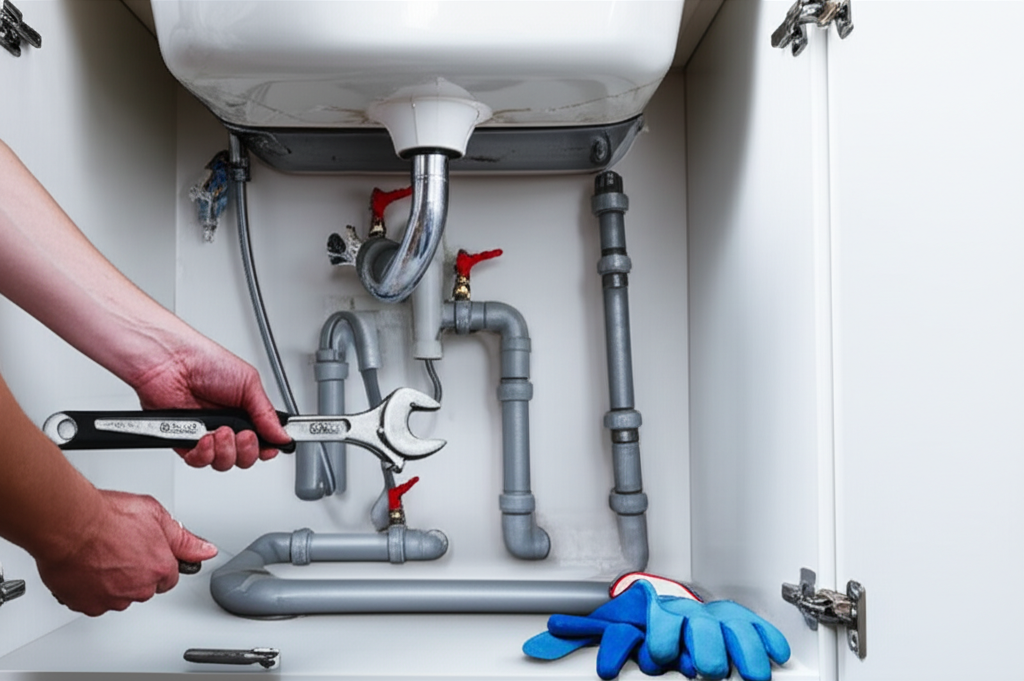
For instance, if you’re planning a renovation, understanding the existing plumbing layout helps you avoid costly mistakes. Or, when a leak appears, the plan can show you exactly where the pipes run, making repairs much simpler. It’s about being prepared and feeling in control of your home’s systems.
Even if you hire a plumber, having some basic knowledge lets you have more informed conversations and understand what’s happening. Most importantly, it empowers you to try simple fixes yourself, saving money and boosting your confidence. We’ll focus on four key elements that make plumbing plans much easier to understand.
Quick Summary: Your Plumbing Plan Cheat Sheet
- Symbols are Your Friends: Learn the common symbols for pipes, fixtures, and valves.
- Line Types Tell a Story: Understand what different lines mean (hot, cold, waste, vent).
- Scale Helps with Size: Know how to interpret the plan’s scale for accurate measurements.
- Legends Explain Everything: Always check the legend for definitions and keys.
This quick summary is your go-to reminder as you dive into reading your plumbing plans. Keep it handy!
Understanding Plumbing Symbols: The Alphabet of Your Plans
Every good map needs a legend, and so do plumbing plans. The first thing you’ll notice are symbols. These are like the letters of the plumbing alphabet, representing different parts of your system. Learning a few common ones can make a huge difference.
Imagine trying to read a book without knowing what letters mean – that’s what a plumbing plan is like without recognizing symbols. But don’t worry, most are quite straightforward once you see them explained.
The most basic symbols you’ll see represent fixtures. For example:
- A small circle with lines might show a faucet.
- A stylized shape often represents a toilet or sink.
- A square can mean a bathtub or shower.
Beyond fixtures, you’ll see symbols for pipes. Solid lines usually mean pipes. But what kind of pipes? That’s where line types come in next. For now, just know that each symbol is a shortcut to identifying a plumbing component.
You can find comprehensive lists of plumbing symbols from reliable sources. For example, the U.S. Department of Housing and Urban Development (HUD) provides building plan guidelines that often include common plumbing symbols with their explanations. Getting familiar with these is a great first step!
Decoding Line Types: Hot, Cold, and Everything in Between
Plumbing plans use different types of lines to show you the different types of pipes. This is super important because hot water pipes and cold water pipes need different handling, and waste pipes have their own rules.
Think of lines as different colored threads in a fabric. Each color has a purpose. On plumbing plans, these line types tell you what’s flowing through the pipe and how it’s supposed to flow.
Here’s a breakdown of the most common line types you’ll encounter:
Solid Straight Lines: These usually represent cold water supply lines. Simple and direct, just like cold water!
Solid Lines with Dashes or Dots (often parallel): These typically indicate hot water supply lines. They might look a bit busier, reflecting the heated water flowing through them.
Dashed Lines: These are very common and usually represent waste or drain lines. They show where used water goes to be removed from your home.
Dotted Lines: These can sometimes indicate vent pipes. Vent pipes are crucial for allowing air into the drainage system, which helps waste flow smoothly. Without them, you might hear gurgling sounds and experience slow drains.
Wavy Lines: These can sometimes represent flexible tubing or specialized pipe types, but their meaning is always clarified in the plan’s legend.
Understanding these line types is like learning to read different fonts. It gives you more detail and helps you understand the system’s functionality.
Common Line Type Uses
| Line Type | Common Meaning | What it Tells You |
|---|---|---|
| Solid Straight | Cold Water Supply | Delivers cold water to fixtures. |
| Solid with Dashes/Dots | Hot Water Supply | Delivers hot water to fixtures. |
| Dashed | Waste/Drain Line | Carries used water and waste away. |
| Dotted | Vent Pipe | Allows air into the drainage system for proper flow. |
When you’re looking at a plan, always try to find the legend. It will confirm exactly what each line type means for that specific set of drawings. It’s your ultimate guide!
Reading the Scale: It’s All About Size and Space
Plumbing plans are drawings, and drawings have to be smaller than the actual thing. That’s where the scale comes in. The scale tells you how much smaller the drawing is compared to the real-life plumbing.
Imagine you have a big room, but you’re drawing it on a small piece of paper. You need a way to say, “This one inch on my paper is equal to one foot in the actual room.” That’s the job of the scale.
For plumbing plans, understanding the scale is key if you’re planning to do any kind of work that involves measurements, like installing a new sink or figuring out how much pipe you’ll need. You don’t want to buy too much or too little, right?
Scales are usually shown in a few ways:
- Graphic Scale: This is a drawing of a ruler with a bar. You can use a piece of paper to measure a length on the bar and then transfer that measurement to the plan.
- Verbal Scale: This is a written statement, like “1 inch = 1 foot” or “1:100”.
- Ratio Scale: This is often shown as a ratio, like 1/4″ = 1′-0″ (meaning a quarter of an inch on the drawing represents one foot in reality).
Knowing the scale allows you to measure distances accurately on the plan and translate them to real-world measurements. This is super helpful for planning any DIY project, no matter how small.
Understanding Common Architectural Scales
Architectural plans often use specific scales to make them manageable. Here are a few you might see and what they mean:
| Common Scale | Meaning on the Plan | Usefulness for DIY Plumbing |
|---|---|---|
| 1/4″ = 1′-0″ | 1/4 inch on the drawing equals 1 foot in reality. | Very common for floor plans. Good for measuring room dimensions and fixture placement. |
| 1/8″ = 1′-0″ | 1/8 inch on the drawing equals 1 foot in reality. | Used for larger areas like site plans or entire building layouts. Less detail for individual pipes. |
| 1″ = 1′-0″ | 1 inch on the drawing equals 1 foot in reality. | Less common for full plans but might be used for detailed drawings of specific components or smaller areas. |
If you’re ever unsure about the scale, look for a scale bar or a written statement on the drawing itself, usually in a corner or the title block. You might need a ruler marked in inches and fractions of an inch to use this information effectively.
The Legend: Your Ultimate Plumbing Plan Decoder
If symbols are the alphabet and line types are the grammar, then the legend is the complete dictionary and rulebook for your plumbing plan. I can’t stress enough how important the legend is!
Every drawing set should have a legend or a key. This section explains exactly what every single symbol, line type, notation, and abbreviation means within that specific set of plans. It’s your master decoder ring!
Why is this so crucial? Because symbols and line types can sometimes vary slightly from one designer or project to another. The legend ensures you’re interpreting the drawings correctly for your particular home or project.
What you’ll typically find in a legend:
- Standard Symbols: Detailed drawings of symbols for fixtures (toilets, sinks, showers), valves (gate valves, ball valves), pipe types (copper, PEX, PVC), and any special components used.
- Line Type Key: A clear explanation of what each different line style represents (e.g., solid line = cold water, dashed line = waste).
- Abbreviation Glossary: Plumbing plans often use abbreviations (like “HW” for hot water, “CW” for cold water, “DW” for drain waste). The legend will spell these out.
- Annotation Explanation: Any notes or labels on the drawing will be cross-referenced here.
For example, a dash-dot line might mean hot water on one plan, but on another plan, it could mean something else entirely if not clearly defined in the legend. Always, always refer to the legend provided with the plans you are using.
Where to Find the Legend
The legend is usually found on the first few pages of the plan set, often on the title sheet or the first architectural drawing page. Sometimes, if the plan set is very large, there might be a dedicated legend sheet.
Pro Tip: Don’t just glance at the legend. Take a few minutes to read through it. It will save you from making assumptions and potential mistakes down the line. Think of it as an investment in clarity!
Putting It All Together: A Practical Example
Let’s imagine you’re looking at a plan for your bathroom. You see symbols for a toilet, a sink, and a shower. You notice dashed lines running from each of these fixtures. Consulting the legend, you confirm that dashed lines represent waste pipes.
Following these dashed lines, you see they all converge and lead to a larger dashed line, which is likely the main drain line for your house. You also see solid lines leading to the sink and shower, and perhaps to the toilet tank. The legend tells you these are cold water supply lines, and maybe some parallel solid lines with dashes are hot water lines.
Example Scenario: Replacing a Leaky Faucet
Suppose you need to replace a leaky faucet on your bathroom sink after reading the plans.
- Locate the Fixture: Find the sink symbol on the plan.
- Identify Supply Lines: See the solid lines (cold) and dotted/dashed parallel lines (hot) leading to the faucet. Note their general path.
- Trace Supply Lines: Follow these lines back from the sink. The plan might show them connecting to vertical pipes inside the wall, which are connected to the main supply lines. This tells you where the shut-off valves are likely located (or where they should be!).
- Check for Valves: A small circle with a diagonal line through it might represent a shut-off valve. The plan might indicate specific valves for the sink.
- Understand the Layout: You can see how the hot and cold water lines are routed, which helps you visualize the work involved before you even turn off the main water or touch a pipe.
This simple exercise shows how understanding just a few elements—symbols, line types, and tracing their paths—gives you a mental picture of the plumbing system. This foresight is what makes DIY plumbing much more manageable and less intimidating.
For more detailed information on plumbing system layouts and best practices, the New Zealand Building Code Handbook (while specific to NZ, it covers universal piping principles found in many building codes) offers valuable insights into how plumbing systems are designed and installed according to safety standards.
4. Key Takeaways for Confident Plumbing Plan Reading
Reading plumbing plans doesn’t have to be a mystery. By focusing on a few key areas, you can build the confidence to understand the basics and even tackle minor repairs yourself. Here are four core tips to keep in mind:
- Master the Symbols: Invest time in learning the most common symbols for fixtures, pipes, and valves. They are the building blocks of understanding.
- Differentiate Line Types: Always distinguish between lines representing hot water, cold water, waste, and vents. This tells you the purpose and flow direction.
- Respect the Scale: Understand how the plan’s scale translates to real-world measurements. This is critical for any project involving physical dimensions.
- Never Ignore the Legend: Treat the legend as your absolute guide. It clarifies all symbols, lines, and abbreviations specific to the drawing set you are using.
When you combine these four essential elements, you gain a much clearer picture of your home’s plumbing. It’s like unlocking a secret code that helps you maintain your home more effectively.
Frequently Asked Questions (FAQs)
Q1: What is the most important part of a plumbing plan for a beginner?
A1: For a beginner, the most important part is the legend. It acts as your key to understanding what all the symbols and lines mean on that specific plan. Always check the legend first!
Q2: How can I find the plumbing plans for my house?
A2: You might have received them when you bought your home. Check with your real estate agent or previous owner. If not, your local building department or municipality might have records, especially if renovations were permitted. Sometimes, if you live in an older home, original plans might not exist.
Q3: Do I need a special ruler to read the scale on plumbing plans?
A3: You’ll need a ruler that shows inches and common fractions of an inch (like 1/2″, 1/4″, 1/8″, 1/16″). Many standard rulers have this. If the plan has a graphic scale bar, you can use a plain piece of paper to transfer measurements from the bar to the plan.
Q4: What does a small circle on a pipe line usually mean?
A4: A small circle on a pipe line on a plumbing plan often represents a point for access, like a cleanout for drains, or sometimes a valve. The legend is always the best place to confirm its exact meaning in your specific plan.
Q5: Can I use plumbing plans to find out what type of pipes I have (e.g., copper vs. PVC)?
A5: Yes, often. Plans may use different symbols or line styles for different pipe materials, and the legend will explain this. However, the best way to be sure is to visually inspect the pipes themselves, if accessible, as plans aren