

“14” Toilet Plumbing: Effortless Install for Homeowners & DIY Beginners
Dealing with toilet troubles? You’re not alone! Many homeowners face common plumbing headaches that can seem overwhelming. But what if I told you installing or fixing a standard “14-inch rough-in” toilet doesn’t have to be a messy, complicated job? It’s true! With the right guidance and a little confidence, you can tackle this common task yourself. This guide is designed just for you – the beginner DIYer or homeowner ready to take on basic plumbing. We’ll break down everything you need, step-by-step, with clear, simple instructions. Get ready to feel empowered and save yourself a plumbing call-out fee. Let’s get your toilet back in perfect working order, the easy way!
Quick Summary: Your “14” Toilet Install Cheat Sheet
Installing a “14-inch rough-in” toilet might sound technical,but it’s surprisingly straightforward for DIY beginners. This guide will give you the confidence to tackle it. We’ll cover identifying your rough-in size, gathering essential tools, and walking you through each installation stage, from preparing the old toilet (if applicable) to setting the new one. You’ll learn about flange installation, wax rings, tank-to-bowl connection, and final tightening. Follow these simple steps, and you’ll have a properly functioning toilet in no time.
Why a “14” Toilet Rough-In? Understanding the Basics
Before we dive into the “how-to,” let’s understand what a “14” toilet plumbing” actually means. When people talk about a “14-inch” toilet, they are almost always referring to the “rough-in” measurement. This is the distance from the finished wall (behind the toilet) to the center of the drain pipe or the flange bolts.
Why is this measurement so important? Because toilets are manufactured with specific rough-ins to fit standard plumbing configurations. The most common rough-in sizes are 10 inches, 12 inches, and 14 inches. Knowing your rough-in size is crucial for selecting the right toilet model. Installing a toilet with the wrong rough-in size will lead to a gap between the tank and the wall, or worse, the tank might not even fit correctly!
While 12-inch rough-ins are the most common in new construction, 14-inch rough-ins do exist, particularly in older homes or specific designs. This article focuses on the 14-inch rough-in, making installation feel effortless.
Identifying Your Rough-In Size
If you’re replacing an old toilet or just want to be sure, measuring is simple:
- Start with a measuring tape.
- Measure from the finished wall (not the baseboard or trim) to the center of the drain hole or the center of the flange bolts (the metal or plastic ring on the floor).
- Confirm the measurement. If it’s close to 14 inches, you likely have a 14-inch rough-in.
Always double-check! If you’re unsure, consult a professional or a detailed plumbing guide.
Tools and Materials: Your “14” Toilet Installation Kit
Gathering your tools and materials beforehand makes the process so much smoother. Don’t worry; most of these are common household or easily rentable items.
Essential Tools:
- Adjustable wrench or pipe wrench
- Bucket
- Caulking gun
- Gloves (rubber or disposable)
- Putty knife or scraper
- Plumber’s putty or silicone sealant (check toilet instructions)
- Rags or old towels
- Screwdriver set (Phillips and flathead)
- Toilet auger (closet auger) – very handy if you encounter a clog
- Toilet flange wrench (optional, but helpful for stubborn flanges)
- Toilet mounting bolts (often come with new toilets, but have extras)
- Toilet paper or wax ring
- Measuring tape
Materials You’ll Need:
- New toilet (ensure it’s specified for a 14-inch rough-in)
- Toilet wax ring with a flange horn (helps seal the drain)
- Toilet supply line (flexible, braided stainless steel is recommended)
- Toilet mounting bolt caps (usually included with the bolts)
Having everything ready ensures you can work without interruptions. It’s like packing a picnic – the more prepared you are, the more enjoyable the outing!
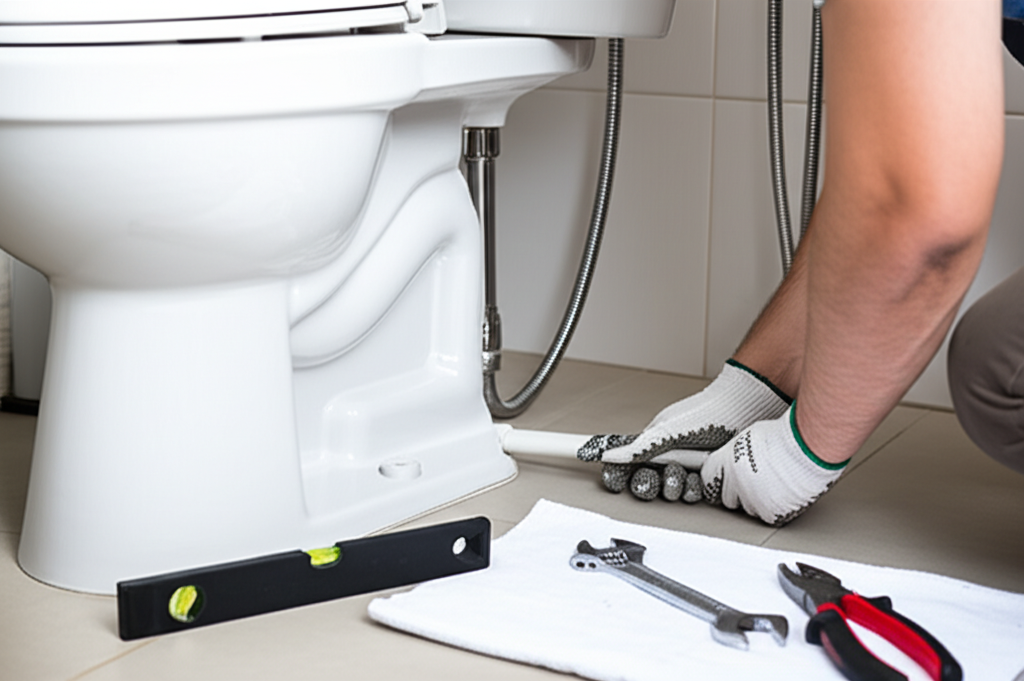
Step-by-Step: Effortless “14” Toilet Installation
Ready to tackle this? We’ll break it down into manageable steps. Remember, patience is key. Take your time, and don’t hesitate to re-read a step if you feel unsure.
Step 1: Shut Off Water and Drain the Old Toilet (If Replacing)
First things first, stop the water supply. Look for the shut-off valve on the wall behind or beside the toilet. Turn it clockwise until it stops. Now, flush the toilet. Hold the flush lever down to drain as much water as possible from the tank. Use a sponge or rags to soak up any remaining water in the tank and the bowl. Dump that water into a bucket.
Step 2: Disconnect the Supply Line
The flexible hose connecting the shut-off valve to the toilet tank needs to be disconnected. Place a bucket or some rags underneath the connection point to catch any residual water. Use your adjustable wrench to loosen the nut connecting the supply line to the tank. Once it’s loose, carefully remove the line.
Step 3: Remove the Old Toilet
Locate the nuts on the bolts at the base of the toilet. These secure the toilet to the floor. You might need to pry off the decorative caps covering them. Use your adjustable wrench to loosen and remove these nuts. Be prepared – they can sometimes be a bit corroded or stiff.
Once the nuts are off, gently rock the toilet back and forth. This helps break the wax seal underneath. Lift the toilet straight up and place it on old towels or cardboard to prevent scratching your floor and to contain any residual water. If it feels stuck, check if you missed any nuts or if the surrounding caulk needs to be cut.
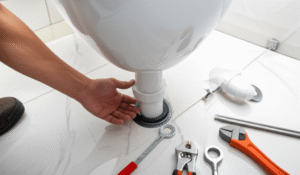
Step 4: Clean the Flange and Floor
Now, you’ll see the toilet flange – that’s the ring on the floor connecting to your drainpipe. Use your putty knife or scraper to remove the old wax ring and any debris from the flange and the floor around it. A clean surface is essential for a good seal. Make sure the flange itself is in good condition. If it’s cracked or broken, you’ll need to replace it, which can be a more involved repair (but still doable!). You can check the Toiletology guide on toilet flanges for more detail on their importance.
Step 5: Install New Mounting Bolts
If your new toilet didn’t come with them, or if the old ones are rusty, install new toilet mounting bolts. Slide them into the slots on the flange. Position them so they are parallel to the wall behind the toilet and about 10 and 2 o’clock from the center of the drain. The arms should stick straight out.
Step 6: Place the New Wax Ring
Take your new wax ring. Many come with a plastic flange horn. If yours does, insert the horn into the drainpipe first, ensuring it sits snugly. Then, place the wax ring onto the flange, centering it around the bolts. Press down gently to help it adhere.
Pro Tip: If your floor isn’t perfectly level, or if your flange sits slightly above the floor, you might need a wax ring with an extended horn or consider using flange spacers. These can be found at most hardware stores.
Step 7: Set the New Toilet Bowl
Carefully lift your new toilet bowl. Align the holes in the base with the mounting bolts on the flange. Gently lower the toilet straight down over the bolts, ensuring the wax ring makes contact. Once it’s seated, press down on the bowl to create a good seal. Wiggle it slightly.
Important Note: Do NOT lift or reposition the toilet after it has made contact with the wax ring! If you need to reposition it, you MUST remove the old wax ring and install a new one. This prevents leaks.
Step 8: Secure the Toilet Bowl
Slide the washers and nuts onto the mounting bolts. Hand-tighten them first. Then, using your adjustable wrench, tighten them a little more. Alternate between the two bolts, tightening each a bit at a time. You want the toilet to be snug and stable, but don’t overtighten, as this can crack the porcelain base.
A good test is to try and rock the toilet. It shouldn’t move. If it wiggles, tighten the bolts very slightly until it’s firm.
Step 9: Install the Tank
Most modern toilets have the tank and bowl sold separately and assembled on-site. Place the rubber gasket onto the tank’s outlet, then carefully position the tank onto the back of the bowl, aligning the bolt holes. Insert the tank bolts (usually with rubber washers) through the tank and bowl. Hand-tighten the nuts underneath, then use your wrench to snug them up. Again, don’t overtighten.
Step 10: Connect the Water Supply
Attach the new flexible supply line to the fill valve on the underside of the tank and to the shut-off valve on the wall. Hand-tighten both ends, then use your wrench to give them a quarter-turn more. Don’t overtighten, as this can damage the plastic fittings on the fill valve.
Step 11: Turn on Water and Check for Leaks
Slowly turn the water supply valve back on (counter-clockwise). Let the tank fill. Once the tank is full, check all connection points: where the supply line meets the tank, where it meets the wall valve, and around the base of the toilet where it meets the wax ring. Look and feel for any drips.
Step 12: Flush and Inspect
Flush the toilet. Watch the water level in the tank and bowl. Check again for leaks around the base and connections. If everything looks good, you’ve successfully installed your “14” toilet! Now place the decorative bolt caps over the mounting bolts.
Step 13: Final Seal (Optional but Recommended)
Some people prefer to seal the base of the toilet to the floor with caulk. This provides a clean finished look and helps prevent water from seeping under the toilet. Apply a bead of bathroom caulk around the base, then smooth it with a wet finger or caulk tool.
Troubleshooting Common “14” Toilet Installation Hiccups
Even with the best instructions, small issues can pop up. Here’s how to handle them:
- Toilet Wiggles: The mounting bolts might not be tight enough, or the floor might be uneven. Try tightening the bolts slightly more, alternating between them. If it’s still wobbly, you might need shims under the base before caulking.
- Water Leaking from Base: This is almost always a faulty wax ring seal. Turn off the water, drain the toilet, and lift it off. Remove the old wax ring and install a new one. Ensure the toilet is seated squarely.
- Water Leaking at Supply Line: Check the tightness of the connections. If they are tight and still leaking, the rubber washer inside the fitting might be damaged or missing. You may need a new supply line or fitting.
- Toilet Doesn’t Flush Properly: Check that the fill valve in the tank is filling correctly and that the chain from the flush lever to the flapper is taut but not too tight. Ensure the tank is filling to the proper water level line inside.
Remember, most issues are minor and solvable with a little patience. If you’re ever unsure or dealing with a persistent problem, don’t hesitate to call a professional. Resources like the EPA WaterSense program offer great information on water-efficient fixtures, which can be a good next step if you’re upgrading.
Pros and Cons of DIY Toilet Installation
Hats off to you for considering a DIY approach! It’s a rewarding experience, but like anything, it has its upsides and potential downsides.
Pros:
- Cost Savings: You avoid paying for a plumber’s labor, which can be significant.
- Sense of Accomplishment: Mastering a new home repair skill is incredibly satisfying.
- Convenience: You can do it on your own schedule without waiting for an appointment.
- Learning: You gain valuable knowledge about your home’s plumbing system.
Cons:
- Potential for Errors: Mistakes can lead to leaks or improper function, potentially costing more to fix.
- Time Commitment: It can take longer than expected, especially for a first-timer.
- Heavy Lifting: Toilets are heavy and awkward to maneuver.
- Dealing with the Unexpected: Old plumbing can sometimes present surprises, like corroded pipes or damaged flanges.
For a “14” toilet installation, the pros often outweigh the cons for beginners with this guide. It’s considered one of the more accessible plumbing DIY projects.
Frequently Asked Questions
Q1: How do I know if I have enough clearance for a 14-inch rough-in toilet?
A1: A 14-inch rough-in measures from the finished wall to the center of your drainpipe or flange bolts. Ensure you have at least 14 inches of clear space for the toilet to fit properly. If you have less than 12 inches, you likely need a 10-inch rough-in toilet, and if it’s more than 12 but less than 14, a 12-inch might be your best bet. Always measure carefully from the wall!
Q2: Can I use a regular wax ring if my toilet has a flange horn?
A2: It’s best to use a wax ring that matches your drain setup. If your toilet came with a flange horn, use a wax ring with a horn. The horn helps guide the wax ring into the drainpipe and ensures a better seal, especially if the flange is slightly recessed. If you don’t have a horn, a standard wax ring will work, but ensure it’s centered correctly.
Q3: What if my toilet rocks or wobbles after installation?
A3: This usually means the tank-to-bowl bolts or the floor bolts are not tightened properly or evenly. Turn off the water, drain the tank, and gently tighten the floor bolts a little more, alternating between them. Ensure they’re snug but don’t overtighten, as porcelain can crack. If it’s still wobbly, you might need to add shims under the base before caulking.
Q4: I’m replacing an old toilet and the wax ring is really stuck. How do I remove it cleanly?
A4: Use a putty knife or a plastic scraper to gently chip away at the old wax. Work around the edges and gently pry it up. Don’t use anything too sharp or metallic that could scratch the flange. Have plenty of rags handy to wipe up the softened wax. A caulk remover spray might help soften stubborn wax.
Q5: How much water should be in the toilet tank after it fills?
A5: Most toilet tanks have a water line mark inside, usually indicated by a small red or blue line, or a statement like “Water level hereby established by _____”. The water level should be about half an inch to an inch below the top of the overflow tube. If it’s too high, adjust the float on the fill valve. If it’s too low, adjust it upwards. Proper water level is crucial for efficient flushing, as noted by resources on plumbing efficiency like those found on <a href="https://www.build.gov.bm/media/documents/ Plumbing-Code-2006.pdf" target="_blank" rel="noopener