

17 Genius Plumbing Layout Tips for a Smarter, Worry-Free Home
Plumbing might seem complicated. Leaks happen. Drains clog. It’s easy to feel overwhelmed when something goes wrong with your pipes. But what if you could plan your plumbing right from the start, or even make small changes to avoid future headaches? Good plumbing design is key to a happy home. I’m Nazmul Hasan, and I’m here to show you how smart layout choices can save you time, money, and stress. Get ready to discover 17 simple yet brilliant tips that make plumbing work for you, not against you!
Quick Summary: 17 Plumbing Layout Tips
- Strategic Fixture Placement: Grouping fixtures near main stacks minimizes pipe runs, saving material and improving drainage.
- Future-Proofing: Plan for potential additions or renovations to avoid costly re-plumbing later.
- Ventilation is Key: Proper venting prevents siphoning and ensures smooth drainage.
- Drainage Angles Matter: Slight slopes are crucial for gravity-fed waste removal.
- Minimize Long Runs: Shorter pipes mean fewer potential leak points and better water pressure.
- Consider Accessibility: Make sure valves, cleanouts, and pipes are easy to reach for maintenance.
- Material Choice: Select durable, appropriate materials like copper or PEX for different applications.
- Water Pressure Management: Design layout to balance pressure across all fixtures.
- Hot Water Recirculation: Plan for systems that deliver hot water faster, saving water.
- Greywater Systems: Integrate systems for water reuse in toilets or gardens.
- Easy Cleanouts: Install accessible cleanout points for clogged drains.
- Water Softener/Filter Placement: Designate a convenient, accessible spot for these units.
- Pipe Insulation: Plan for insulation to prevent heat loss and freezing.
- Support Systems: Ensure pipes are properly supported to prevent sagging and stress.
- Soundproofing: Consider pipe insulation or boxing to reduce noise.
- Backflow Prevention: Design to prevent contaminated water from entering the supply.
- Permits & Codes: Always adhere to local building codes and obtain necessary permits.
Why Great Plumbing Layout Makes a Difference
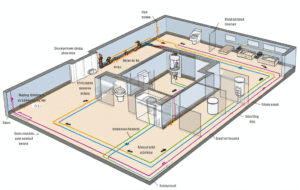
Imagine a kitchen where the dishwasher lines up with the bathroom pipes, or a bathroom where the toilet, sink, and shower are all close together. This isn’t just neat; it’s smart plumbing. A well-planned layout helps water flow smoothly and efficiently. It reduces the chances of clogs and leaks. It also makes repairs much easier down the road. When pipes are grouped logically, fewer materials are used, and the system works better overall. This is especially true for drainage and venting, which rely on gravity and air. Getting these right from the start saves so much trouble.
Even if you’re not building a new house, understanding these layout principles can help you with renovations or troubleshooting. It empowers you to make better choices and feel more in control of your home’s systems.
Tip 1: Strategic Fixture Placement is Your Best Friend
This is perhaps the most crucial tip for any plumbing project. Think about where your bathrooms, kitchen, and laundry room are located. If you can group water-using fixtures – like sinks, toilets, and showers – close to each other, you’re golden. Ideally, they should be near your home’s main drain and vent stacks. Why is this so smart? Shorter pipe runs mean less material, fewer joints (which are potential leak points), and better drainage. Gravity does most of the work, and shorter pipes make its job easier.
Consider your home’s layout. Can you place a new bathroom adjacent to an existing one? Or design your kitchen so the sink is relatively close to the waste line? This reduces the complexity and cost of the plumbing system. It’s like organizing your tools – having them close by makes the job faster and smoother.
Tip 2: Don’t Forget to Future-Proof Your Plumbing
It’s tempting to plan plumbing only for today. But what about tomorrow? Homes change. Families grow. You might want to add a basement bathroom or a new sink in the garage. Planning ahead is a game-changer. When you’re designing, think about how you might expand your plumbing later. Leave extra space in walls or crawl spaces for potential future pipe runs. You could even install capped-off pipes in strategic locations for easy tie-ins later. This might seem like extra work now, but it can save you a fortune and a lot of disruption if you decide to renovate or add on.
It’s like future-proofing your computer or phone – the extra effort upfront means more flexibility later. Think about your long-term home plans, even if they’re just a little idea right now.
Tip 3: Ventilation is More Important Than You Think
You know how sometimes when a sink drains, you hear a gurgling sound? Or how toilet water levels can sometimes slosh around? That’s often a sign of poor venting. Plumbing vents allow air into the drain system. This air breaks the vacuum that water can create as it flows down pipes. Without proper venting, the water can siphon out of fixture traps (like the U-bend under your sink), allowing sewer gases into your home. It also slows down drainage. Vent pipes connect to the main drain and go up through the roof, allowing air exchange.
When planning your layout, ensure that all fixtures have proper, correctly sized vent pipes. If you’re adding a fixture, you’ll need to ensure it’s vented correctly according to local codes. This is a critical step for a functional and safe plumbing system. You can check out the International Plumbing Code for detailed requirements on venting, which most local codes are based on.
Tip 4: The Gentle Slope of Drainage
Gravity is your plumbing system’s best friend for waste removal. That’s why drain pipes need a slight slope, or pitch. If the pipe is too flat, waste can settle and cause clogs. If it’s too steep, the water can run away too quickly, leaving solids behind. For most drain, waste, and vent (DWV) pipes, a common recommendation is a quarter-inch drop for every foot of horizontal pipe. This is usually enough to ensure solids are carried along with the water flow.
When laying out new pipes or adjusting existing ones, always check the slope. A laser level or even a simple spirit level with a known spacer can help. Proper sloping ensures your waste moves efficiently from your fixtures to the main sewer line, preventing many common plumbing problems.
Tip 5: Keep Those Pipe Runs Short and Sweet
Every foot of pipe you add is another potential place for a problem. Longer pipe runs mean more material, more joints, increased possibility of leaks, greater pressure drop, and potentially slower drainage due to friction and the need for steeper slopes over longer distances. By grouping fixtures (as mentioned in Tip 1) and planning efficient routes, you minimize these risks. Shorter pipes generally mean better water pressure and more reliable performance. It’s a simple concept: less pipe, fewer problems.
When you’re designing your plumbing layout, consciously try to take the most direct route from the fixture to the main stack or sewer connection. Measure twice, cut once, and keep it as short as possible while still adhering to code requirements for slope and venting.
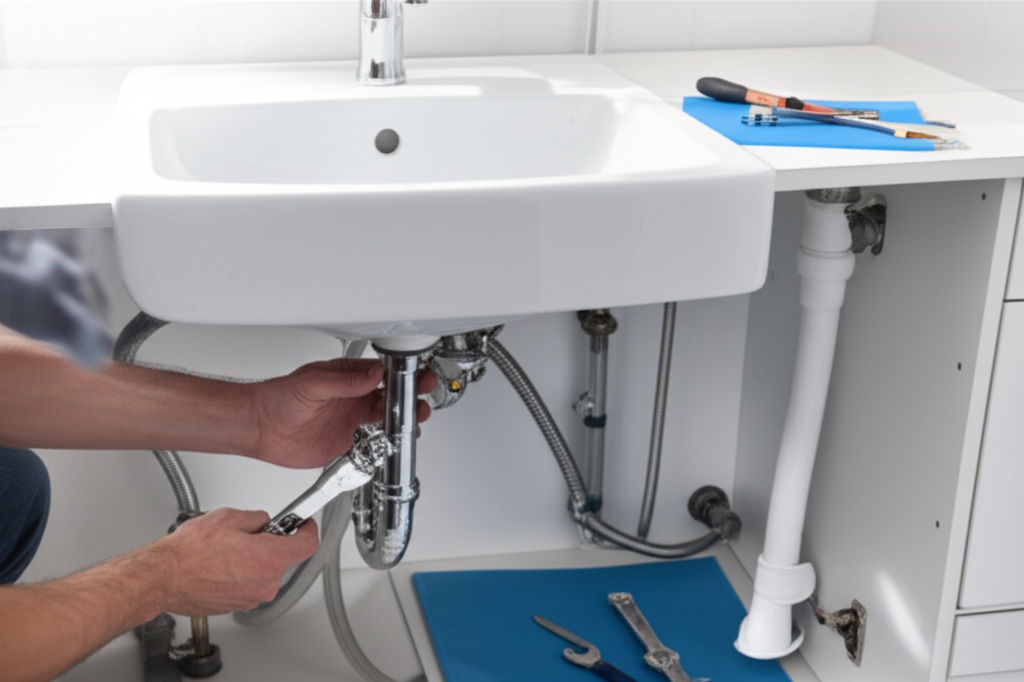
Tip 6: Access for Easy Maintenance and Repair
Plumbing systems need maintenance. Sometimes, things need to be fixed. If your pipes are hidden behind permanent walls without access panels, or if valves are tucked away in impossible-to-reach spots, you’re setting yourself up for a major headache later. Plan for access. Install access panels for shut-off valves, cleanouts, and anywhere you might need to reach pipes for repairs or inspections. This is especially important in showers, tubs, and behind appliances like dishwashers and washing machines.
Think about future you, or a plumber you might hire. Can they easily get to critical components? A little foresight in placement can make a huge difference when an issue arises. This also applies to installing cleanouts at strategic points, allowing snaking of drains if they become blocked.
Tip 7: Choose the Right Pipe Material for the Job
Not all pipes are created equal. The material you choose matters for durability, cost, and ease of installation. Common choices include:
| Material | Pros | Cons | Common Uses |
|---|---|---|---|
| Copper | Durable, corrosion-resistant, long lifespan | More expensive, requires soldering (skill needed) | Water supply lines, hot and cold water systems |
| PEX (Cross-linked Polyethylene) | Flexible, easy to install, less expensive than copper, fewer fittings | Can degrade with UV exposure, requires specific crimping tools | Water supply lines, radiant heating |
| PVC (Polyvinyl Chloride) | Inexpensive, easy to cut and join, corrosion-resistant | Can become brittle over time, not ideal for hot water or high pressure | Drainage, waste, and vent (DWV) pipes, cold water lines |
| Galvanized Steel | Strong, durable for high pressure | Prone to corrosion and scale buildup internally over time, threads can seize | Older water supply lines (less common in new installs) |
For supply lines, copper and PEX are excellent choices. For drain, waste, and vent (DWV) systems, PVC or ABS are typically used. Always check your local building codes for approved materials. Ensuring you use the right material for the right application is a foundational part of a robust plumbing layout.
Tip 8: Balancing Water Pressure is Key
Have you ever turned on the shower and the kitchen sink, only to have the shower pressure drop dramatically? This is often a symptom of an unbalanced system or undersized pipes. When planning your layout, consider how water will flow to multiple fixtures simultaneously. Larger diameter pipes can help maintain pressure over longer runs. Additionally, proper venting (Tip 3) helps ensure consistent pressure. If you have significant pressure issues, a pressure-reducing valve (PRV) might be needed at the main water line, but proper layout itself contributes to a more balanced system.
Think about the total flow rate your system will need, especially during peak usage times (like mornings when everyone is getting ready). Designing your pipe sizes and layout to accommodate this demand will lead to a much more pleasant experience for everyone in the home.
Tip 9: Plan for Hot Water Speed and Efficiency
Waiting for hot water is a common frustration and a waste of water. Installing a hot water recirculation system can solve this. These systems pump hot water through the pipes so it’s readily available at the tap. Planning for this involves installing a return line, which can be a dedicated pipe or sometimes piggybacked on the cold water line (depending on the system). Ideally, these lines should be insulated to maintain temperature and run efficiently.
Even without a full recirculation system, grouping hot water fixtures close to the water heater and ensuring adequate pipe insulation can drastically reduce wait times and water waste. This is a comfort and conservation win!
Tip 10: Consider Greywater Systems for Sustainability
Greywater is gently used water from sinks (not kitchen sinks), showers, and laundry. Instead of sending all water down the drain, could you reuse some of it? Greywater systems capture this water, filter it minimally, and can use it for things like watering gardens or flushing toilets. Planning for a greywater system needs to be done during the initial layout phase. It involves separate plumbing lines for greywater collection, a collection tank, and a distribution system. While this can be a more advanced DIY project, even simple rainwater harvesting systems require thoughtful plumbing layout for collection and dispersal.
Using greywater can significantly reduce your household’s demand on fresh water resources. Organizations like the Greywater Action offer great resources on its benefits and how it works.
Tip 11: Make Drain Cleanouts Accessible
Clogs happen. It’s just a fact of life. A well-planned plumbing layout includes strategically placed cleanouts. These are capped fittings installed in the drainage system that allow access for drain cleaning equipment, like an auger or snake. They should be installed at the base of vertical stacks, at the ends of horizontal runs, and at changes in direction where a clog might commonly occur. Crucially, they need to be accessible!
A cleanout in a finished wall might require an access panel (see Tip 6). A cleanout flush with the basement floor or outside the home is ideal. If a cleanout is difficult to reach, it’s less likely to be used, making a clogged pipe harder to clear.
Tip 12: Designate Space for Water Treatment Systems
Many homes benefit from water softeners or filtration systems, especially if you have hard water or specific water quality concerns. These units require space, access to the main water line, a drain for regeneration (for softeners), and possibly an electrical outlet. When planning your plumbing layout, identify a suitable location for these systems. Often, the basement, garage, or a utility closet is a good spot. Ensure there’s enough room to service the unit and that it’s protected from freezing temperatures.
Placing these units near the main water shut-off valve can make installation and future maintenance simpler. It’s about integrating these necessary components seamlessly into your home’s infrastructure.
Tip 13: Insulate Pipes for Protection and Efficiency
Pipe insulation serves two main purposes: preventing heat loss from hot water pipes and preventing cold water pipes from freezing in unheated areas. In older homes, or during renovations, it’s wise to plan for insulation. For hot water lines, insulation means you get hot water faster and it stays hotter longer, saving energy. For cold water lines in areas prone to freezing, insulation is essential to prevent burst pipes, which can cause catastrophic damage.
When laying out pipes, especially those running through basements, crawl spaces, or exterior walls, consider how you will insulate them. Foam pipe sleeves are readily available and easy to install. Proper insulation is a proactive way to protect your home and save on energy bills.
Tip 14: Proper Pipe Support Prevents Problems
Pipes, especially long horizontal runs or heavy-duty vertical runs, need support. Without it, pipes can sag over time. Sagging pipes:
- Can disrupt the necessary slope for drainage.
- Put stress on joints, increasing the risk of leaks.
- Make the system more prone to noise and vibration.
Use appropriate pipe hangers and straps to secure pipes to joists, studs, or other structural elements. The spacing of these supports is important and depends on the pipe material and diameter. Check manufacturer recommendations or plumbing codes for specific guidelines. Good support is the silent guardian of a long-lasting, leak-free plumbing system.
Tip 15: Soundproofing for a Quieter Home
No one likes the sound of running water, gurgling drains, or flushing toilets echoing through their home. Plumbing noise is a common complaint. While often associated with bathroom renovations, the layout itself can contribute to noise reduction. Using insulated pipes (check for acoustic insulation options), ensuring pipes are properly secured and not rubbing against framing, and boxing in pipes in living areas with sound-dampening materials can make a big difference.
For busy households, consider the placement of noisy fixtures like washing machines or toilets relative to bedrooms or quiet living spaces. Even within a single room, the layout of the pipes within the walls can impact sound transmission.
Tip 16: Incorporate Backflow Prevention
Backflow is when water or other substances flow backward in the piping system. This can happen due to pressure changes and can contaminate your clean water supply. Consider installing backflow prevention devices, such as vacuum breakers on hose bibs (outdoor faucets) and check valves in specific locations. Cross-connection control is vital for public health. Think about where your potable water lines meet potentially non-potable sources, like irrigation systems or boiler blow-off lines, and implement appropriate prevention.
Understanding how to locate and protect against cross-connections is a key aspect of a safe plumbing layout. Local plumbing codes dictate the requirements for backflow prevention in many situations. You can find helpful information through resources like the EPA’s Safer Water resources on Cross-Connection Control.
Tip 17: Always Adhere to Local Codes and Permits
This might be the most important tip of all. Plumbing codes are in place for safety and health. They dictate everything from pipe sizing and material to venting and fixture requirements. Before starting any significant plumbing work, always check with your local building department about required permits and the specific codes you need