

Quick Summary:
Learn how to perform a hidden leak test on your plumbing like a pro. This essential skill identifies unseen water damage early, preventing costly repairs and safeguarding properties. We’ll guide you through simple, effective methods to find those elusive leaks before they become major problems.
As appliance plumbers, we know that the worst leaks are the ones you can’t see. A slow drip behind a wall or under a floor can go unnoticed for weeks, even months, causing rot, mold, and structural damage. These “hidden” leaks are a plumber’s nightmare and a homeowner’s disaster. But spotting them early is crucial. It saves money, prevents headaches, and keeps your customers happy. This guide will walk you through proven, job-site-tested methods to detect these sneaky leaks, giving you the confidence to tackle any hidden water issue. We’ll break down the process step-by-step, so you can find and fix them before they cause real trouble.
Why Hidden Plumbing Leaks Are a Big Deal
Hidden leaks are the silent destroyers of plumbing systems and buildings. Unlike a visible pipe burst that’s obvious, these leaks operate in the shadows. They might be tiny drips from a faulty joint behind a vanity, a pinhole in a pipe within a concrete slab, or a corroded section of pipe running through an inaccessible area. The longer they persist, the more damage they inflict. Mold thrives in dark, damp environments created by these leaks, posing serious health risks. Wood can rot, drywall can crumble, and even the structural integrity of a home or building can be compromised. For us as appliance plumbers, identifying and addressing these leaks efficiently means protecting our reputation and our clients’ investments.
The cost of repairs can skyrocket when a hidden leak is left untreated. What might have started as a minor issue can escalate into a major renovation project involving demolished walls, replaced flooring, and extensive water damage restoration. This is precisely why mastering the art of the hidden leak test isn’t just good practice – it’s essential. It’s a fundamental skill that separates a competent plumber from one who is truly exceptional. By developing this ability, you’re not just fixing a problem; you’re providing invaluable peace of mind to your clients.
Understanding the Signs of Hidden Leaks
Before you even start a formal test, you need to be aware of the subtle clues that a hidden leak might be present. These signs are often the first indicators that something is wrong, even before water is visibly pooling. Keeping an eye out for these symptoms during routine checks or appliance installations is part of that professional diligence appliance plumbers are known for. Think of it as your initial diagnostic phase. The more attuned you are to these signals, the quicker you can jump into action and prevent a small problem from becoming a catastrophe.
Here are some common indicators to watch for:
- Unexplained Water Bill Increases: If your customer reports a sudden, significant jump in their water bill without any apparent reason (like new appliances or increased usage), a leak is a prime suspect. Even a small, constant drip can add up over a billing cycle.
- Musty or Moldy Odors: Persistent, damp, or musty smells in certain areas of a home, especially basements, crawl spaces, or behind walls, are classic signs of hidden moisture. Mold growth often accompanies these odors.
- Visible Water Stains or Discoloration: Look for water spots or discolored patches on ceilings, walls, or floors. These often appear as yellow, brown, or dark rings. They might start small but can expand as the leak continues.
- Peeling Paint or Wallpaper: Moisture in walls can cause paint to blister and peel, and wallpaper to bubble or detach from the surface. This indicates that water is seeping behind the finished surface.
- Warped Flooring or Baseboards: Wood flooring or baseboards that are beginning to warp, swell, or feel spongy underfoot are clear indicators of prolonged moisture exposure from a hidden leak.
- Warm Spots on Floors or Walls: If you notice unusually warm areas on a floor, especially over a concrete slab, it could be a sign of a hot water line leak beneath the surface.
- Sound of Running Water: Sometimes, you might hear the faint sound of water running when no fixtures are in use. This is a direct clue that water is flowing somewhere it shouldn’t be.
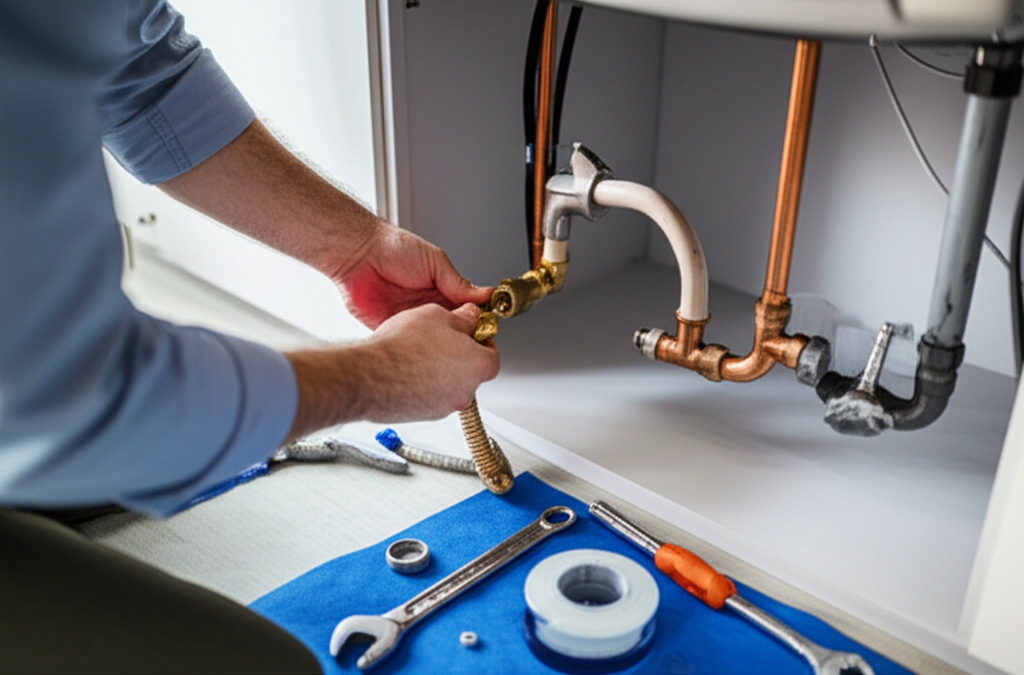
Essential Tools for Hidden Leak Testing
To effectively perform hidden leak tests, you’ll need a few key tools. These aren’t overly specialized, but having them on hand will make your diagnostic work much easier and more accurate. Think of this as equipping yourself for stealth operations – you’re looking for the enemy (the leak) in its hiding places.
Here’s a rundown of the essential gear:
- Your Plumbing Knowledge & Experience: This is your most critical tool. Understanding pipe layouts, common problem areas, and the principles of water pressure is paramount.
- Water Meter: For testing the entire house system.
- Pressure Gauge: To check water pressure and monitor for drops.
- Stethoscope or Listening Device: To “hear” leaks in walls or under floors. Specialized electronic listening devices are even better if available.
- Moisture Meter: Useful for detecting hidden moisture within building materials like drywall, wood, and concrete.
- Infrared (IR) Camera or Thermal Imaging Camera: These advanced tools can detect temperature differences caused by water, revealing leaks behind surfaces.
- Borescope or Inspection Camera: Small cameras that can be inserted into small openings (like drill holes) to visually inspect inside walls or pipes.
- Plumber’s Tape and Cap/Plugs: For isolating sections of pipe.
- Bucket and Rags: For cleanup and collecting any small drips.
- Flashlight: To illuminate dark spaces like crawl spaces and under sinks.
The Genius Method: Step-by-Step Hidden Leak Testing
Now, let’s get down to business. These methods are designed to be straightforward and effective, allowing you to systematically find hidden leaks. We’ll cover testing both the supply (hot and cold) and drain lines, as they require slightly different approaches.
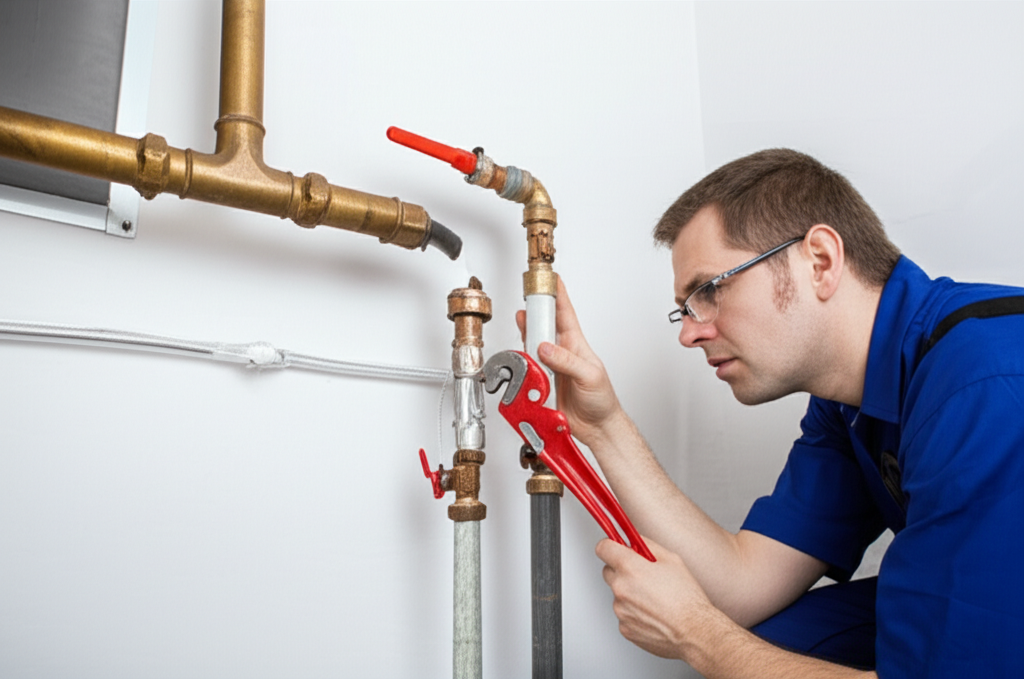
Testing Water Supply Lines (Pressurized)
These are the lines carrying fresh water into your home. They are under constant pressure, which means leaks can be more active and damaging if left unchecked. The principle here is to isolate sections and monitor pressure, or listen for escaping water.
Method 1: Water Meter Test (Whole House System)
This is your first line of defense to determine if a leak exists at all. It’s a quick way to gauge the overall situation.
- Turn Off All Water-Using Appliances: Make sure no toilets are flushing, no washing machines are filling, no dishwashers are running, and no faucets are on.
- Locate Your Water Meter: This is usually found near the street, often in a metal or plastic box in the ground.
- Record the Meter Reading: Note the exact reading on the meter. Many meters have a small, low-flow dial or indicator that spins even with minimal water flow.
- Wait and Re-Check: Wait for at least 30-60 minutes (longer is better, ideally 1-2 hours). Do NOT use any water during this period.
- Compare Readings:
- If the meter reading has changed, there is a leak somewhere in your system.
- If the meter reading has not changed, leaks within the house are less likely, but a very, very slow leak could still be present, or the issue might be with a specific fixture.
Method 2: Pressure Gauge Test (Segmenting the System)
This is more precise for pinpointing leaks within specific zones of your plumbing. It relies on detecting pressure drops.
- Ensure No Water is Being Used: Just like the meter test, confirm all water is off.
- Attach a Pressure Gauge: Find an accessible outdoor hose bib (spigot) or a washing machine outlet. Attach your pressure gauge firmly.
- Turn On Water and Check Pressure: Slowly open the valve to let water into the system and your gauge. Record the static water pressure.
- Turn Off the Main Water Supply: Close the main shut-off valve to your home.
- Monitor the Gauge: Watch the pressure gauge closely.
- If the pressure slowly drops, you have a leak somewhere on the supply side of the plumbing system between the main valve and the gauge.
- If the pressure remains steady, the supply lines to that point are likely intact.
Method 3: Isolation and Listening
This technique involves shutting off water to specific zones or fixtures and then listening for leaks.
- Isolate Sections: If you have shut-off valves for different parts of the house (e.g., bathroom wing, kitchen), shut off water to one section at a time.
- Listen Carefully: With the water shut off to a section, use a stethoscope or listening device. Place the probe against walls, floors, and ceilings, especially in areas near plumbing runs. Move slowly and methodically. Listen for any hissing, dripping, or running water sounds.
- Test Fixtures Individually: For critical fixtures like toilets, shut off their dedicated supply valve and listen. If you suspect a toilet tank leak, add food coloring to the tank, wait 15 minutes without flushing, and check the bowl for color.
- Hot Water Line Leaks: These can sometimes be detected by unusual warmth on walls or floors. If you find a warm spot, isolate that zone and listen closely for sounds.
Method 4: Using an Inspection Camera (Borescope)
For definitive proof or very hard-to-reach areas, a borescope is invaluable.
- Identify Potential Leak Area: Based on other clues (water stains, dampness), pinpoint the most likely spot.
- Drill a Small Access Hole: If necessary and with caution, drill a small (1/4″ – 3/8″) hole into a stud bay or floor cavity.
- Insert the Borescope: Feed the camera into the hole and navigate it through the space.
- Visually Inspect: Look for signs of moisture, corrosion, drips, or standing water on pipes, joints, or surrounding materials.
Testing Drain and Sewer Lines (Gravity Dependent)
Drain lines aren’t under constant pressure like supply lines. They rely on gravity to move waste. This means leaks often occur when water is actually flowing through them. Testing these requires filling sections of pipe with water and observing.
Method 5: The Dye Test (For Fixtures)
This is excellent for checking the seals of individual fixtures, especially toilets.
- Add Dye: Place a few drops of food coloring or a leak detection dye into the toilet tank.
- Wait: Let the toilet sit without flushing for at least 15-20 minutes.
- Check the Bowl: If colored water appears in the toilet bowl, it indicates a leak in the flapper valve or the seal allowing water to slowly seep from the tank into the bowl.
Method 6: Water Fill and Observation (For Specific Drain Sections)
This is good for isolating a particular drain line in a bathroom, kitchen, or basement.
- Seal Off the Drain: Use a drain plug, stopper, or even a wet rag to completely seal the drain opening.
- Fill with Water: Slowly fill the sink, tub, or shower with a few inches of water.
- Observe for Leaks:
- Check the ceiling and walls below the fixture being tested. Look for any signs of dripping or dampness.
- Check under the sink if you are testing a sink drain.
- Listen for any sounds of trickling water.
- Release Water and Repeat: Once you’ve observed for a period (15-30 minutes), release the water and repeat the process, perhaps filling the fixture even higher if no leak is apparent initially.
Method 7: Smoke Testing (For Advanced Detection)
A smoke test is a professional method for finding leaks in drain-vent systems, especially where water tests are impractical or don’t reveal the issue.
- Seal All Vents: Close off all roof vents that connect to the drain system being tested.
- Introduce Smoke: Use a smoke bomb or machine specifically designed for plumbing. Introduce the smoke into the drain system, usually from an open line or cleanout.
- Observe for Smoke: Go outside and check the vents and around the foundation. Smoke escaping from cracks, unseen vents, or wall penetrations indicates a breach in the drain-line integrity.
- Check Inside: Inspect attics, crawl spaces, and around fixtures for wisps of smoke.
Important Note: Always ensure proper ventilation when using smoke bombs. Follow manufacturer instructions precisely.
Advanced Techniques and Technologies
While the basic methods above are highly effective, modern technology offers even more advanced ways to pinpoint hidden leaks, especially in commercial settings or complex residential jobs. Incorporating these can elevate your service offering.
Infrared (IR) Thermography:
Infrared cameras detect temperature differences on surfaces. Areas where a pipe is leaking warm water will appear warmer than surrounding materials. Conversely, where cold water is leaking, it can cool the surface.
- How it Works: A thermal camera captures infrared radiation emitted by objects. This radiation corresponds to their temperature.
- Applications: Excellent for finding hot water leaks within concrete slabs, behind walls, or under flooring. It can quickly scan large areas and highlight potential problem zones for closer inspection.
- Limitations: Air currents, insulation, and the depth of the pipe can affect accuracy. It’s often used in conjunction with other methods.
You can learn more about the principles of thermography from reputable sources like the U.S. Department of Energy’s Energy Saver website.
Acoustic Leak Detectors:
These are a significant upgrade from a plumber’s stethoscope. They use highly sensitive microphones and filters to isolate the distinct sound frequencies of water escaping under pressure.
- How it Works: The device amplifies faint leak sounds, allowing the operator to pinpoint the source even through significant material like concrete or soil.
- Applications: Ideal for finding active leaks underground, under slabs, or within walls where traditional listening is difficult.
- Calibration: Often requires calibration to distinguish between actual leak sounds and ambient noise.
Preventative Measures and Maintenance Tips
As appliance plumbers, your expertise can also extend to advising clients on how to prevent leaks in the first place. Proactive maintenance is the best defense against hidden leaks.
Regular Inspections:
- Encourage clients to conduct visual inspections of exposed pipes under sinks, in basements, and crawl spaces monthly.
- Keep an eye on water bills for unexpected increases.
- Listen for unusual running water sounds.
Appliance Care:
- Ensure new appliance installations are done correctly, with properly rated supply hoses and secure connections. Regularly check hoses for signs of aging, cracking, or bulging – especially on washing machines.
- Advise clients to consider braided stainless steel supply hoses, which are far more durable than standard rubber ones.
Pipe Material and Age:
- Educate clients about the lifespan of different pipe materials (e.g., galvanized steel, copper, PEX). Older homes with older materials are at higher risk.
- When performing repairs or replacements, use durable, modern materials like PEX or copper with proper joining techniques.
Water Pressure:
- Ensure the home’s water pressure is within an acceptable range (typically 40-60 PSI, with many local codes setting the maximum at 80 PSI). High water pressure can stress pipes and fittings, leading to leaks. A Pressure Reducing Valve (PRV) might be necessary. You can find information on safe water pressure from resources like AWWA’s consumer information on water pressure.
Common Pitfalls to Avoid
Even with the best intentions and tools, certain mistakes can lead to missed leaks or false positives. Here are some common pitfalls appliance plumbers should be aware of:
- Rushing the Test: Not allowing enough time for pressure drops or