

Quick Summary:
Plumbing 101 means mastering basic pipe connections, understanding fitting types, and knowing how to safely shut off water. This guide equips appliance plumbers with essential skills for straightforward, successful installations and repairs every time.
Hey Appliance Plumbers! Ever feel a little uncertain when it comes to basic plumbing connections? You’re not alone. Many appliance installations involve connecting water lines, and getting it right the first time saves you time, prevents leaks, and keeps customers happy. This guide breaks down the essentials of plumbing 101, focusing on what you need to know for your appliance jobs. We’ll cover the fundamentals, from understanding fittings to making leak-proof connections, so you can tackle these tasks with confidence. Get ready to level up your plumbing game!
Understanding Your Plumbing System
Before we grab any tools, let’s get a grip on the basics of the water systems you’ll be working with. Most homes have two main water systems: the potable water supply and the drainage system. Understanding the difference and how they work is crucial for any plumbing job.
Potable Water Supply
This is your clean water. It comes from the main supply line to your house and is delivered under pressure to your fixtures and appliances. Think hot and cold water lines. The pressure is what pushes water where it needs to go.
Drainage System (DWV)
This is how wastewater leaves your house. It’s a system of pipes that uses gravity to move used water and sewage away from your fixtures and appliances, eventually leading to a sewer line or septic tank. Unlike the supply system, it’s not pressurized and relies on proper slope and venting.
Key Components of the Supply System
You’ll encounter a few key things when working with the supply lines:
- Main Shut-off Valve: This is your emergency stop. It controls all the water entering your house. Knowing where this is and how to operate it is step one for safety.
- Fixture Shut-off Valves: These are smaller valves located near appliances or sinks/toilets. They control water flow to individual fixtures. Always try to use these before the main valve if possible.
- Pipes: For supply lines, you’ll most commonly see copper, PEX (cross-linked polyethylene), or CPVC (chlorinated polyvinyl chloride). Each has its pros and cons, but for appliance hookups, flexible supply lines are very common.
- Fittings: These are the connectors that join pipes together, change direction, or adapt to different sizes.
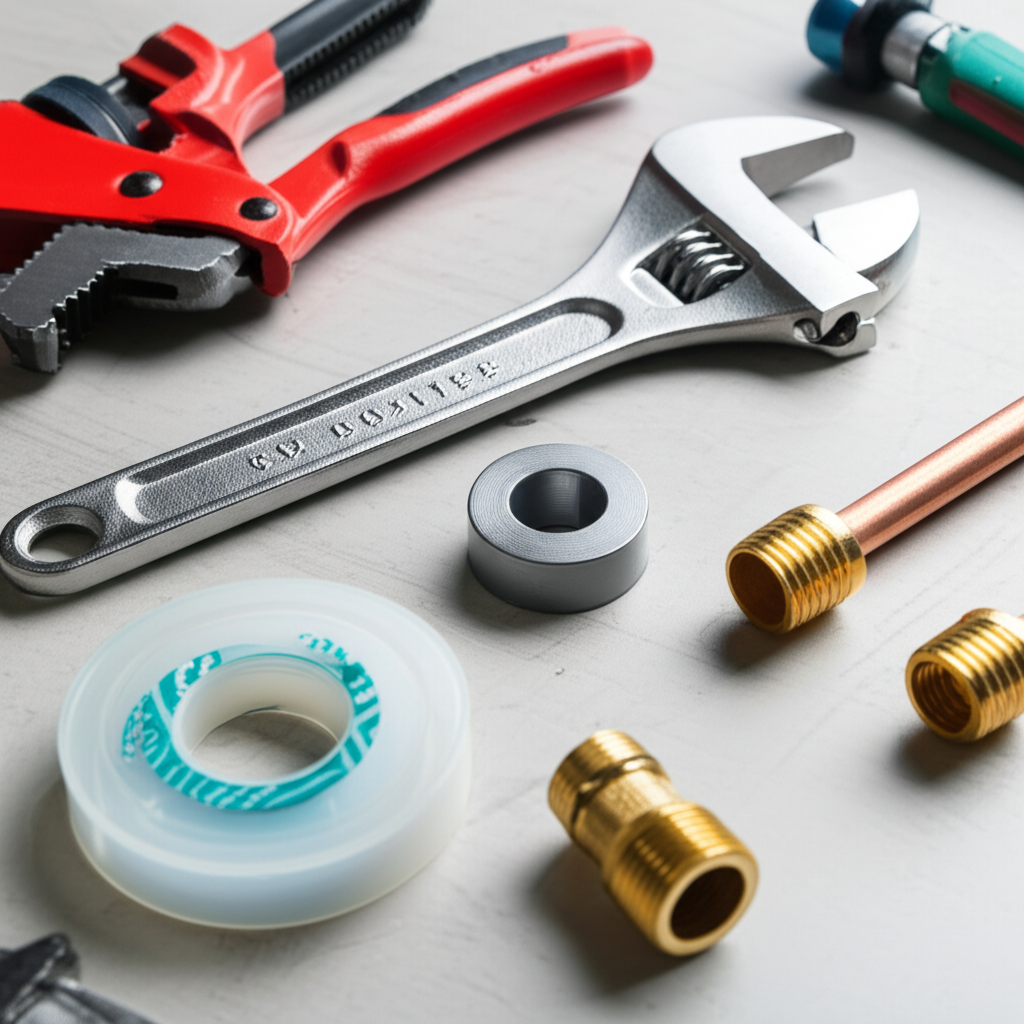
Essential Plumbing Tools for Appliance Installers
You don’t need a truck full of tools for basic appliance plumbing, but having the right gear makes a huge difference. Here are the essentials that will get most appliance plumbing jobs done efficiently and safely.
Must-Have Tools
These are the workhorses for appliance plumbing:
- Adjustable Wrenches (Crescent Wrenches): Get a few different sizes. They’re versatile for gripping nuts and bolts on supply line connections, valves, and fittings.
- Pipe Wrench: While less common for flexible appliance lines, a small pipe wrench can be useful for older, rigid connections or stubborn fittings. Use it carefully to avoid damaging the pipe.
- Pliers (Channel Locks/Groove Joint Pliers): Excellent for gripping larger or irregularly shaped items, and for tightening or loosening fittings. Come in handy when you need extra leverage.
- Tubing Cutter: If you’re working with copper or soft metal tubing, a good cutter ensures a clean, square cut, which is vital for making good compression fittings.
- Deburring Tool: After cutting pipe, you need to smooth the inside and outside edges. This prevents snagging O-rings and ensures a tight seal. A simple deburring tool or even the edge of your tubing cutter can work.
- Thread Seal Tape (Teflon Tape) and Pipe Dope (Pipe Joint Compound): These sealants are essential for threaded connections to prevent leaks. Use them correctly.
- Bucket and Rags: Always have these on hand to catch residual water when disconnecting lines and for cleanup.
- Safety Glasses: Protect your eyes! Water pressure or debris can cause unexpected sprays.
Optional but Helpful Tools
These can make your life easier on certain jobs:
- PEX Crimp Tool: If your appliance has a PEX supply line connection, you’ll need this to attach crimp rings.
- Wire Brush: For cleaning threads on older or corroded fittings.
- Flashlight or Headlamp: Good lighting is crucial, especially in tight, dark spaces.
Understanding Plumbing Fittings and Connectors
Fittings are the unsung heroes of plumbing. They connect pipes, change direction, reduce or increase pipe size, and adapt to different connection types. For appliance plumbing, you’ll mainly deal with fittings for supply lines.
Common Fitting Types for Appliance Plumbing
When hooking up appliances like dishwashers, refrigerators, or washing machines, you primarily deal with threaded connections and sometimes compression fittings or PEX connections.
Threaded Fittings
These rely on threads to create a mechanical connection. For water lines, you’ll often see:
- NPT (National Pipe Taper) Threads: These are the standard tapered threads used in North America for pipes and fittings. They create a tight seal when the threads are compressed, further enhanced by thread sealant.
- Garden Hose Thread (GHT): Commonly found on washing machine supply hoses and outdoor spigots. These are straight threads, relying on a rubber washer for the seal.
Compression Fittings
These are excellent for connecting pipes without soldering or gluing. They consist of a nut and a ferrule (a ring that deforms). When you tighten the nut, it squeezes the ferrule onto the pipe, creating a watertight seal against the fitting body. They are very common for appliance supply lines directly to valves.
PEX Fittings
If you’re working with PEX supply lines, you’ll use PEX fittings. These typically involve barb fittings that slide into the PEX tubing, and then a crimp ring or clamp is secured around the outside of the tubing, clamping it onto the barb for a watertight seal. This method is popular for its durability and ease of installation.
Choosing the Right Fitting
Always match the fitting type and size to the pipe and the appliance connection. A dishwasher outlet might be 3/8” compression, while a washing machine might use 3/4” GHT. Double-check the appliance’s manual or existing connections.
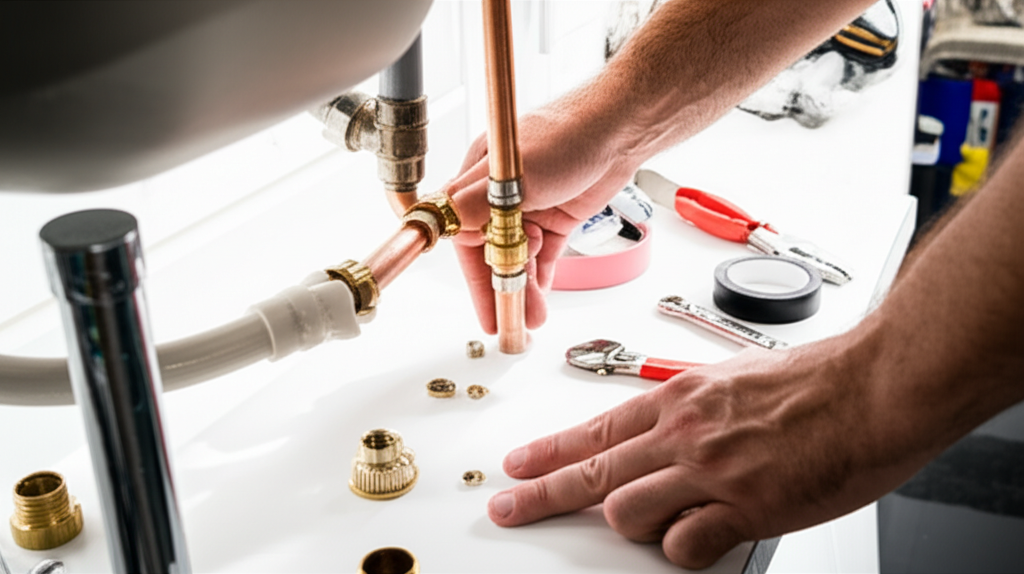
Connecting Water Supply Lines: Step-by-Step
This is where the rubber meets the road for most appliance installations. Making secure, leak-free connections is key. We’ll focus on the most common scenario: connecting flexible supply lines to shut-off valves.
Step 1: Identify and Shut Off Water
First things first: locate the shut-off valve for the appliance you’re working on. If you can’t find a specific valve, you’ll need to shut off the main water supply to the house. Turn the valve handle clockwise to shut off the water. Open a nearby faucet to relieve pressure in the line. You should hear the water stop flowing.
Step 2: Disconnect Old Line (If Necessary)
If you’re replacing an old appliance or supply line, place a bucket and some rags under the connection. Use an adjustable wrench or pliers to carefully loosen the nut connecting the old supply line to the shut-off valve. Expect a small amount of residual water to drain out.
Step 3: Prepare the New Supply Line
Inspect your new supply line for any damage. Ensure the rubber gaskets or O-rings inside the connector nuts are present and properly seated. For PEX or other pipe types, ensure the end is cut square and clean, and any burrs are removed.
Step 4: Apply Thread Sealant (If Applicable)
For threaded connections (like the ones on most flexible supply lines connecting to valves), you don’t need pipe dope or Teflon tape on the male threaded end of the supply line itself. The seal is made by the rubber washer inside the nut of the supply line as it presses against the valve’s outlet. However, if you are connecting two threaded pipes together (not a flexible hose to a valve), you would apply Teflon tape or pipe dope to the male threads. Always refer to the manufacturer’s instructions for the appliance and supply lines.
Step 5: Connect the Supply Line
Align the supply line nut with the outlet of the shut-off valve. Hand-tighten the nut as much as you can. Then, use an adjustable wrench to tighten it an additional 1/4 to 1/2 turn. Be firm, but don’t overtighten, as this can damage the fitting or the valve. For washing machine hoses, ensure you’re connecting hot to hot and cold to cold. They often have color-coded ends or threads.
Step 6: Turn On Water and Check for Leaks
Slowly turn the shut-off valve back on (counter-clockwise). Listen for running water and watch the connection point closely. Feel around the connection with your hand (not just look) for any drips. If you see or feel a leak, shut off the water immediately and tighten the connection slightly more. It’s common to need a small adjustment.
Step 7: Final Check
Once you’re confident there are no leaks, let the water run through the appliance for a minute or two. Check the connection again. It’s a good idea to re-check the connection again after an hour or so, just to be absolutely sure.
Drainage Connections for Appliances
Connecting the drain line is just as critical as the water supply. A proper drain connection ensures wastewater is carried away efficiently and without backing up or causing sewer gas leaks.
Washing Machines and Dishwashers
Most washing machines and dishwashers have a flexible drain hose. This hose typically connects to one of three places:
- Standpipe: This is a vertical pipe that extends up from the floor. The drain hose is usually inserted into the standpipe, often secured with a clamp. The top of the standpipe needs to be at the correct height (typically 30-39 inches from the floor according to plumbing codes, but always check local codes) to prevent siphoning.
- Sink Tailpiece: A dishwasher drain hose can often be connected to a special inlet fitting on the sink’s tailpiece (the pipe directly below the sink drain). A hose clamp is used to secure it. You might need to knock out a plug inside the tailpiece fitting first if it’s a new installation.
- Garbage Disposal: Dishwasher drain hoses can also connect to a dedicated inlet on a garbage disposal. Similar to the tailpiece, you’ll need to ensure the inlet nipple is clear (knock out the plug) and use a hose clamp.
Key Drainage Principles
- Slope: Drain lines must have a continuous downward slope (typically 1/4 inch per foot) to allow gravity to move water.
- Venting: Proper venting allows air into the drain system, preventing vacuum or pressure buildup that can cause slow drains or sewer gas odors. Most appliance connections tie into a properly vented system.
- Air Gap: For dishwashers, plumbing codes often require an “air gap” device. This is a small fixture installed on the countertop or sink rim that creates a physical break between the drain hose and the drain pipe, preventing contaminated drain water from siphoning back into the dishwasher.
Making the Connection
Ensure the drain hose is securely fastened with a hose clamp. The hose should not be kinked, as this will impede drainage. For standpipes, make sure the hose doesn’t create an airtight seal at the top; a small amount of air entering around the hose is generally okay and can help prevent siphoning. Always check appliance manuals for specific drain hose installation requirements.
Common Plumbing Problems and Solutions
Even with the best setup, you might run into a few common snags. Here are some tricky situations and how to handle them like a pro.
Slow Drips After Connection
Problem: A persistent drip from a newly connected supply line.
Solution:
- Shut off the water supply.
- Carefully tighten the connection another 1/8 to 1/4 turn.
- Turn water back on and check again.
- If it’s still dripping, shut off water, disconnect the fitting, and check the rubber washer or O-ring inside the nut. Ensure it’s seated correctly and not damaged.
- If threads are corroded or damaged, clean them with a wire brush or replace the fitting.
- Make sure you didn’t overtighten and crack the plastic fitting on the appliance inlet or the valve.
Water Hammer
Problem: A loud banging noise when water flow stops suddenly (e.g., washing machine fill valve closes).
Solution: Water hammer is caused by the sudden stop of moving water. The best fix is to install water hammer arrestors on the supply lines. For appliance hookups, flexible supply lines with built-in air chambers at each end can often help absorb the shock. Ensure supply lines are not kinked, which can exacerbate the issue.
Kinked Supply or Drain Lines
Problem: Supply lines are bent too sharply, restricting water flow, or drain lines are kinked, causing slow or no draining.
Solution:
- Carefully reposition the hose.
- If the kink is severe and permanent, replace the hose.
- For drain lines, ensure adequate space and proper routing to avoid kinks. Using larger radius elbows can help.
Corroded or Damaged Valves
Problem: Shut-off valves are stiff, leaking, or won’t fully close.
Solution: These valves often need replacement. If the valve is slightly stiff but functional, a little penetrating oil might help. However, if it’s leaking or not shutting off properly, it’s best practice to replace it. Always shut off water at the main supply before attempting valve replacement.
Safety First: Best Practices for Plumbers
Plumbing involves working with water and sometimes in cramped spaces. Safety should always be your top priority. Here are some essential safety tips for every appliance plumbing job.
Working Safely with Water Systems
- Always Shut Off the Water: This is non-negotiable. Before disconnecting any line, ensure the water is turned off at the appropriate valve or the main shut-off.
- Relieve Pressure: After shutting off water, open a faucet nearby to drain residual water and relieve pressure in the lines.
- Know Your Water Pressure: High water pressure can stress fittings and connections. If you encounter consistently high pressure (over 80 psi), consider recommending the installation of a pressure-reducing valve (PRV) to save the home’s plumbing system. You can measure this with a simple pressure gauge that screws onto an outdoor spigot.
- Check for Leaks Thoroughly: Don’t rush the leak check. Revisit your connections after a few minutes, then again after an hour. Catastrophic leaks can happen hours later if a connection wasn’t fully secured.
PPE and Site Safety
- Wear Safety Glasses: Always protect your eyes from water, debris, or potential pipe bursts.
- Use Gloves: Protect your hands from sharp edges, hot water, or potential contaminants.
- Proper Footwear: Wear slip-resistant shoes, especially in potentially wet areas.
- Secure Work Area: Keep the work area clean and free of trip hazards. Place drip pans and rags strategically.
- Electrical Safety: Be aware of any nearby electrical outlets or appliances. Keep tools and materials away from them. When working with appliances that connect to both water and electricity, always ensure power is disconnected before beginning and that you follow manufacturer guidelines.
Municipal Water Regulations and Codes
Plumbing work is regulated by local building codes. These codes ensure work is done safely and correctly, protecting public health and property. Familiarize yourself with the basic plumbing codes in your service area, especially regarding water supply line materials, drain line slopes, venting, and fixture clearances. The International Plumbing Code (IPC) and Uniform Plumbing Code (UPC) are common references, though local jurisdictions may adopt their own versions or amendments. You can often find resources on your local municipality’s building department website. For example, the International Code Council (ICC) provides information on plumbing codes.
Adhering to codes isn’t just about avoiding fines; it’s about ensuring a safe and functional system for the homeowner.
Troubleshooting Common Appliance Water Issues
Beyond the basic connections, appliances themselves can have plumbing-related problems. Here’s how we tackle them.
Dishwasher Not Filling or Draining
Not Filling