

Quick Summary: Plumb a hot tub by connecting dedicated hot and cold water supply lines, including shut-off valves, to the tub’s inlets. Ensure proper drainage setup. This guide breaks down the process, making it straightforward for appliance plumbers to achieve reliable, leak-free results.
Hey folks, Nazmul Hasan here. When a hot tub needs plumbing, it’s not just about hooking up hoses. Get it wrong, and you’re looking at leaks, low pressure, or unhappy customers. It’s a common job we see, and honestly, it can feel a bit daunting if you haven’t done it before. But don’t sweat it. We’re going to walk through this step-by-step. I’ll share the practical, on-the-job techniques that make plumbing a hot tub like any other appliance – safe, efficient, and built to last. Let’s get your hot tub project running smoothly.
Understanding Hot Tub Plumbing Basics
Before we grab our tools, let’s get a firm grip on what’s involved. Hot tub plumbing is primarily about two things: getting water into the tub and getting it out when needed. This involves connecting to existing water supply lines and setting up a way for the water to drain effectively. For appliance plumbers, thinking about this like any other water-using appliance installation is key. We need to ensure we have proper shut-off valves for both hot and cold water feeds, robust connections that won’t leak, and a drain system that meets local codes and is convenient for the homeowner.
The goal is always a seamless installation. This means identifying the correct types of fittings, understanding pressure requirements, and anticipating any potential issues that could lead to callbacks. We’ll cover the tools you’ll need, the materials you should use, and the exact sequence of steps to get this done right the first time. We’ll also touch on safety and local plumbing codes, because that’s non-negotiable for a professional job.
Essential Tools and Materials for Hot Tub Plumbing
Getting the right gear is half the battle. Having a well-stocked toolbox means you can move efficiently and tackle any snags that come up. For hot tub plumbing, you’re going to need a mix of standard plumbing tools as well as some items specific to connecting to a water supply.
Here’s a breakdown of what you should have ready:
- Pipe Cutter: For clean, precise cuts on copper or PEX tubing.
- Deburring Tool: Essential for smoothing the edges after cutting pipe to ensure proper fitting.
- Adjustable Wrenches (2): For tightening fittings securely without overtightening.
- Pliers (Channel Lock and Slip-Joint): Versatile for gripping and turning various components.
- Pipe Thread Sealant (PTFE Tape or Pipe Dope): For creating watertight threads on threaded fittings.
- Measuring Tape: For accurate pipe runs and placement of components.
- Level: To ensure pipes and fittings are installed correctly.
- Drill and Bits: If you need to drill holes for pipe access.
- Bucket and Rags: For catching any residual water and for cleanup.
- Safety Glasses: Always protect your eyes.
- Gloves: For grip and protection.
When it comes to materials, the specifics will depend on your local codes and the existing plumbing. However, you’ll generally be working with:
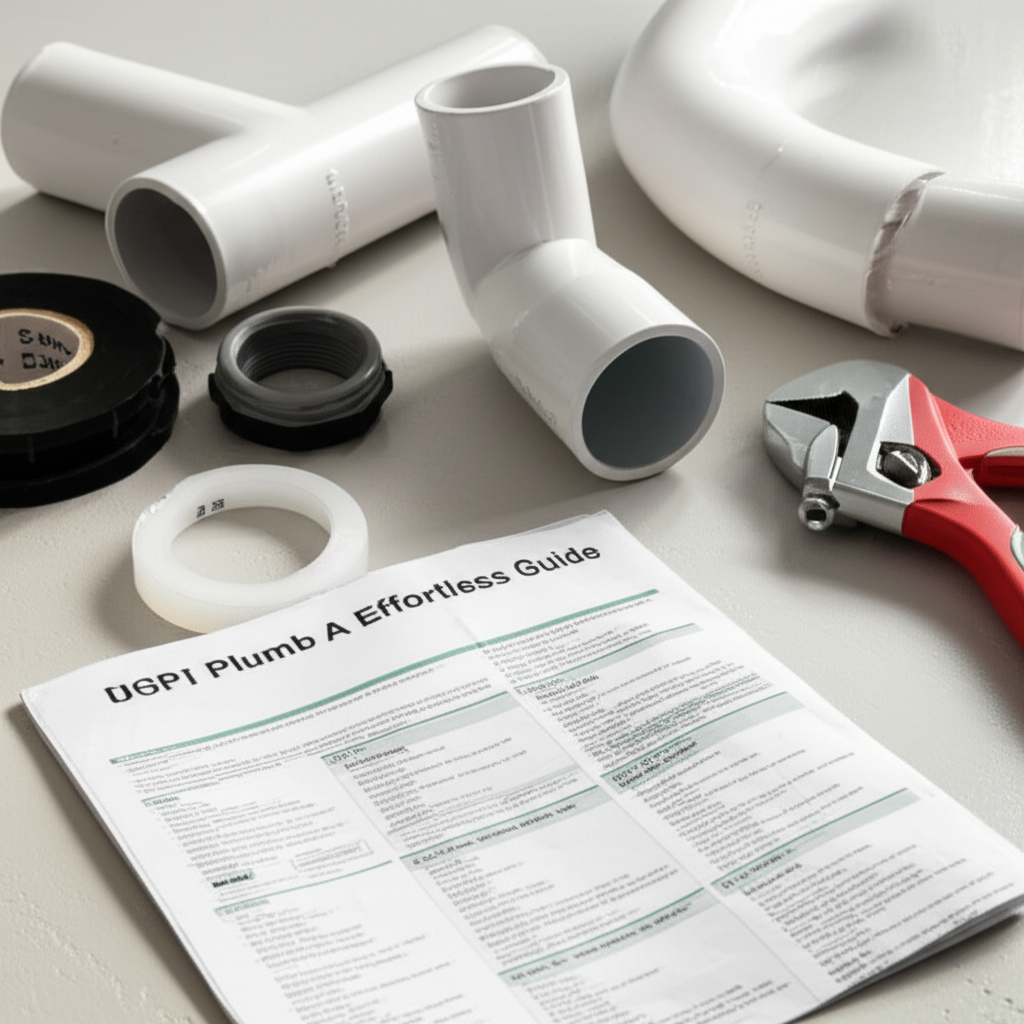
- PEX Tubing or Copper Pipe: Your primary supply lines. PEX is often easier for DIY and appliance plumbers due to its flexibility and ease of connection.
- Appropriate Fittings: Such as PEX couplings, elbows, adapters (e.g., PEX to NPT), or their copper equivalents.
- Ball Valves: Crucial for isolation. You’ll need at least one for the hot water supply and one for the cold water supply. Consider a dedicated hot tub shut-off valve if local codes require it.
- Hose Bibb or Frost-Proof Sillcock: (Optional, for drainage): If you’re connecting a drain line to an external spigot.
- PVC Pipe and Fittings: For drain lines, if applicable.
- Pipe Hangers/Clamps: To secure the plumbing and prevent stress on the connections.
- Adapters for Hot Tub Inlet/Outlet: These connect your supply and drain lines to the hot tub itself. Check your hot tub’s manual for the specific thread size and type.
Always double-check the hot tub manufacturer’s manual for any specific connection requirements or recommended materials. Local plumbing codes should also be consulted, as they dictate materials and installation methods allowed in your area.
Step-by-Step Guide: Connecting the Water Supply
This is where the real work begins. We’re going to connect dedicated lines to the hot and cold water supply. The key here is to create clean, secure connections that can handle the water pressure and temperature changes without a hitch. We’re aiming for reliability and ease of maintenance.
Step 1: Locate and Prepare the Water Supply
First, identify the nearest hot and cold water lines that can supply the hot tub. These should ideally be large enough in diameter (e.g., 3/4-inch PEX or copper) to provide adequate flow. If you need to tap into smaller pipes, you might need to upgrade them to meet the hot tub’s demand.
Turn off the main water supply to the house or the specific area if you have zone shut-offs. Open the lowest faucet in the house to drain any remaining water from the lines. This is a critical safety step to prevent flooding and scalding.
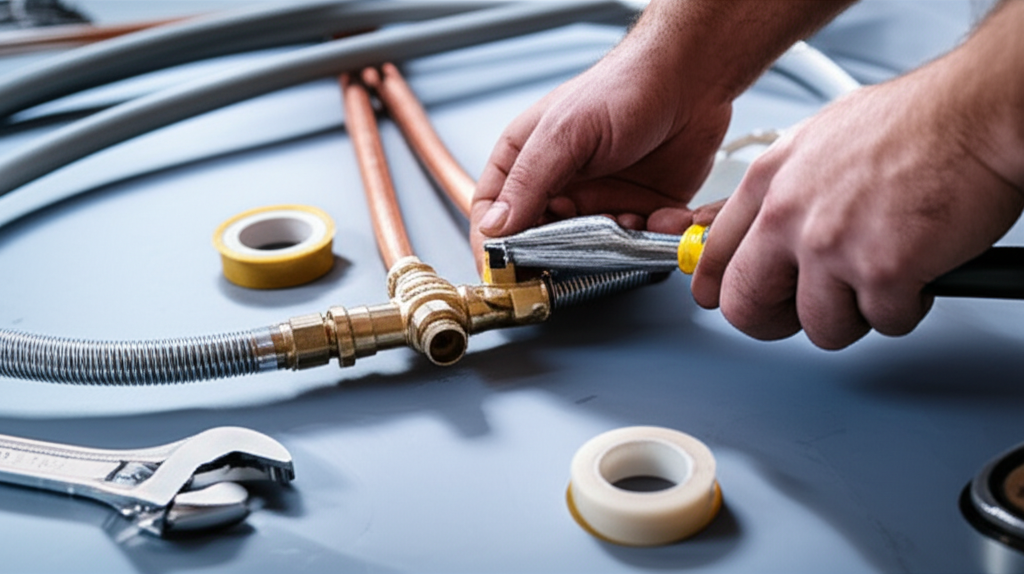
Use your pipe cutter to make clean cuts in both the hot and cold water lines at the points where you will be installing your shut-off valves. Deburr the inside and outside of the cut edges thoroughly. If you’re using copper, you might need to clean the pipe ends with emery cloth or a deburring tool until they are bright and shiny.
Step 2: Install Shut-Off Valves
This is arguably the most important part of your plumbing setup. You absolutely need dedicated shut-off valves for both the hot and cold water lines feeding the hot tub. These allow you to isolate the tub for maintenance or in case of an emergency without shutting off water to the entire house.
For PEX, use PEX ball valves and the appropriate crimp or expansion tools for your PEX system. For copper, use sweat-type ball valves or compression fittings. Ensure the valves are rated for both hot and cold water and the expected pressure range. Apply PTFE tape or pipe dope to the threads of any threaded fittings you’re connecting to the valves.
Connect a ball valve to the existing plumbing for both the hot and cold lines. Make sure the valves are installed in a way that is easily accessible. If the valve is on a vertical pipe, the operating lever should typically be oriented so it’s easy to turn.
Step 3: Run Supply Lines to the Hot Tub
Now, run your new supply lines (PEX or copper) from the installed shut-off valves to the location of the hot tub. Plan this route to be as short and direct as possible, minimizing bends and potential stress points. Use pipe hangers or clamps to support the lines every few feet, especially for longer runs, to prevent sagging and to stabilize the pipes against vibration.
Pay attention to how you’ll get the pipes to the tub. You may need to drill holes through walls, floors, or cabinets. Ensure any holes drilled through structural members are done in accordance with building codes. Protect the pipes from sharp edges by using grommets or conduit where they pass through materials.
When connecting your new lines to the shut-off valves and preparing to connect to the hot tub inlet, always use the correct fittings. For PEX, this means using PEX couplings and adapters. For copper, it will be soldered fittings or compression fittings.
Step 4: Connect to the Hot Tub Inlet
This part usually involves connecting to a threaded inlet port on the hot tub’s plumbing manifold. Consult your hot tub’s manual to identify the exact size and thread type of the inlet. You will likely need a threaded adapter that mates your supply pipe material (e.g., PEX adapter with NPT threads, or a copper threaded adapter) to the tub’s inlet.
Apply pipe thread sealant (PTFE tape or pipe dope) to the male threads of the adapter before screwing it into the hot tub inlet. Tighten it securely, but be careful not to overtighten, as this can damage the plastic threads on the hot tub. Connect your supply lines (hot and cold) to these adapters using the appropriate fittings.
Ensure the hot water supply connects to the hot water inlet and the cold water supply connects to the cold water inlet. Most hot tubs have clearly labeled inlets, or you can refer to the manual.
Step 5: Test for Leaks
Once everything is connected, it’s time for the crucial leak test. Make sure the hot tub is empty or at a level where water won’t immediately cause damage if a leak occurs. Slowly open the cold water shut-off valve first. Listen and look carefully for any drips or leaks at all connections – from the supply line tap-in, at the valves, along the pipe run, and at the hot tub inlet connections.
If you find any leaks, close the valve and tighten the connection slightly. If it persists, you may need to disassemble that connection, check for damaged O-rings or threads, reapply sealant, and reassemble. Once the cold side is leak-free, slowly open the hot water shut-off valve and repeat the inspection process for the hot water line.
It’s a good practice to leave the water on for a while and re-check for leaks periodically. Once you’re confident there are no leaks, you can proceed with filling the tub.
Setting Up the Drainage System
Proper drainage is essential for maintenance and for preventing stagnant water issues. Many hot tubs have a built-in drain fitting. Your job is to connect a suitable line to this fitting if the tub doesn’t come with an integrated solution.
Option 1: Direct Drain Connection (if available)
Some hot tubs have a threaded drain port that you can connect a hose or a PVC pipe to. In this case, you’ll need an adapter that threads onto the drain port and provides a fitting for your drain pipe (often a slip fitting for PVC).
Install this fitting, ensuring a watertight seal using thread sealant. Run a PVC pipe or a flexible drain line from this fitting to a suitable drainage point. This could be a dedicated drain, a floor drain, or an outdoor discharge point where local codes permit.
Option 2: Using a dedicated drain valve
If your hot tub has a simple drain valve, you might just need a hose adapter that fits the valve’s outlet. From there, you can run a flexible hose or a PVC pipe. Ensure the hose is rated for the job and won’t kink. PVC pipe is a more permanent solution and offers better support.
Option 3: Siphoning or Pumped Drainage
In some scenarios, particularly if the hot tub is far from a drain, you might rely on siphoning water out with a hose or using a submersible utility pump. While not a direct plumbing connection in the traditional sense, appliance plumbers often encounter these situations. Ensure the drainage method is efficient and can remove water completely to prevent freezing or mold.
| Drainage Method | Pros | Cons | Best For |
|---|---|---|---|
| Direct Drain Fitting (PVC connection) | Permanent, reliable, easy to operate. | Requires access to a suitable drain. Installation can be more involved. | Permanent installations with nearby drainage points. |
| Hose Connection to Valve | Flexible, easy to disconnect for different drainage points. | Hose can kink, may not be as aesthetically pleasing. | Situations where the tub might be moved or when temporary drainage is needed. |
| Siphon/Pump | Works from any location. | Not automatic. Manual effort required or requires a pump. | Remote locations or when direct drain hookup is impractical. |
Regardless of the method, ensure the drain pipe has a slight downward slope to allow gravity to assist in drainage. Avoid creating any dips or traps where water can collect. Check local codes regarding wastewater discharge – some areas have specific requirements for where hot tub water can be sent.
Safety and Code Compliance
As appliance plumbers, safety and adherence to codes are paramount. Never assume what’s allowed; always verify with your local building department or plumbing inspector.
Key Safety Considerations:
- Water Damage Prevention: Ensure all connections are leak-free, especially before your initial fill. Use high-quality fittings and proper sealing techniques.
- Electrical Safety: If you’re running plumbing near electrical components of the hot tub or its pumps, ensure adequate clearance and follow all electrical codes for bonding and grounding. Never let water come into contact with exposed electrical parts.
- Freeze Protection: In colder climates, ensure that sections of pipe that could freeze are properly drained or insulated, especially if the tub is not in use during winter. Shut-off valves should be located where they can be easily accessed to drain lines if necessary.
- Water Quality: While beyond the scope of direct plumbing, ensure the supply water quality is suitable for the hot tub.
Common Code Requirements:
- Shut-Off Valves: Most codes require easily accessible shut-off valves for both hot and cold water supplies to appliances like hot tubs.
- Pipe Materials: Codes specify approved materials for water supply and drainage lines (e.g., PEX, copper, specific types of PVC).
- Drainage Discharge: Regulations often dictate where wastewater can be legally discharged. It’s usually not permitted to discharge directly to storm drains without treatment. Consult your local wastewater authority. You can find general guidance on plumbing codes from organizations like the International Code Council (ICC) at iccsafe.org.
- Backflow Prevention: Depending on your location and specific connection type, backflow prevention devices might be required to prevent contaminated water from entering the potable water supply.
- Pipe Support: Codes typically mandate how pipes must be supported to prevent stress and failure.
Always get the necessary permits for this type of work. A final inspection can give you and your customer peace of mind that the job meets all safety and regulatory standards.
Troubleshooting Common Issues
Even with the best preparation, you might run into a few snags. Here are some common issues and how to handle them:
| Problem | Possible Cause | Solution |
|---|---|---|
| Low Water Pressure | Partially closed shut-off valve. Kinked supply line. Undersized supply pipes. Clogged filter in the hot tub. |
Fully open valves. Straighten or reroute kinked lines. Consider upgrading supply piping. Inspect and clean the hot tub’s filter (refer to manual). |
| Leaking Connections | Improperly tightened fittings. Damaged threads or O-rings. Insufficient or excessive thread sealant. Cracked fitting. |
Tighten connections gradually. Replace damaged parts. Reapply sealant correctly. Replace cracked fittings. |
| Hot Tub Not Filling | Shut-off valves are closed. Air lock in supply line. Hot tub inlet clogged. |
Open all valves fully. Briefly relieve pressure at a point after the valve if possible to purge air. Check and clear the inlet. |
| Drainage is Slow | Slope of drain pipe is insufficient. Debris in the drain line. Drain valve not fully open. |
Ensure proper downhill slope. Clear the drain line with a snake or by flushing. Fully open the drain valve. |
| Water Leaking from Tub Itself (Not connections) | Crack in the tub shell. Failed gasket or seal on equipment. |
This often requires repair by a hot tub technician or the manufacturer. The plumbing is likely not at fault here. |
Remember, always turn off the water supply and relieve pressure before attempting any fixes. Documenting the problem and your solution can be helpful for future reference and for customer communication.
Maintaining Hot Tub Plumbing
Good plumbing isn’t just about the initial installation; it’s about ensuring longevity and reliability. Regular