

Quick Summary: Plumb a pressure tank by connecting the inlet to the pump, the outlet to the system, and the air valve for pressure regulation. Ensure proper pipe sizing, thread sealing, and secure connections for reliable water pressure and system longevity. This guide covers essential steps for a safe and effective installation.
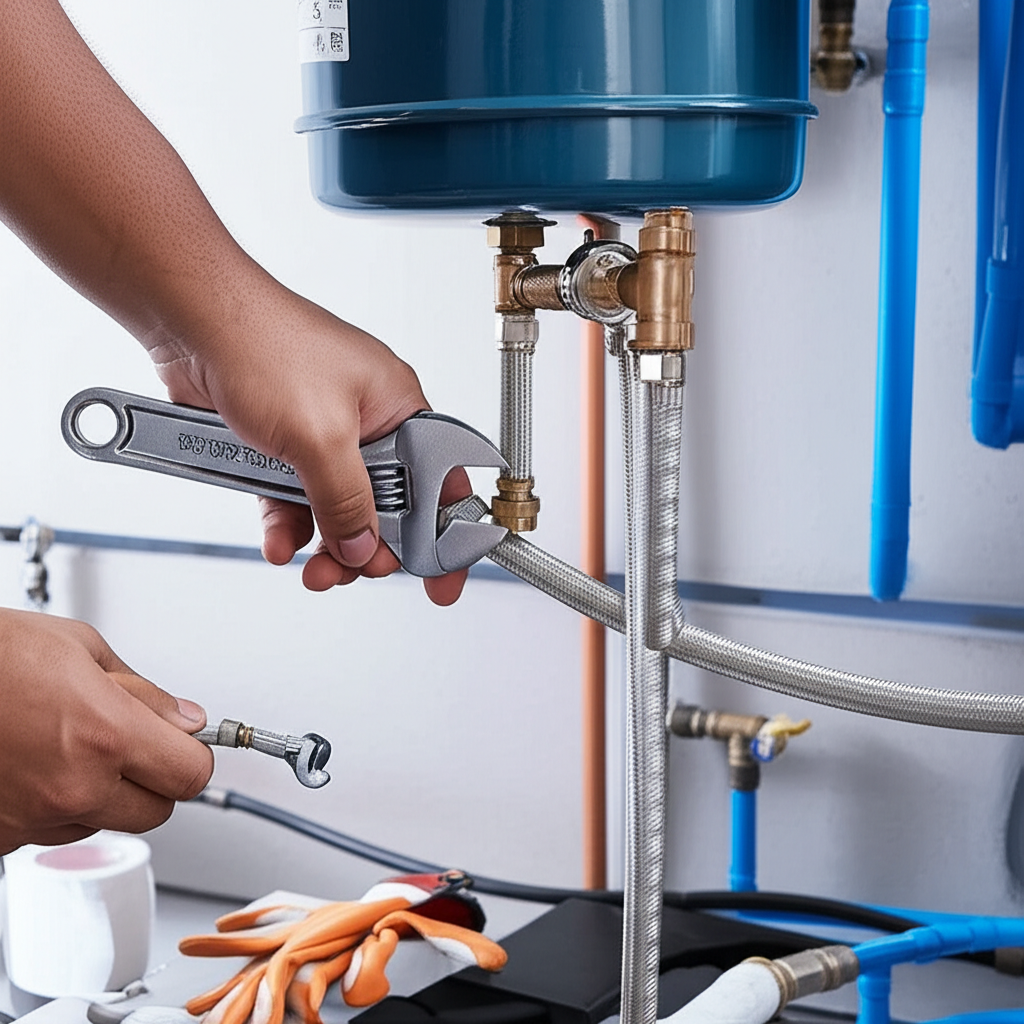
Hey folks, Nazmul here. Dealing with inconsistent water pressure can be a real pain, right? Especially when you’re troubleshooting why a well system isn’t performing like it should. A lot of times, the culprit is the pressure tank – it’s the unsung hero holding that crucial buffer of water. Getting it plumbed correctly from the start is key to a smooth-running system and keeping those callback invoices low. Don’t sweat it; this guide breaks down exactly how to plumb a pressure tank, step-by-step, using techniques you can trust on any job site. We’ll cover everything from the fittings you’ll need to ensuring a leak-free, durable setup.
Understanding Your Pressure Tank
Before we grab our tools, let’s get a handle on what a pressure tank actually does. Think of it as a water storage reservoir for your plumbing system. When your pump shuts off, the tank holds a reserve of water under pressure. As you open a faucet, this stored water is pushed out by the compressed air inside the tank. This does a few important things:
- Reduces Pump Cycling: Without a tank, your pump would turn on and off with every little bit of water used. Constant cycling wears out the pump motor faster and wastes energy. The tank allows the pump to run for longer, more efficient periods.
- Maintains Consistent Pressure: The air charge within the tank acts like a cushion, smoothing out pressure fluctuations. This means you won’t experience sudden drops or surges in water flow when you turn on a tap.
- Protects Your Plumbing: By preventing rapid pressure changes, the tank helps protect your pipes, fixtures, and appliances from the stress of water hammer and sudden impacts.
Pressure tanks aren’t complicated, but understanding their function helps in making the right connections. The two main types you’ll encounter are:
- Traditional (Diaphragm/Bladder) Tanks: These have a flexible bladder or diaphragm inside that separates the water from the air. The air is pre-charged to a specific PSI (pounds per square inch). As water enters, it compresses the bladder and the air.
- Captive Air Tanks: In these, the air isn’t contained in a separate bladder but rather forms a captive cushion between the water and the tank walls. Many modern tanks are this type.
Regardless of type, the core principle is the same: water in, air out, pressure maintained. Properly plumbing it means ensuring this cycle works efficiently and safely.
Essential Components and Tools
Let’s talk about what you’ll need to get this job done right. Having the right parts and tools on hand makes all the difference between a smooth installation and a frustrating one. Think of this as your pre-flight checklist.
Materials You’ll Need:
- Pressure Tank: Obviously! Make sure it’s sized appropriately for your system’s needs. A common size for residential use is around 20-80 gallons.
- Tee Fitting (3-Way): This is crucial. It connects the pump, the tank, and the house supply line. Typically, you’ll want a robust brass or galvanized steel tee.
- Short Nipples/Adapters: You’ll need these to connect the tank to the tee fitting and potentially adapt threads if necessary.
- Pipe Thread Sealant (PTFE Tape or Paste): Essential for creating watertight seals on threaded connections. Use a type rated for potable water if applicable.
- Ball Valve: A shut-off valve is highly recommended. It allows you to isolate the tank for maintenance without shutting off the entire house water supply.
- Check Valve: Often installed between the pump and the tee fitting to prevent water from flowing back into the well when the pump cycles off.
- Pressure Switch: This controls when your pump turns on and off based on the system pressure. It’s usually threaded into the tee fitting or the tank.
- Pressure Gauge: To monitor your system’s pressure and verify accurate settings.
- Air Valve (Schrader Valve): Similar to a tire valve, this is usually located at the top of the tank and is used to check and adjust air pressure.
- Pipe and Fittings: Based on your existing plumbing – usually PEX, copper, or PVC.
Tools You’ll Need:
- Pipe Wrenches (2): For tightening threaded fittings. Having two allows you to grip both sides of a connection.
- Adjustable Wrench: For various nuts and bolts.
- Pliers (Various Types): Channel locks, slip-joint, etc.
- Pipe Cutter: For making clean cuts on copper or plastic pipe.
- Deburring Tool: To smooth the edges of cut pipes.
- Soldering Torch and Solder (if using copper): For sweat connections.
- PEX Crimp Tool and Rings (if using PEX): For PEX connections.
- PVC Primer and Cement (if using PVC): For solvent-welding PVC.
- Teflon Tape Gun or Paste Applicator: For applying thread sealant.
- Tire Pressure Gauge: To check the air in the tank.
- Drill and Bits: Potentially needed for mounting brackets or running conduit for electrical connections (though we’re focusing on the plumbing here).
- Bucket and Rags: For catching any residual water and cleaning up.
Step-by-Step Guide: How to Plumb a Pressure Tank
Alright, let’s get down to business. This is where the rubber meets the road. We’re going to connect everything so that glorious water pressure is always at your fingertips.
Step 1: Shut Off Water and Drain the System
Safety first, always. Before you do anything, you need to turn off the power to your well pump at the breaker box. Then, open the lowest faucet in the house to drain any remaining pressurized water from the lines. This prevents a geyser when you start disconnecting existing pipes.
Step 2: Locate and Prepare the Mounting Area
Find a solid, level spot for your pressure tank. It should be close to your well pump and the main water line entering your house. Many tanks have a base or legs for stability. Ensure there’s enough clearance around it for accessing the air valve and fittings. Tanks are heavy when full of water, so a stable foundation is critical.
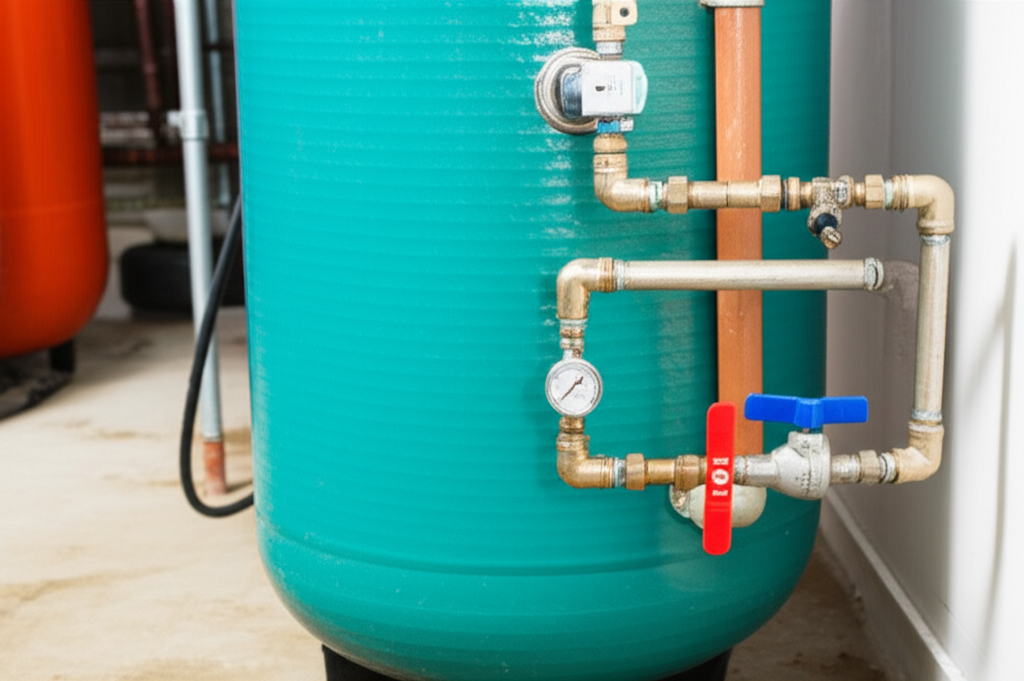
Step 3: Install the 3-Way Tee Fitting
This is the central hub. You’ll typically install a 3-way tee fitting directly to the pipe coming from your well pump. One port of the tee will connect to the pump discharge, another will connect to the house’s main water supply line, and the third, usually the side port, is where the pressure tank will connect.
Important: If you’re replacing an existing setup, you’ll disconnect the old line and fit the new tee in its place. Apply thread sealant to all male threads before screwing them into the corresponding female fittings. Use two wrenches – one to hold the fitting steady, the other to turn – to ensure a snug, leak-free connection.
Step 4: Connect the Pressure Switch and Gauge
The pressure switch and pressure gauge usually thread into the 3-way tee fitting. The pressure switch needs to be on the outlet side of the tank, where the water pressure is regulated. Screw the pressure gauge into a designated port on the tee or directly into the tank fitting if it has one. Again, use plenty of PTFE tape or pipe dope on the threads to ensure a good seal.
Tip: Some plumbers prefer to install the pressure gauge after the tank is connected and the system is pressurized for initial setup. However, having it on the tee gives you a constant reading of the system pressure before it even enters the tank.
Step 5: Connect the Pressure Tank to the Tee
Now, let’s hook up the tank itself. You’ll need a short nipple and potentially an adapter to connect the inlet port of your pressure tank to the side port of the 3-way tee. Ensure the tank is oriented correctly (usually upright if it’s a bladder type). Thread sealant is your best friend here. Tighten until snug but avoid overtightening, which could crack the fitting.
Step 6: Install the Shut-Off Valve (Recommended)
On the pipe leading from the 3-way tee to your house’s main water supply line (the outlet side), install a ball valve. This valve allows you to isolate the pressure tank and pump system for any future maintenance or repairs without shutting off water to the entire home. Make sure the valve is installed in a position that’s easy to access.
Step 7: Connect the Pump Discharge (if not already done)
If your pump discharge line isn’t already connected to the appropriate port on your 3-way tee, now’s the time. Ensure you use the correct fittings for your pump and pipe material (e.g., galvanized, PVC union, PEX adapter). A check valve is often installed in this line, usually right after the pump, to prevent backflow. Make sure it’s oriented correctly according to the arrow indicator on the valve body.
Step 8: Verify Air Pressure in the Tank
This is a critical step for system performance. Before connecting the water supply, check the air pressure in the tank. Locate the air valve (usually on top). Use a tire pressure gauge to check it. The correct pre-charge pressure should be 2 PSI below your pump’s cut-in pressure. For example, if your pump turns on at 40 PSI, the tank should be pre-charged to 38 PSI. You can add or release air using a bicycle pump or air compressor.
Why 2 PSI below? This ensures that when the tank is empty of water, there’s still enough air pressure to push the bladder or diaphragm against its stops, and for the air to effectively cushion the water.
Step 9: Connect the House Water Supply Line
Connect your main water supply line (the one that goes to your house) to the outlet port of the 3-way tee, after the shut-off valve. Use appropriate fittings for your pipe type.
Step 10: Slowly Introduce Water and Check for Leaks
Turn the power back on to your well pump. Then, slowly open the shut-off valve you installed. Listen for the pump to kick on. As the tank begins to fill, carefully inspect all your new connections for any signs of leaks. Tighten fittings gently if you find any drips. Allow the pump to run until it shuts off automatically based on the pressure switch setting.
Step 11: Test System Pressure and Adjustments
Once the pump has cycled off, check your pressure gauge. Note the pressure. Then, wait for the pressure to drop until the pump turns back on (this is your cut-in pressure). Note that pressure too. The difference between the cut-off and cut-in pressures is your tank’s drawdown or drawdown capacity. This drawdown is what provides you with water between pump cycles.
If the pressure switch settings are incorrect or need adjustment, consult your pressure switch manual. You may need to adjust the cut-in and cut-off PSI settings. If you notice excessive water hammer or rapid pump cycling, your tank might need refilling or has a problem.
Pressure Tank Sizing and Performance
Choosing the right size pressure tank is as important as plumbing it correctly. An undersized tank will lead to frequent pump cycling, shortening the pump’s life and causing inconsistent pressure. An oversized tank might be unnecessarily expensive and can lead to water sitting around for too long, potentially affecting water quality.
Manufacturers provide charts to help you size tanks based on pump flow rate (GPM – gallons per minute) and desired drawdown. The drawdown is the amount of water the tank can deliver between the pump turning on and off. A common rule of thumb for residential systems is to select a tank that provides about 50% of its total volume as usable water (drawdown). For example, a 40-gallon tank would offer roughly 20 gallons of drawdown.
Factors to Consider for Tank Size:
- Pump Flow Rate (GPM): Higher flow rate pumps generally require larger tanks to prevent excessive cycling.
- Pressure Switch Settings: The range between your cut-in and cut-out pressure settings affects drawdown. A wider range allows for greater drawdown but more pump cycling.
- Water Usage Demand: How many fixtures are typically used simultaneously in the household?
- Well Recovery Rate: If your well produces water slowly, a larger tank can help bridge the gap between pump cycles.
Understanding these factors helps you select a tank that optimizes performance and longevity for your specific application. Consulting professional resources like the National Ground Water Association (NGWA) can provide even more detailed guidance on system design and tank selection.
Troubleshooting Common Issues
Even with a perfect installation, you might run into a few hiccups down the line. Here are some common issues and how to address them:
Issue: Pump Cycles Too Frequently
- Possible Cause: Undersized tank, low air charge, or faulty diaphragm/bladder.
- Solution: Verify air pressure and adjust. If the air pressure drops rapidly after filling, the bladder may have a leak or the tank is damaged. Consider a larger tank if usage demands it.
Issue: Water Hammer (Banging Pipes)
- Possible Cause: Insufficient air charge in the tank, or the tank itself is waterlogged (air has been absorbed into the water).
- Solution: Check and adjust the air charge. If the tank is waterlogged, you may need to drain it completely, ensure the air valve is functioning, and re-pressurize. Some tanks have a drain valve for this purpose.
Issue: No Water Pressure or Very Low Pressure
- Possible Cause: Pump not running, power issue, clogged foot valve, leak in the system, or a completely waterlogged tank.
- Solution: Check power to the pump. Ensure the pump is primed and running. Inspect for leaks. If the tank is waterlogged, address as above. Check the pressure switch settings.
Issue: System Loses Pressure Quickly When Pump is Off
- Possible Cause: Leak in the system (including check valve failure), or the pressure tank is not holding air.
- Solution: Inspect all plumbing for leaks. Test the check valve for integrity. Check air pressure in the tank and look for leaks around the air valve or inside the tank.
A well-maintained pressure tank is key to a reliable water system. Regular checks of air pressure and looking for leaks can prevent many of these issues before they become major problems.
Safety and Best Practices
Plumbing involves water and, in this case, pressurized air. Safety should always be paramount. Here are some critical best practices to follow:
- Always Disconnect Power: Before working on any part of the well system, shut off the power to the pump at the breaker. Water and electricity are a dangerous combination.
- Relieve System Pressure: Open a faucet to drain any residual water and pressure from the lines before disconnecting anything.
- Use Proper Thread Sealant: Always use PTFE tape or pipe dope suitable for your pipe material and water type. Ensure a tight seal to prevent leaks.
- Don’t Overtighten Fittings: Especially with plastic or brass fittings, over-tightening can cause cracks, leading to leaks. Tighten until snug and then a quarter-turn more, but if resistance increases sharply, stop.
- Support the Tank Properly: Ensure the pressure tank is on a stable, level surface. A full tank is very heavy.
- Follow Manufacturer Instructions: Always refer to the specific installation and maintenance manual provided by the tank manufacturer.
- Know Your Pressures: Understand your pump’s cut-in and cut-out pressures, and ensure your tank’s air charge is set correctly relative to the cut-in pressure. Incorrect air pressure is the most common cause of system inefficiency and premature pump wear.
- Consider a Pressure Relief Valve: For extra safety, especially in systems prone to over-pressurization, consider installing a pressure relief valve on the system. It will discharge water if pressure exceeds a safe limit. You can find guidance on plumbing codes and safety devices through resources like the U.S. Environmental Protection Agency (EPA) website, which offers information on safe drinking water systems.
Adhering to these practices ensures not only a functional installation but also a safe one for you and the homeowner.
Conclusion
Plumbing a pressure tank might seem daunting at first, but by breaking it down into these clear, manageable steps, you’ll see it’s entirely achievable. From understanding the tank’s role to meticulously connecting each fitting and verifying air pressure, you’re setting yourself up for a reliable water system. Remember, a correctly plumbed and serviced pressure tank is the backbone of