


Sink Plumbing: Your Genius Installation Guide
Got a leaky faucet or a clogged drain? Plumbing can seem tricky, but it doesn’t have to be! I’m Nazmul Hasan, and I love making home repairs easy. Installing a new sink might sound like a big job, but with the right steps, you can do it yourself. You’ll feel so proud when it’s done!
This guide breaks everything down. We’ll cover the tools you need and walk through each step. Let’s get your new sink installed and working perfectly.
Sink Plumbing Made Simple: A Quick Summary
Installing a new sink doesn’t have to be a headache. This guide covers everything a DIY beginner needs.
- Gather Your Tools: Essential gear for a smooth installation.
- Preparation is Key: Turning off water and clearing the space.
- Dismantle the Old: Carefully removing the existing sink and fixtures.
- Install the New Faucet & Drain Parts: Assembling the new components.
- Position and Secure the Sink: Fitting the sink into place.
- Connect Supply Lines & Drain: Hooking up the water and waste.
- Test for Leaks: Ensuring everything is watertight.
Follow these steps, and you’ll have your new sink ready to go!
Why This Guide is Your Plumbing Buddy
Hi there! I’m Nazmul Hasan, and I know how daunting plumbing can seem. Maybe you’ve had a small leak that turned into a big problem, or you just want to upgrade your kitchen or bathroom. Whatever your reason, you’re in the right place.
Many people worry about tackling plumbing projects. You might think it requires special tools or years of training. But the truth is, with a little guidance and patience, you can handle many common plumbing tasks, like installing a new sink. It’s a satisfying DIY victory!
This guide is designed for you – the homeowner, the DIY beginner, the person who wants to solve problems without calling a professional for every little thing. I’ll explain everything in plain language, breaking down complex steps into simple, manageable actions. You’ll feel confident and capable every step of the way. We’ll go from gathering your tools to turning on the water, ensuring a leak-free, happy new sink!
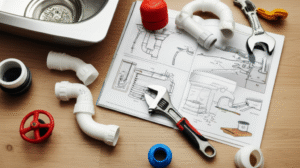
Essential Tools for Sink Installation
Before we start, let’s get our toolbox ready. Having the right tools makes the job much easier and safer. Don’t worry if you don’t have them all; many can be borrowed or are inexpensive to buy and will be useful for future projects.
Here’s what you’ll likely need:
- Adjustable Wrench (or Pipe Wrench): For tightening and loosening nuts and fittings.
- Basin Wrench: A specialized tool for reaching nuts behind the sink basin. It’s a lifesaver!
- Plumber’s Putty: A soft, pliable compound used to seal around drains and fixtures.
- Teflon Tape (Pipe Thread Sealant Tape): Wrap this around threaded pipe connections to ensure a watertight seal. You can learn more about its proper use from resources like This Old House.
- Bucket: To catch any residual water from pipes.
- Towels or Rags: For spills and drying.
- Safety Glasses: Protect your eyes from debris or drips.
- Screwdriver Set: For various screws you might encounter.
- Utility Knife: For cutting caulk or old seals.
- Pliers (Channel Locks): Useful for gripping pipes and fittings.
- Caulk Gun and Silicone Caulk: To seal the sink to the countertop.
- New Sink Components: Faucet, drain assembly, P-trap kit, supply lines.
It might look like a lot, but many of these are common household tools. The basin wrench is the most specialized, but it’s worth the investment for sink work. We’ll use these tools to make sure everything is installed correctly and doesn’t leak.
Step 1: Preparation is Your Best Friend
Before we touch anything, setting ourselves up for success is crucial. This means gathering everything you need and, most importantly, shutting off the water supply. This is non-negotiable for safety and to prevent a watery mess!
Shutting Off the Water
Look under your sink for two shut-off valves, usually one for hot water and one for cold. They are typically small, round handles.
- Turn both valve handles clockwise until they stop. This closes the valves.
- Turn on the faucet to release any remaining water pressure in the lines. Let it run until no more water comes out.
If you can’t find these valves, or they don’t work, you’ll need to shut off the main water supply to your house. This valve is usually located where the water pipe enters your home, often in the basement, garage, or near the water meter. Remember to inform others in the house you’re doing this!
Clear the Workspace
Take everything out from under the sink cabinet. This gives you plenty of room to work and prevents items from getting wet or damaged. Place a bucket and some old towels underneath the drain pipes and shut-off valves. Just in case any drips happen when you disconnect things.
Also, check if your new sink requires any adjustments to the countertop opening. If you’re replacing an old sink, measure carefully to ensure the new one fits the existing hole. Sometimes, you might need to slightly enlarge or adjust the opening.
Step 2: Removing the Old Sink and Fixtures
Now that everything is prepped, it’s time to say goodbye to the old sink. This involves disconnecting the faucet, drain, and then lifting the sink out. Take your time here, and remember those towels and that bucket!
Disconnect the Water Supply Lines
- First, make sure the water is off (we did that in Step 1!).
- Use your adjustable wrench to loosen the nuts connecting the supply lines to the faucet tailpieces. There will be one for hot and one for cold.
- Have your bucket ready underneath as a small amount of water might still be in the lines.
- Once loose, unscrew the nuts by hand and pull the supply lines away from the faucet.
Disconnect the Drain Pipes
This part involves the P-trap, the U-shaped pipe under the sink. It’s designed to hold water to prevent sewer gases from coming back up. Disconnecting it requires a bit more care.
- Place another towel or a second bucket directly under the P-trap connection points.
- Most P-traps have large plastic or metal slip nuts. Loosen these by hand or with channel lock pliers, turning counter-clockwise.
- Carefully lower the P-trap. Be prepared for water to drain out.
- If your drain isn’t a P-trap style or is connected differently, you may need to loosen a flange nut or other fittings.
Remove the Old Faucet
The faucet is typically held in place by nuts underneath the sink basin. This is where the basin wrench really shines!
- Locate the nuts securing the faucet to the sink.
- Use your basin wrench to reach up and loosen these nuts (turn counter-clockwise).
- Once the nuts are off, the faucet should lift free from the top of the sink.
Loosen and Remove the Sink
Sinks are usually secured by caulk or clips around the edge where they meet the countertop.
- If there’s caulk, use a utility knife to carefully cut through the seal all around the sink’s edge.
- Check underneath for any mounting clips. These might be spring-loaded or attached with screws. Loosen or remove them.
- Gently try to lift the sink from the countertop. If it feels stuck, double-check for missed caulk or clips. Sometimes, a gentle wiggle is all it needs.
- Once free, lift the old sink out. Wipe the countertop surface clean where the old sink sat.
Step 3: Installing the New Faucet and Drain Parts
Now for the exciting part: getting your new components ready! It’s much easier to attach the faucet and drain assembly to the sink before you place the sink on the countertop.
Install the Faucet
- Read your new faucet’s instructions – they can vary.
- Most faucets come with rubber gaskets or seals. Place these as directed on the faucet base.
- Insert the faucet through the pre-drilled holes in your new sink.
- From underneath the sink, thread on the mounting nuts that came with the faucet. Tighten them securely with your basin wrench, but don’t overtighten. Make sure the faucet is straight from above.
Install the Drain Assembly
This includes the drain flange, gasket, and body.
- Apply a rope of plumber’s putty around the underside of the drain flange (the decorative piece that sits in the sink opening).
- Press the flange firmly into the drain hole on the top of the sink.
- From underneath, slide the rubber gasket, then the friction ring, and finally the large locknut onto the drain tailpiece.
- Thread the locknut on by hand.
- Tighten the locknut with pliers or a wrench. As you tighten, excess plumber’s putty will squeeze out around the flange.
- Wipe away the excess putty from both the top and the underside of the sink. Some drain assemblies use a rubber gasket instead of putty; follow your kit’s instructions.
Step 4: Positioning and Securing the New Sink
With the faucet and drain parts attached, it’s time to get the sink into its new home on the countertop.
Apply Sealant
This is important for a watertight seal and to prevent water from seeping under the sink.
- Apply a continuous bead of silicone caulk or plumber’s putty around the underside edge of the sink where it will meet the countertop. If you’re using plumber’s putty for the entire seal, make sure it’s a nice, even rope.
- If your countertop has a rim, ensure the caulk/putty covers that area well.
Place the Sink
- Carefully lower the new sink into the countertop opening. Line it up so it sits evenly and the faucet is straight.
- Press down gently to set the caulk or putty.
Secure the Sink
Some sinks have mounting clips that screw into place from underneath. If yours does:
- Attach the mounting clips into their designated slots.
- Tighten the clips until the sink is snug against the countertop. Again, don’t overtighten, as this can crack the sink or damage the countertop.
- If your sink design doesn’t use clips, the caulk/putty itself will hold it, especially if it’s a drop-in sink.
Clean Up Excess Sealant
Immediately wipe away any excess caulk or putty that squeezed out from around the sink edge with a damp cloth or sponge. It’s much easier to clean when it’s fresh.
Step 5: Connecting Supply Lines and Drain Pipes
We’re almost there! Now we connect the water supply and the drain. This is where we bring the sink to life.
Connect Supply Lines
These connect your new faucet to the shut-off valves.
- Take your new flexible supply lines. One end will connect to the faucet tailpieces underneath the sink, and the other will connect to the shut-off valves.
- Many flexible supply lines have rubber washers inside the fitting, so you don’t need Teflon tape on these connections. Check your specific supply lines.
- Hand-tighten the fittings onto the faucet tailpieces first, then connect them to the shut-off valves.
- Using your adjustable wrench, tighten each connection about a quarter to a half turn past hand-tight. Be careful not to overtighten, which can damage the fittings or the valves.
Connect the Drain (P-Trap)
Reassembling the drain is usually straightforward.
- If you haven’t already, attach the new P-trap kit components to the sink’s tailpiece and to the wall drainpipe.
- Ensure all the slip nuts and washers are correctly positioned according to the P-trap kit’s instructions. Usually, the tapered side of the washer faces the fitting it seals against.
- Hand-tighten all the slip nuts. Then, use channel lock pliers to give them an extra quarter turn. They need to be snug but not so tight you crush the plastic.
A tip for P-traps: they’re adjustable to help align pipes. Don’t be afraid to slightly reposition pieces to get everything to line up without forcing it.
Step 6: The Moment of Truth – Test for Leaks!
This is the most exciting and nerve-wracking part! We’re going to turn the water back on and see if our work holds up.
Turn Water Back On
- Slowly turn the shut-off valves under the sink counter-clockwise to open them.
- If you had to shut off the main water supply, turn that back on slowly.
Check All Connections
As soon as the water is on, get down there and look and feel for any drips.
- Inspect the connections at the shut-off valves to the supply lines.
- Check the connections at the faucet tailpieces.
- Look closely at the drain assembly connections, especially the P-trap slip nuts.
- Turn on the faucet to both hot and cold. Let the water run for a minute.
- While the water is running, check all the connections again. Also, look for any leaks around the faucet base or the drain flange.
- Fill the sink basin partway with water, then let it drain. This puts pressure on the drain assembly and P-trap. Double-check all drain connections for leaks during this process.
If you see any drips, turn the water off immediately and slightly tighten the offending connection. Sometimes, a small drip means a washer wasn’t seated properly or a nut needs a tiny bit more snugging. It’s often a simple fix!
Troubleshooting Common Sink Plumbing Issues
Even with careful work, sometimes minor issues pop up. Here’s how to handle them.
| Problem | Possible Cause | Solution |
|---|---|---|
| Dripping Faucet After Installation | Loose packing nut, damaged O-ring, or debris in the valve seat. | Try tightening the packing nut slightly. If still dripping, you may need to disassemble the handles to check the O-rings or valve seat, or replace the cartridge. Refer to your faucet manual. |
| Leaking Supply Line Connections | Connections not tight enough, missing or damaged washer, or cross-threaded fitting. | Tighten slightly. If that doesn’t work, unscrew, check the washer, and re-thread carefully. A quick resource on pipe fittings is available from organizations like ICC-ES, which provides information on building product standards. |
| Leaking Drain/P-Trap |